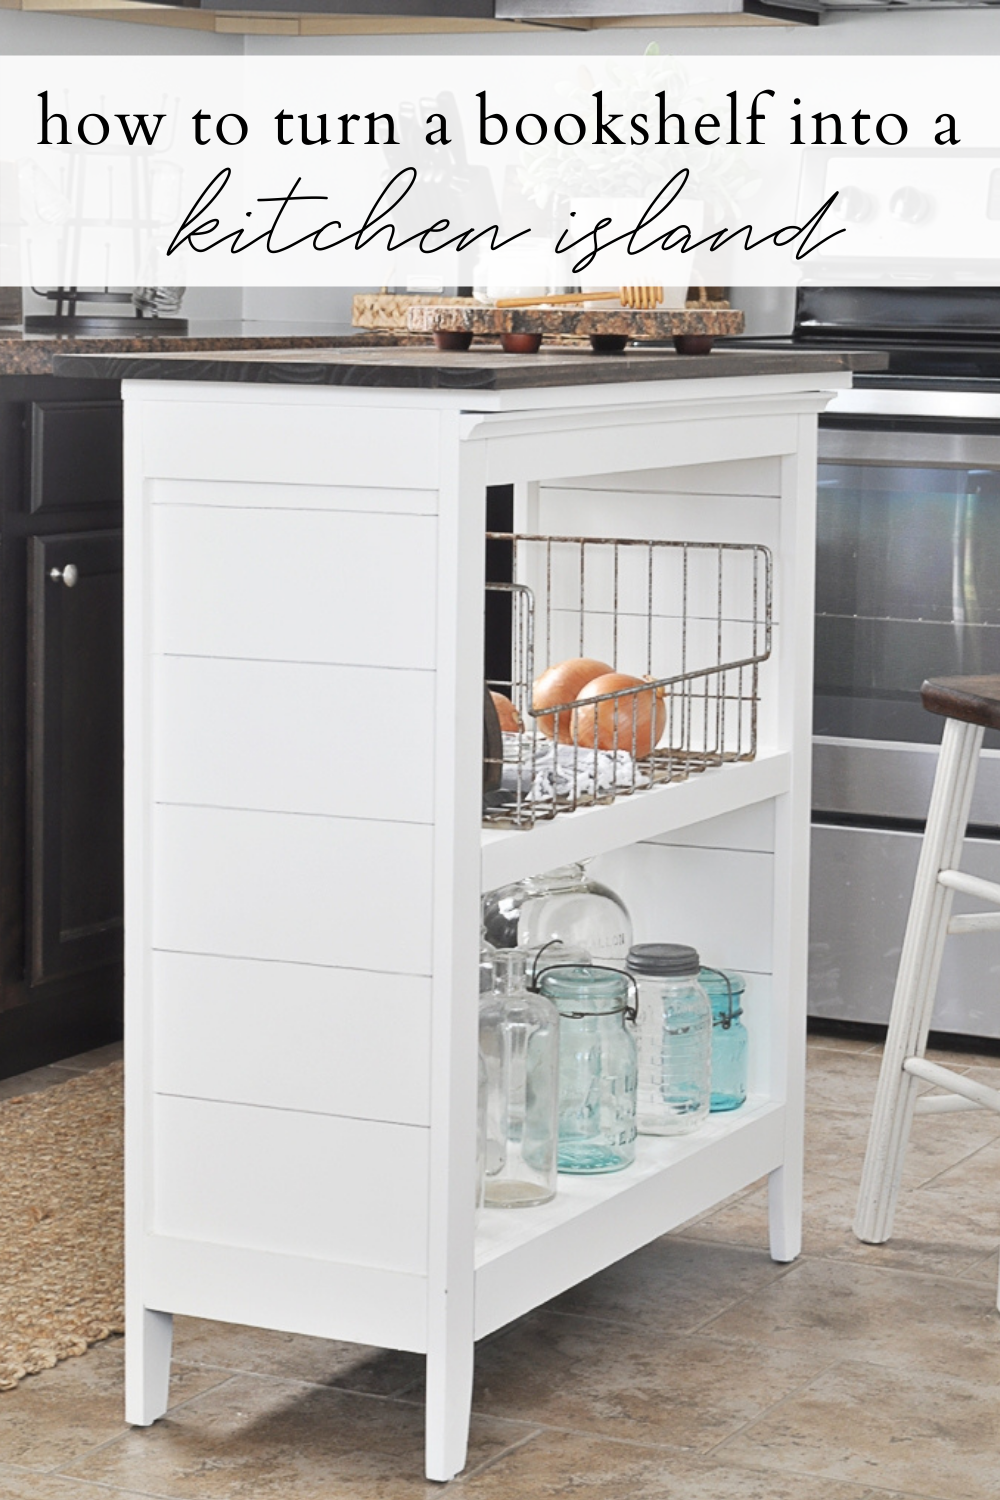
How to Turn a Bookshelf into a Kitchen Island
See how I transformed an old bookshelf into a kitchen island. Perfect for extra workspace and storage in a small space.
This post is the epitome of why I love a good DIY project. Repurposing old into new, being able to use my creativity, and saving money in the process is what it’s all about!
My taste in home décor changes from time to time, so I am always looking at ways to flip a piece I already have and try to make it fit a new style. I tend to let unused pieces sit in our basement for long periods of time. But before I get rid of them I play around with a few ideas.
Sometimes they work, sometimes they don’t. That’s just the name of the game! I always figure, what’s the harm in making a last ditch effort!?
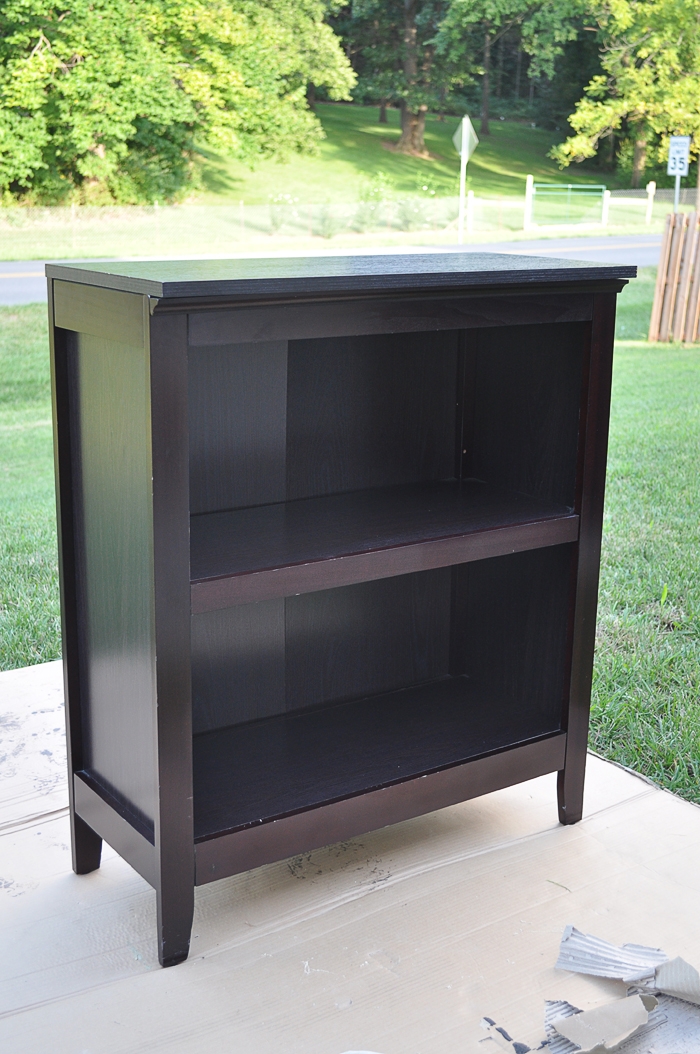
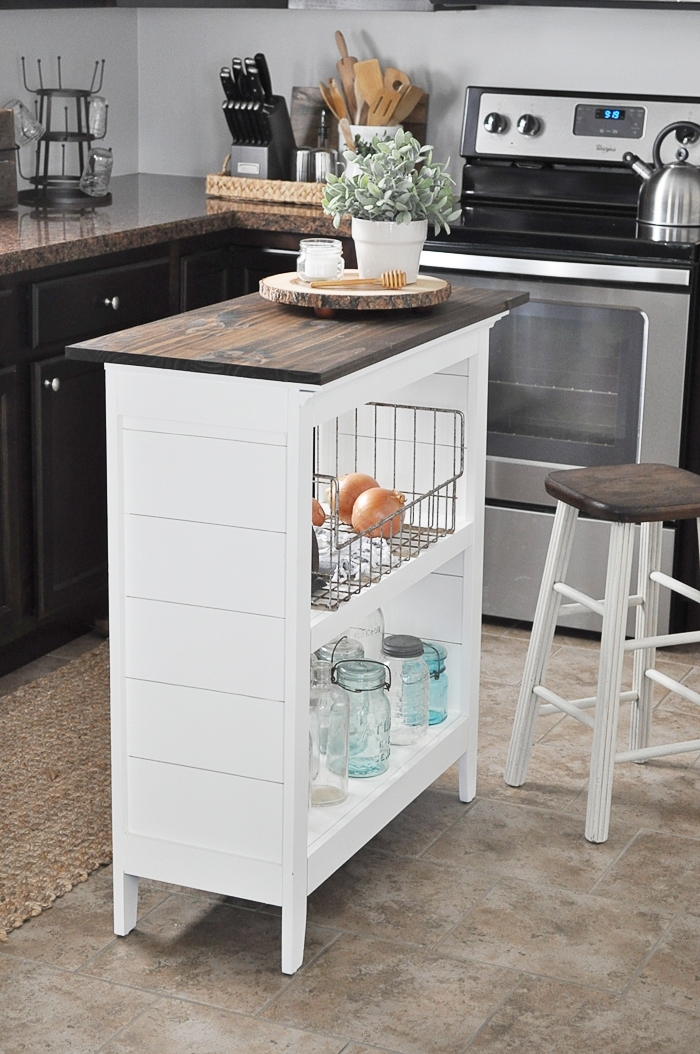
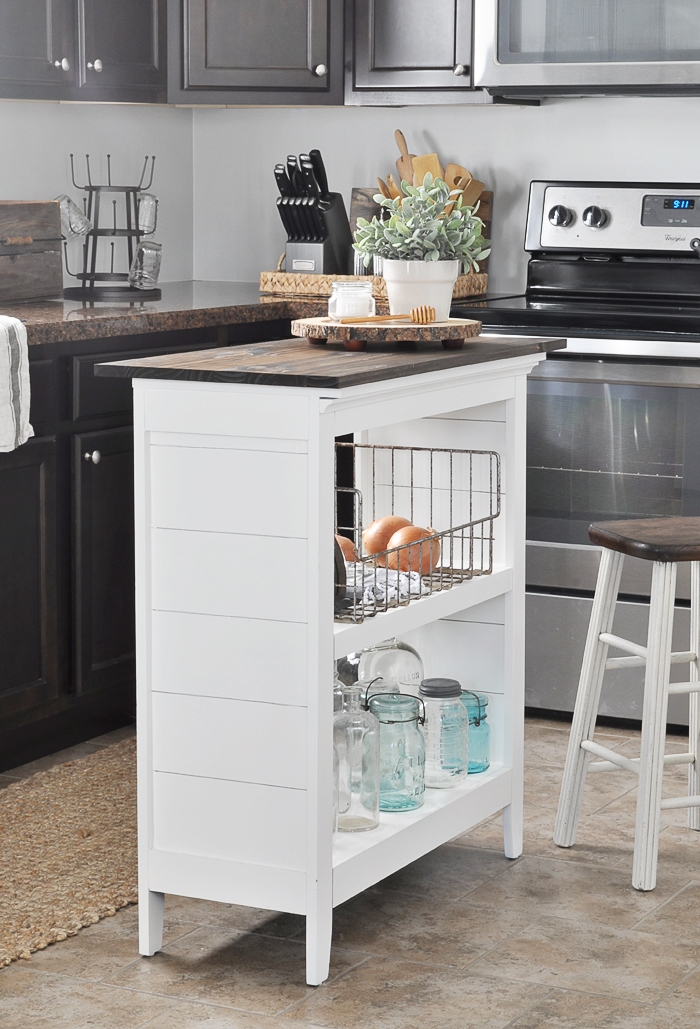
This bookcase hadn’t seen the light of day in years. It was a good sturdy piece that I bought at Target so long ago. I had a few ideas for it, but didn’t have the perfect spot for it.
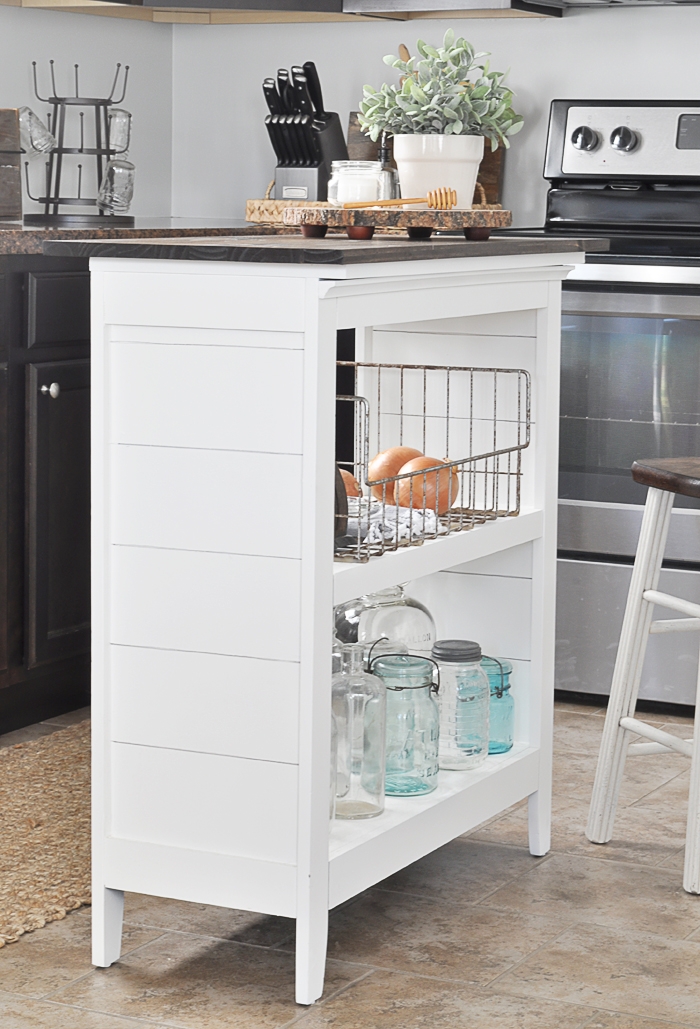
Then I had one of those ah-ha moments and hauled it upstairs to our kitchen, and bingo! The perfect fit for a little bookshelf kitchen island! And our kitchen sure needed it!
Supplies Needed for Bookshelf Kitchen Island
Affiliate links are provided below for your convenience. For more information, see my full disclosure here.
- Bookshelf
- Primer (This is my go-to spray primer)
- Yardstick
- Drill
- 1/4in Plywood
- Saw (Love my Dremel Saw for smaller projects like this one!)
- Sandpaper
- Liquid Nails
- Clamps
- Caulk
- Paint
- Paint Brush or Paint Sprayer
- Wood Slab
- Wood Stain (This is the color I used)
Instructions for Bookshelf Kitchen Island
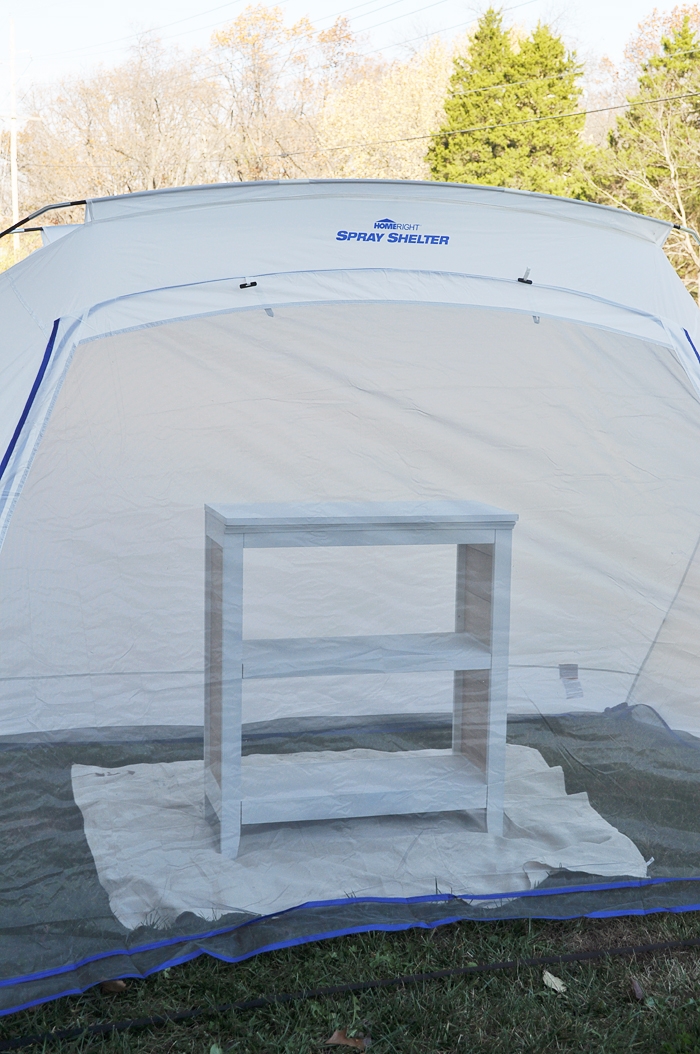
- I started by wiping down the bookshelf with a damp rag to remove dust, then used spray primer to prime the piece so the paint would stick better (especially since this bookshelf had parts that were slick laminate).
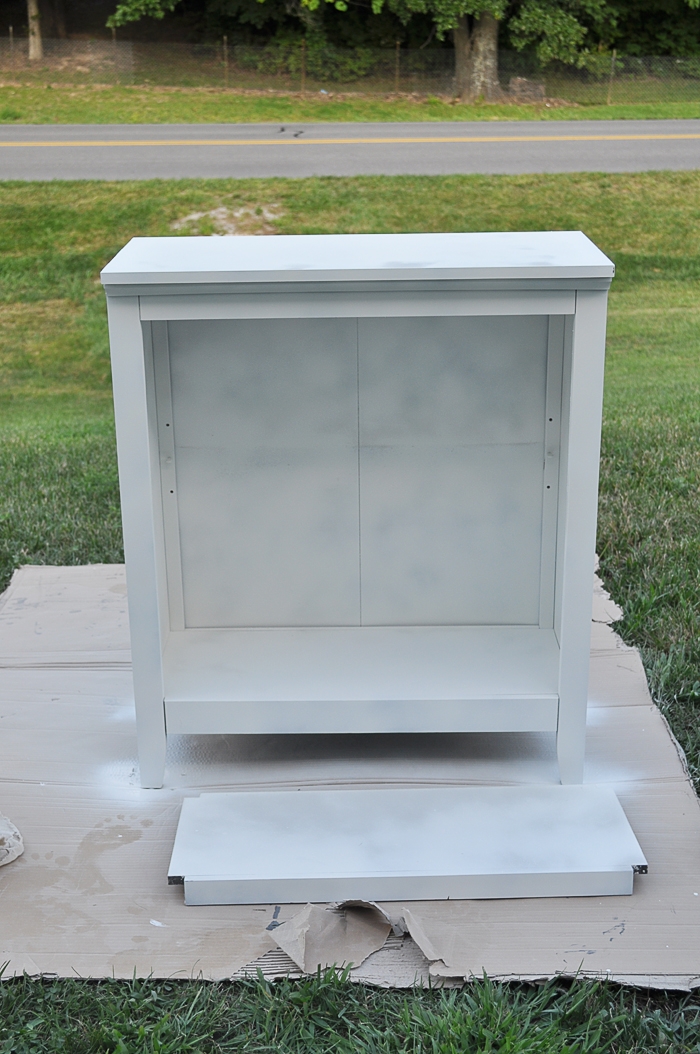
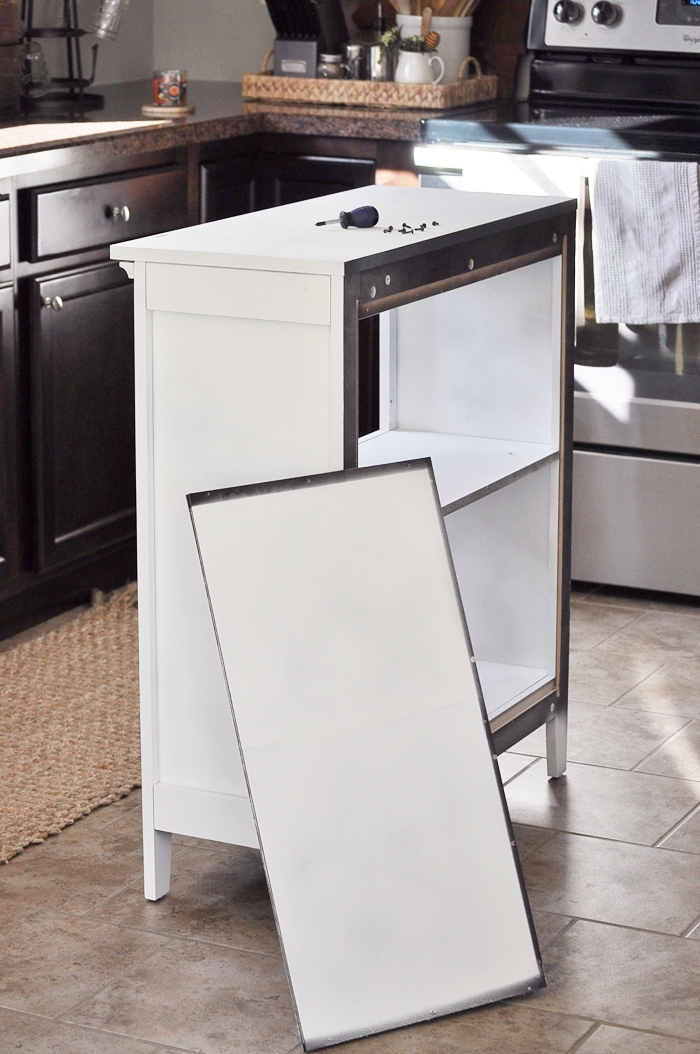
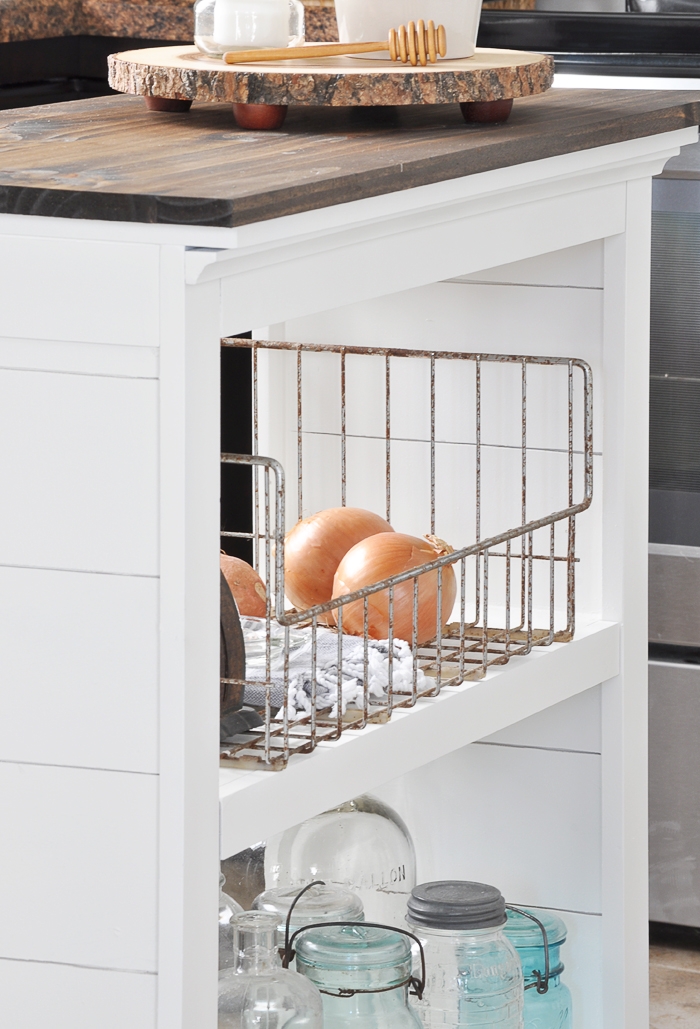
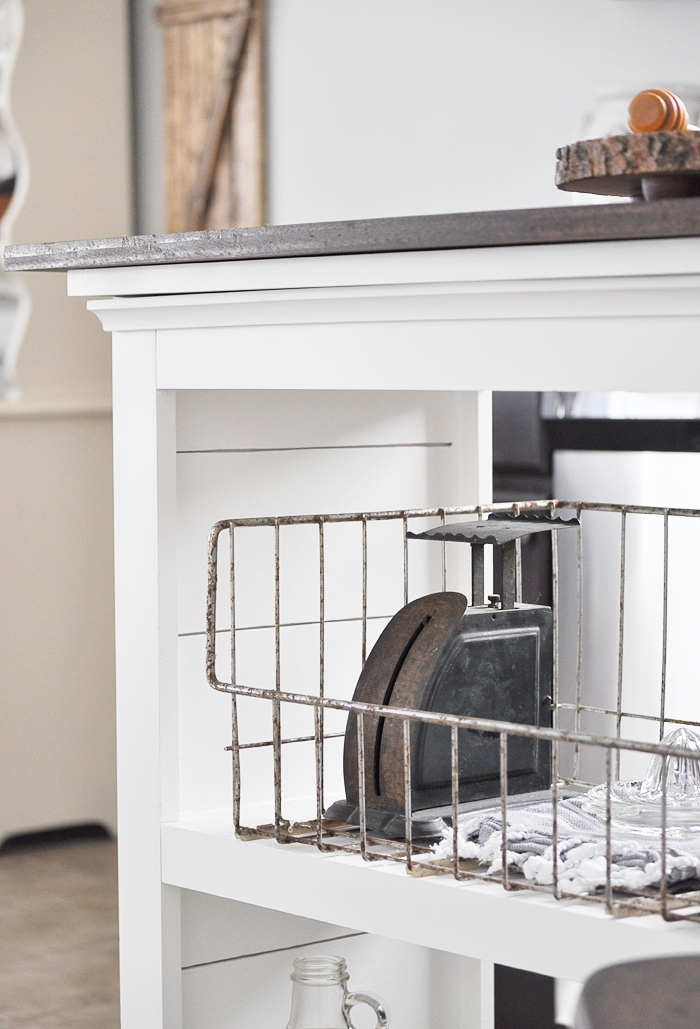
- Before I primed it, I didn’t know what my exact end look would be, but I ended up removing the back paneling of the bookshelf to create an open shelf look.

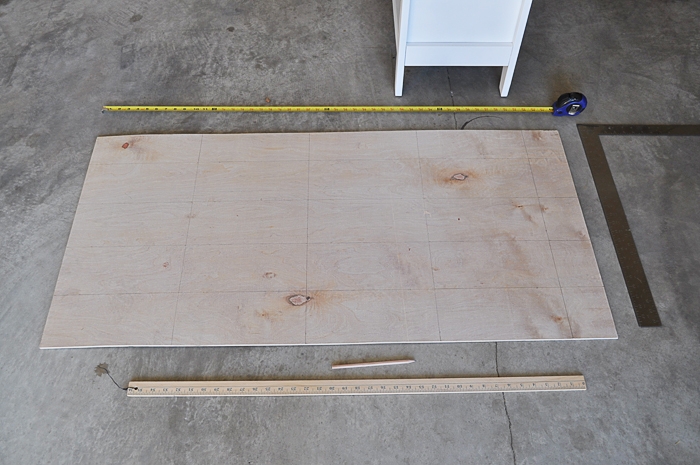
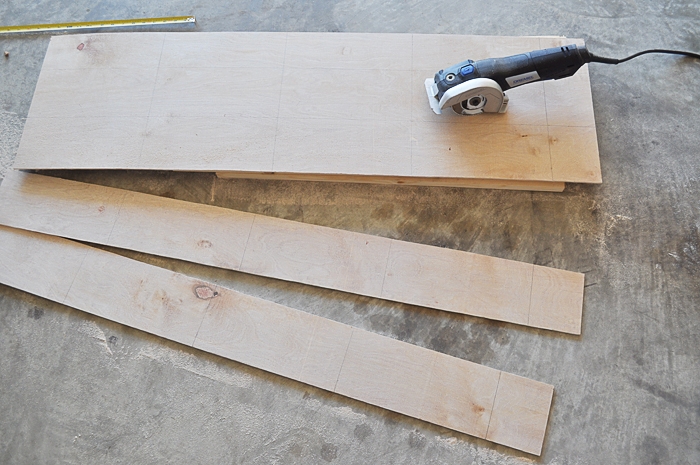
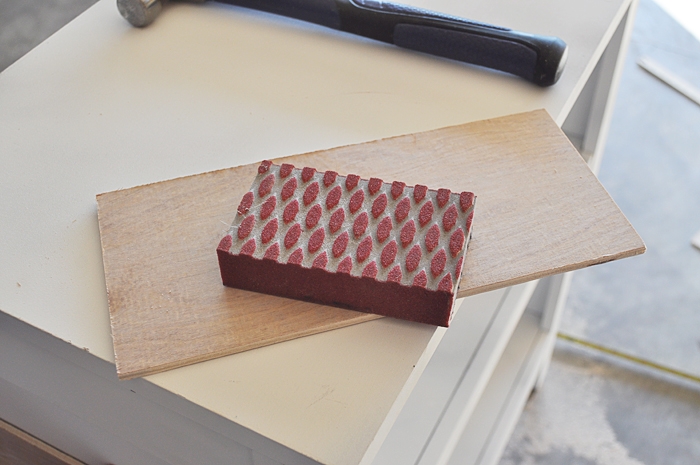
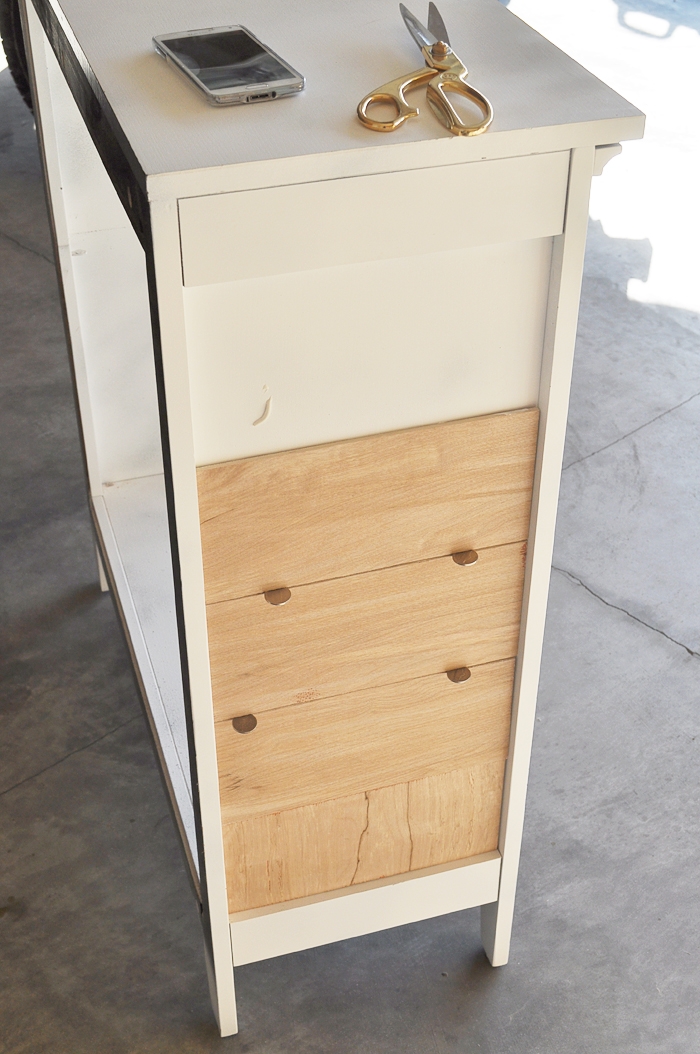
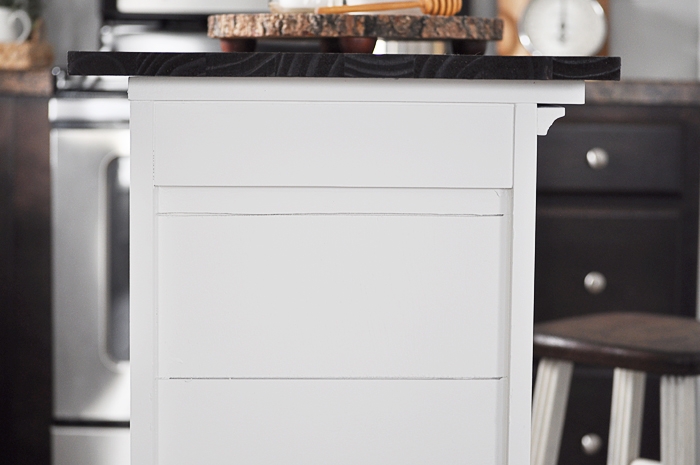
- To give the sides of the bookshelf some added character, I ended up going with a shiplap look. I used 1/4in thick plywood that I measured to the size I wanted and cut with a saw, then sanded the edges smooth.
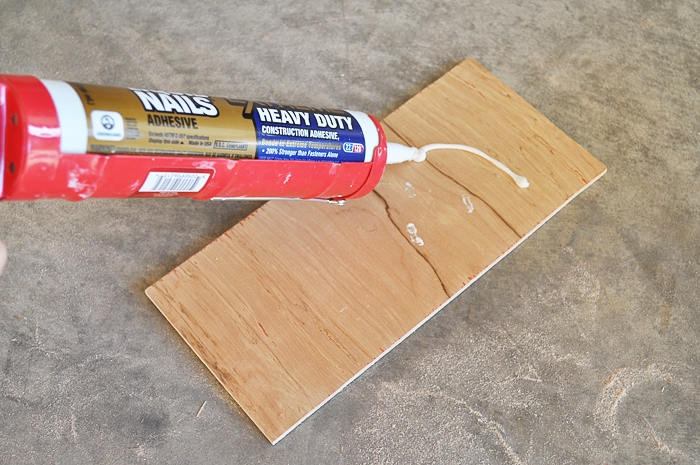
- Next, I used liquid nails and clamps to attach the shiplap to the sides and inside. I used nickels as spacers in between each piece of shiplap.
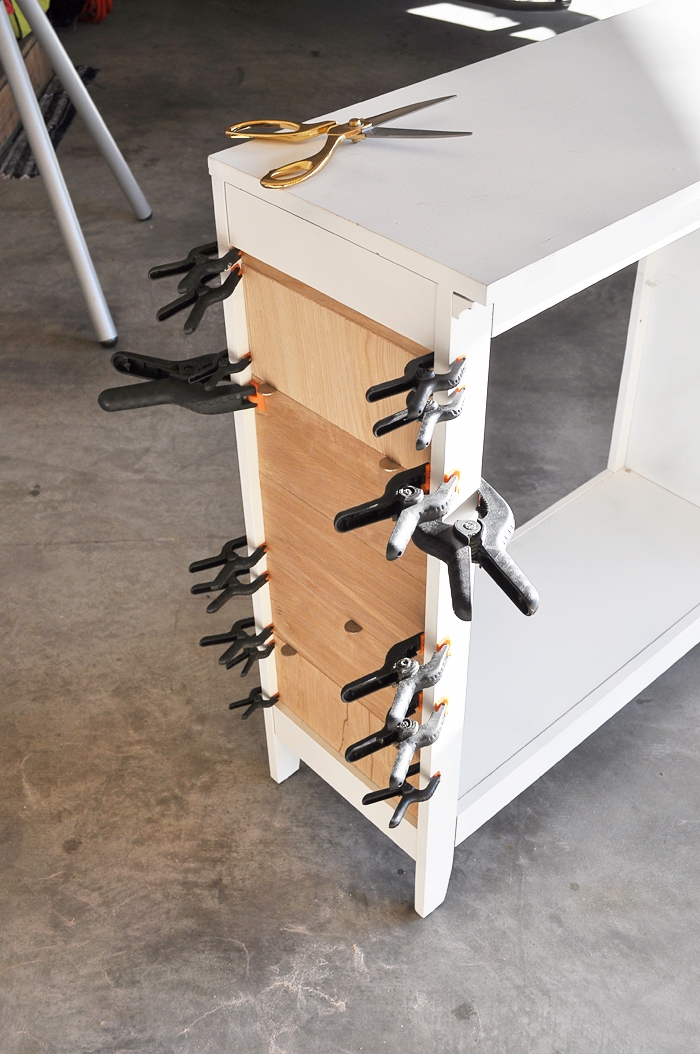
- After the plywood was glued on and secured, I caulked the edges to give it a smooth, clean finish.

- Next up, it was time to paint. I used my paint sprayer and white paint to get that flawless finish I was hoping for. Of course you don’t need a paint sprayer for this step, but it does make things much quicker and easier!
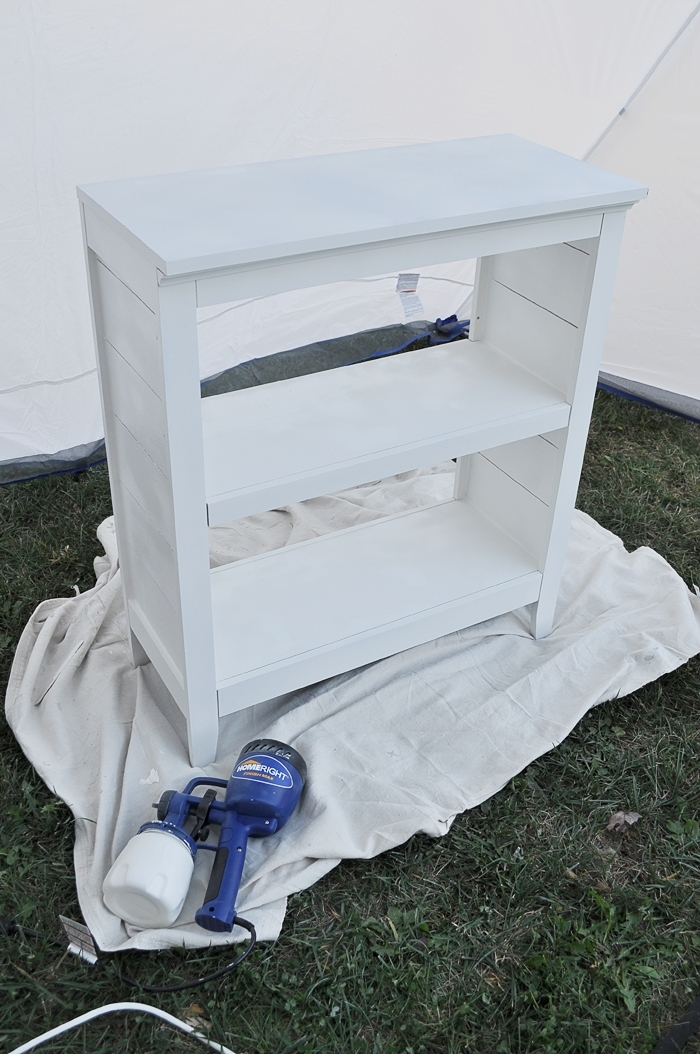
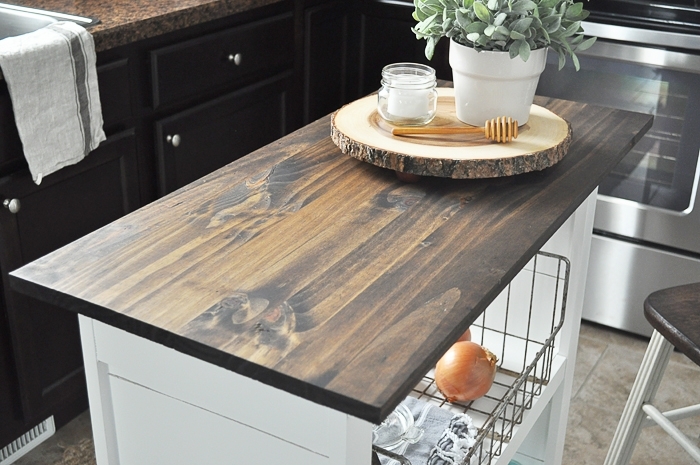
- For the top, I just cut a piece of wood and stained it with my favorite wood stain, then attached it to the top of the bookshelf with Liquid Nails.
Why Turn a Bookshelf into a Kitchen Island?
- Great for smaller kitchens.
- Provides extra storage and workspace.
- Saves money utilizing something you already have, rather than buying something new.
- Completely customizable to your needs and style.
- Can move around (you can even add wheels to the bottom).
I really enjoyed this easy DIY project. It made such a huge impact to our kitchen and its functionality. We use the island everyday for extra workspace and it just fits so nicely. It was meant to be!
Simular DIY Projects
- Guest Bedroom Armoire Makeover
- Farmhouse Desk
- Wooden Coffee Table Makeover
- Four Drawer Side Table
- Nursery Furniture Makeover
Pin this Post for Later

I know that this is an old post but I am so thankful that I found it. I have this exact bookcase as I, too, had a period of everything espresso and was thinking of turning it into a kitchen island so to find this post with my exact bookcase was wonderful. I don’t have a paint sprayer though.
That is so great to hear! And you absolutely don’t need a paint sprayer for this project! Just some primer and good old can of spray paint would do fine! Or regular paint! Whatever works for you!
For everyone looking for this bookshelf – it’s from Target!
I had the same exact book shelf! Saw this and couldn’t help but turn it into an island! The only thing I did different is I didn’t do the plank look on the sides (too lazy honestly lol), and I cut off the legs and used liquid nails to glue some finished wood to the bottom so that I could put wheels on it. LOVE IT!
The shiplap totally makes this piece! It just goes from nice to decorator! Well done.
I am absolutely in love and am currently making it do you know how thick and how big the slab is on top
I love, love, love your kitchen island project Ashley. I need a kitchen island for food preparation, as I have very limited counter space in my small kitchen. I absolutely love the detail you give on how to DIY.
On another note: Can you tell me what kind of counter tops you have in your kitchen area? What color are they & what material are they made of? They would go perfectly in my kitchen & give it a much needed updated look?
Thank you for the inspiration.
This is amazing! What is the height or dimensions of your bookcase?
Love this ashley! What were the dimensions on the book shelf? Trying to do something sinilar
Love this, Ashley! You’re so creative! I want to try this with an old bookshelf that I have on hand. Thanks for the inspiration! xoxo
This is so clever. I miss having an island. This would be perfect for our kitchen. We need something narrow and this fits the bill.
I absolutely LOVE this! I was surfing around yesterday and stumbled on your blog-a new favorite! This is the cutest thing ever-great great job!
This is adorable and the shipload adds so much character
Cindy
Absolutely stunning!! Love it. This is the perfect idea for my very small kitchen and I will be pinning this to copy. Thanks so much for sharing this idea.
In complete agreement. Now I am torn between using an old, smaller dresser for an island, or this. I have come to love my tiny kitchen but more storage is ALWAYS plus. This is perfect for the space and extra sorage. Beautifully done.
Love your creativity!
GREAT idea! As always, love the staging you do and yes, I was sooooo scoping out your fun kitchen, too!
This is AMAZING!!! Well done.
That is awesome before and after Ashley!