Farmhouse Pantry Makeover
Create a beautiful farmhouse style pantry makeover by adding DIY shiplap and stained wood shelves. This custom look can make any pantry stunning and functional at the same time!
Shiplap has finally made an appearance for the first time in our house! It’s very minor, but it’s there! I wanted to test the waters with a small space before committing to an entire wall, or a whole room for that matter!
To my surprise, it was a lot easier than I thought it would be. Meaning now I want to shiplap the entire house! The walls, the ceiling, the floor. Okay, maybe not the floor, but you get the idea.
Seriously though, we shiplapped the inside of our pantry for this farmhouse pantry makeover, and it looks amazing. I have wanted to redo this space for some time now, with this exact plan in mind and we finally got around to doing it a few weekends ago.
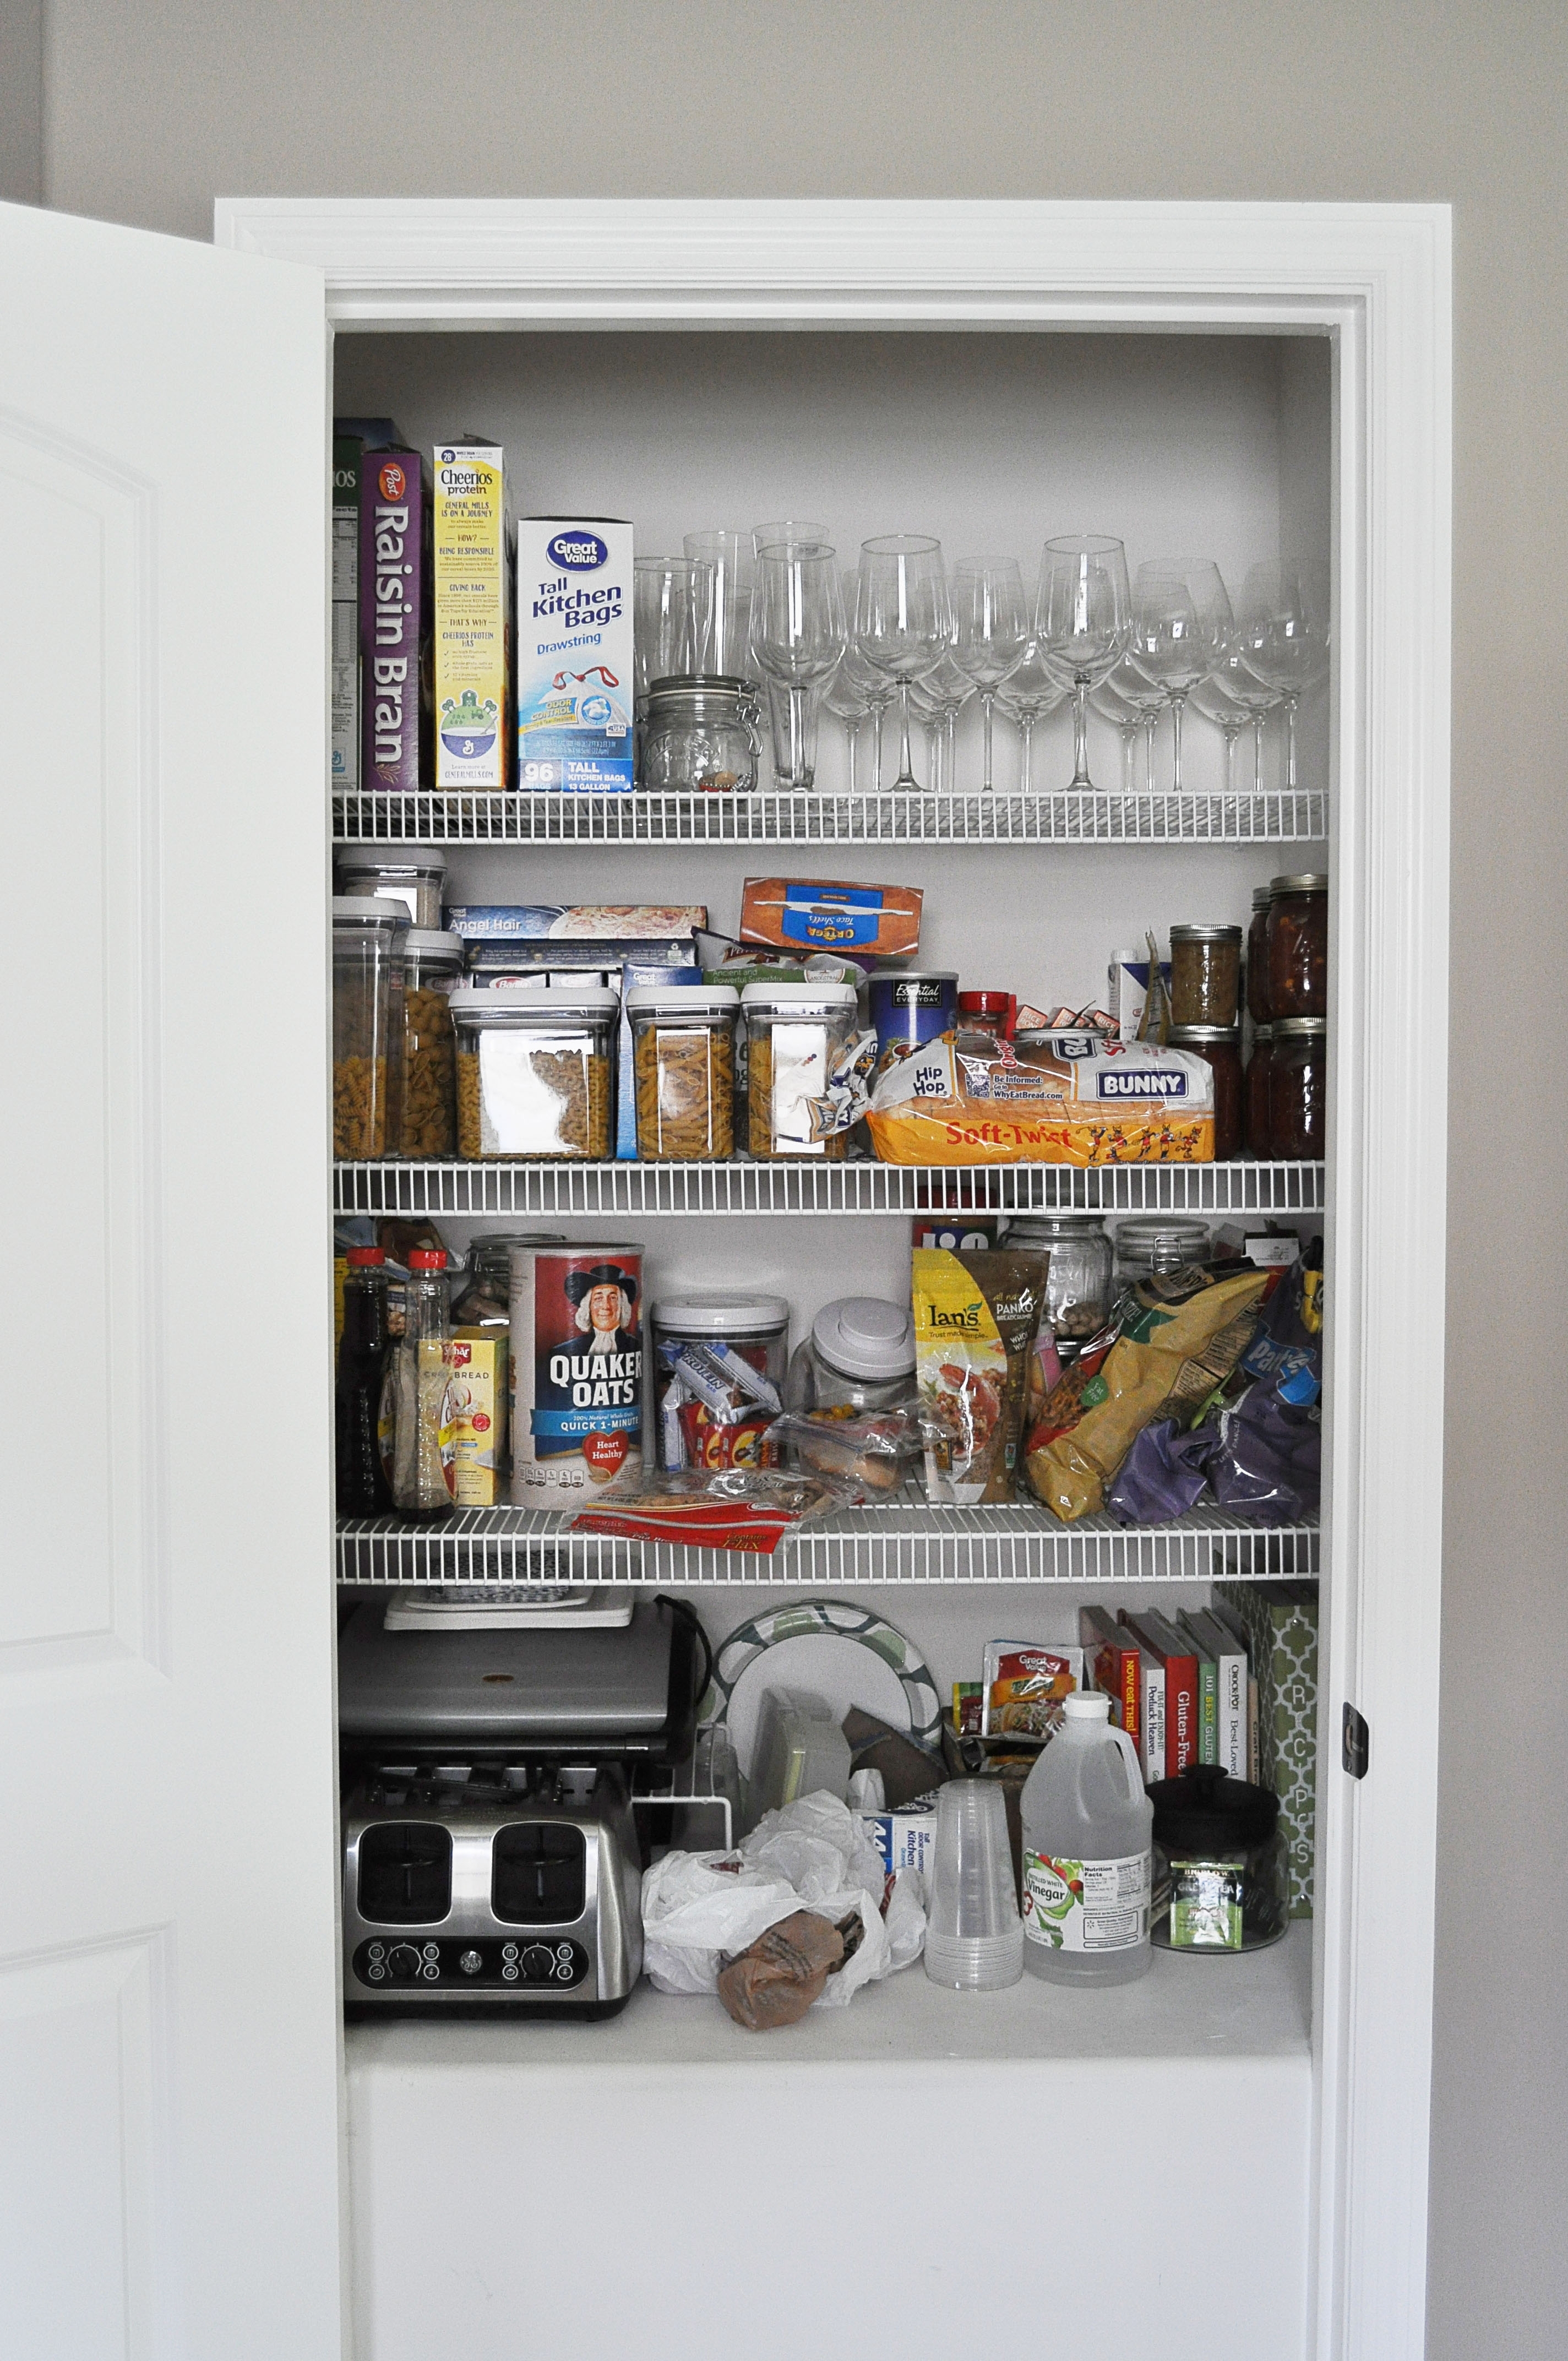
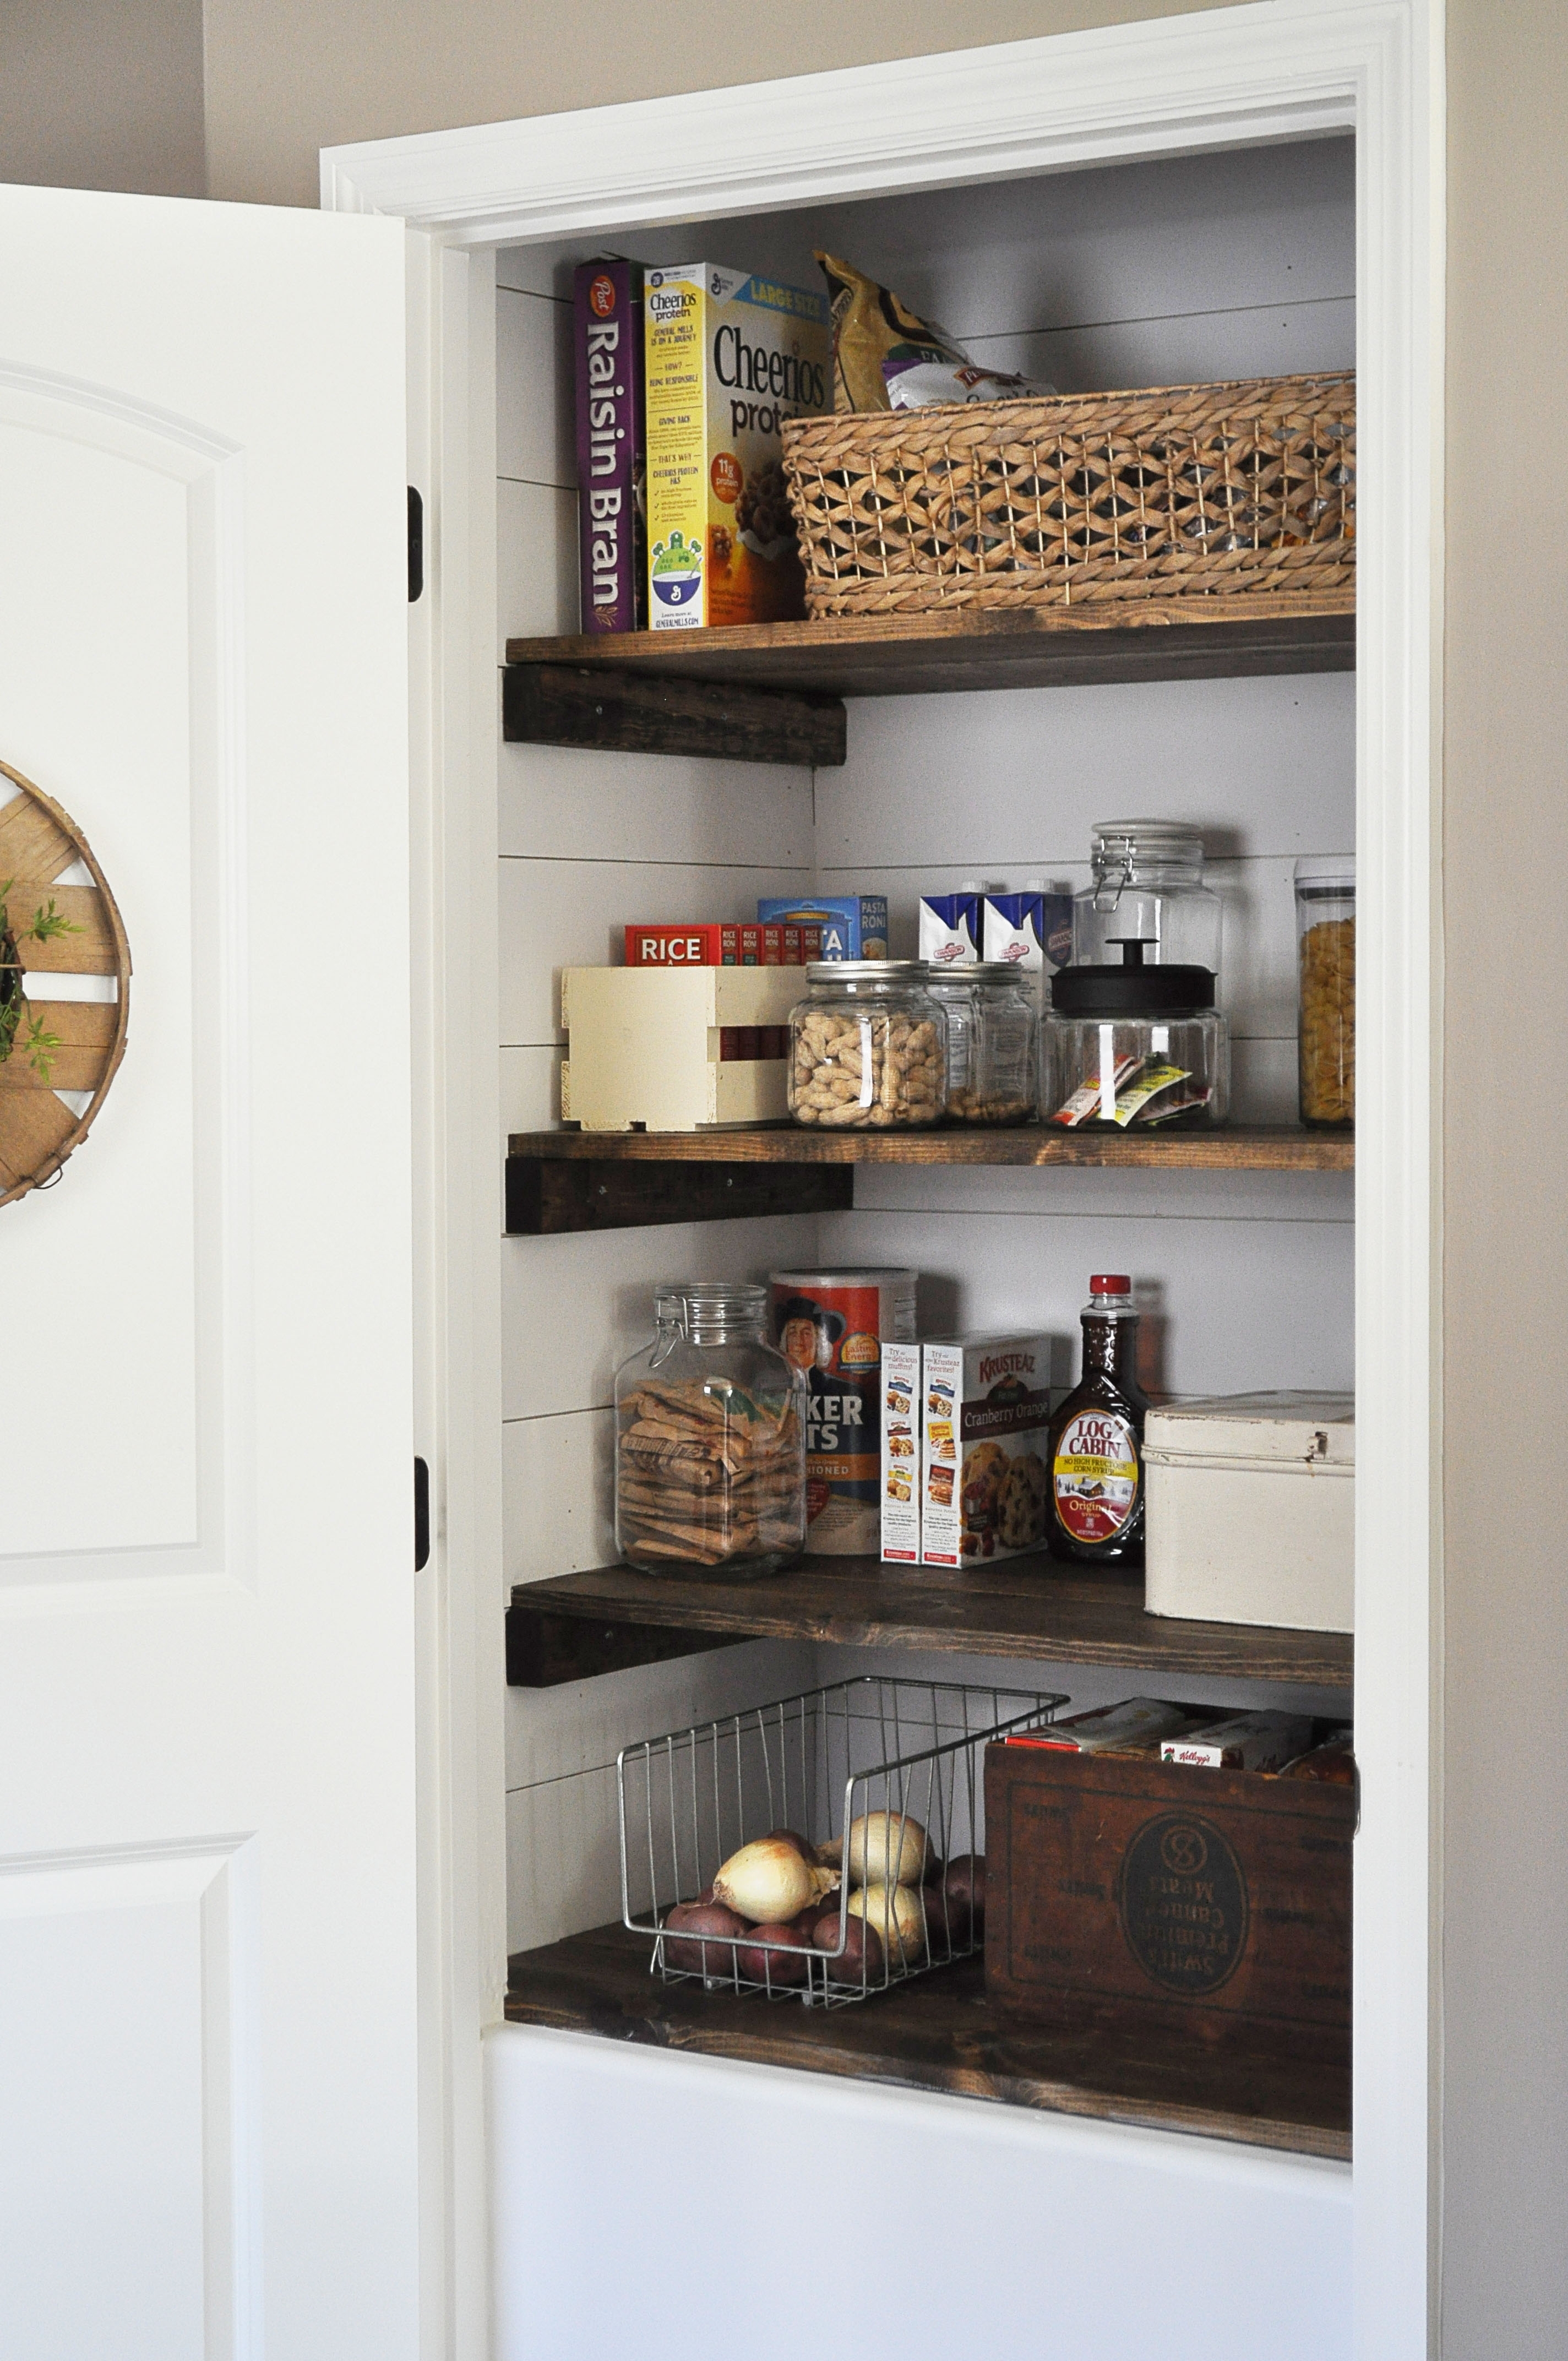
Farmhouse Pantry Makeover – The Before
I cannot even believe I am showing you this before, but it’s real life friends! Our pantry was super builder-grade, like the rest of our home. I knew I wanted to rip out those awful white wire shelves the minute we bought the house, so I am glad we finally did!
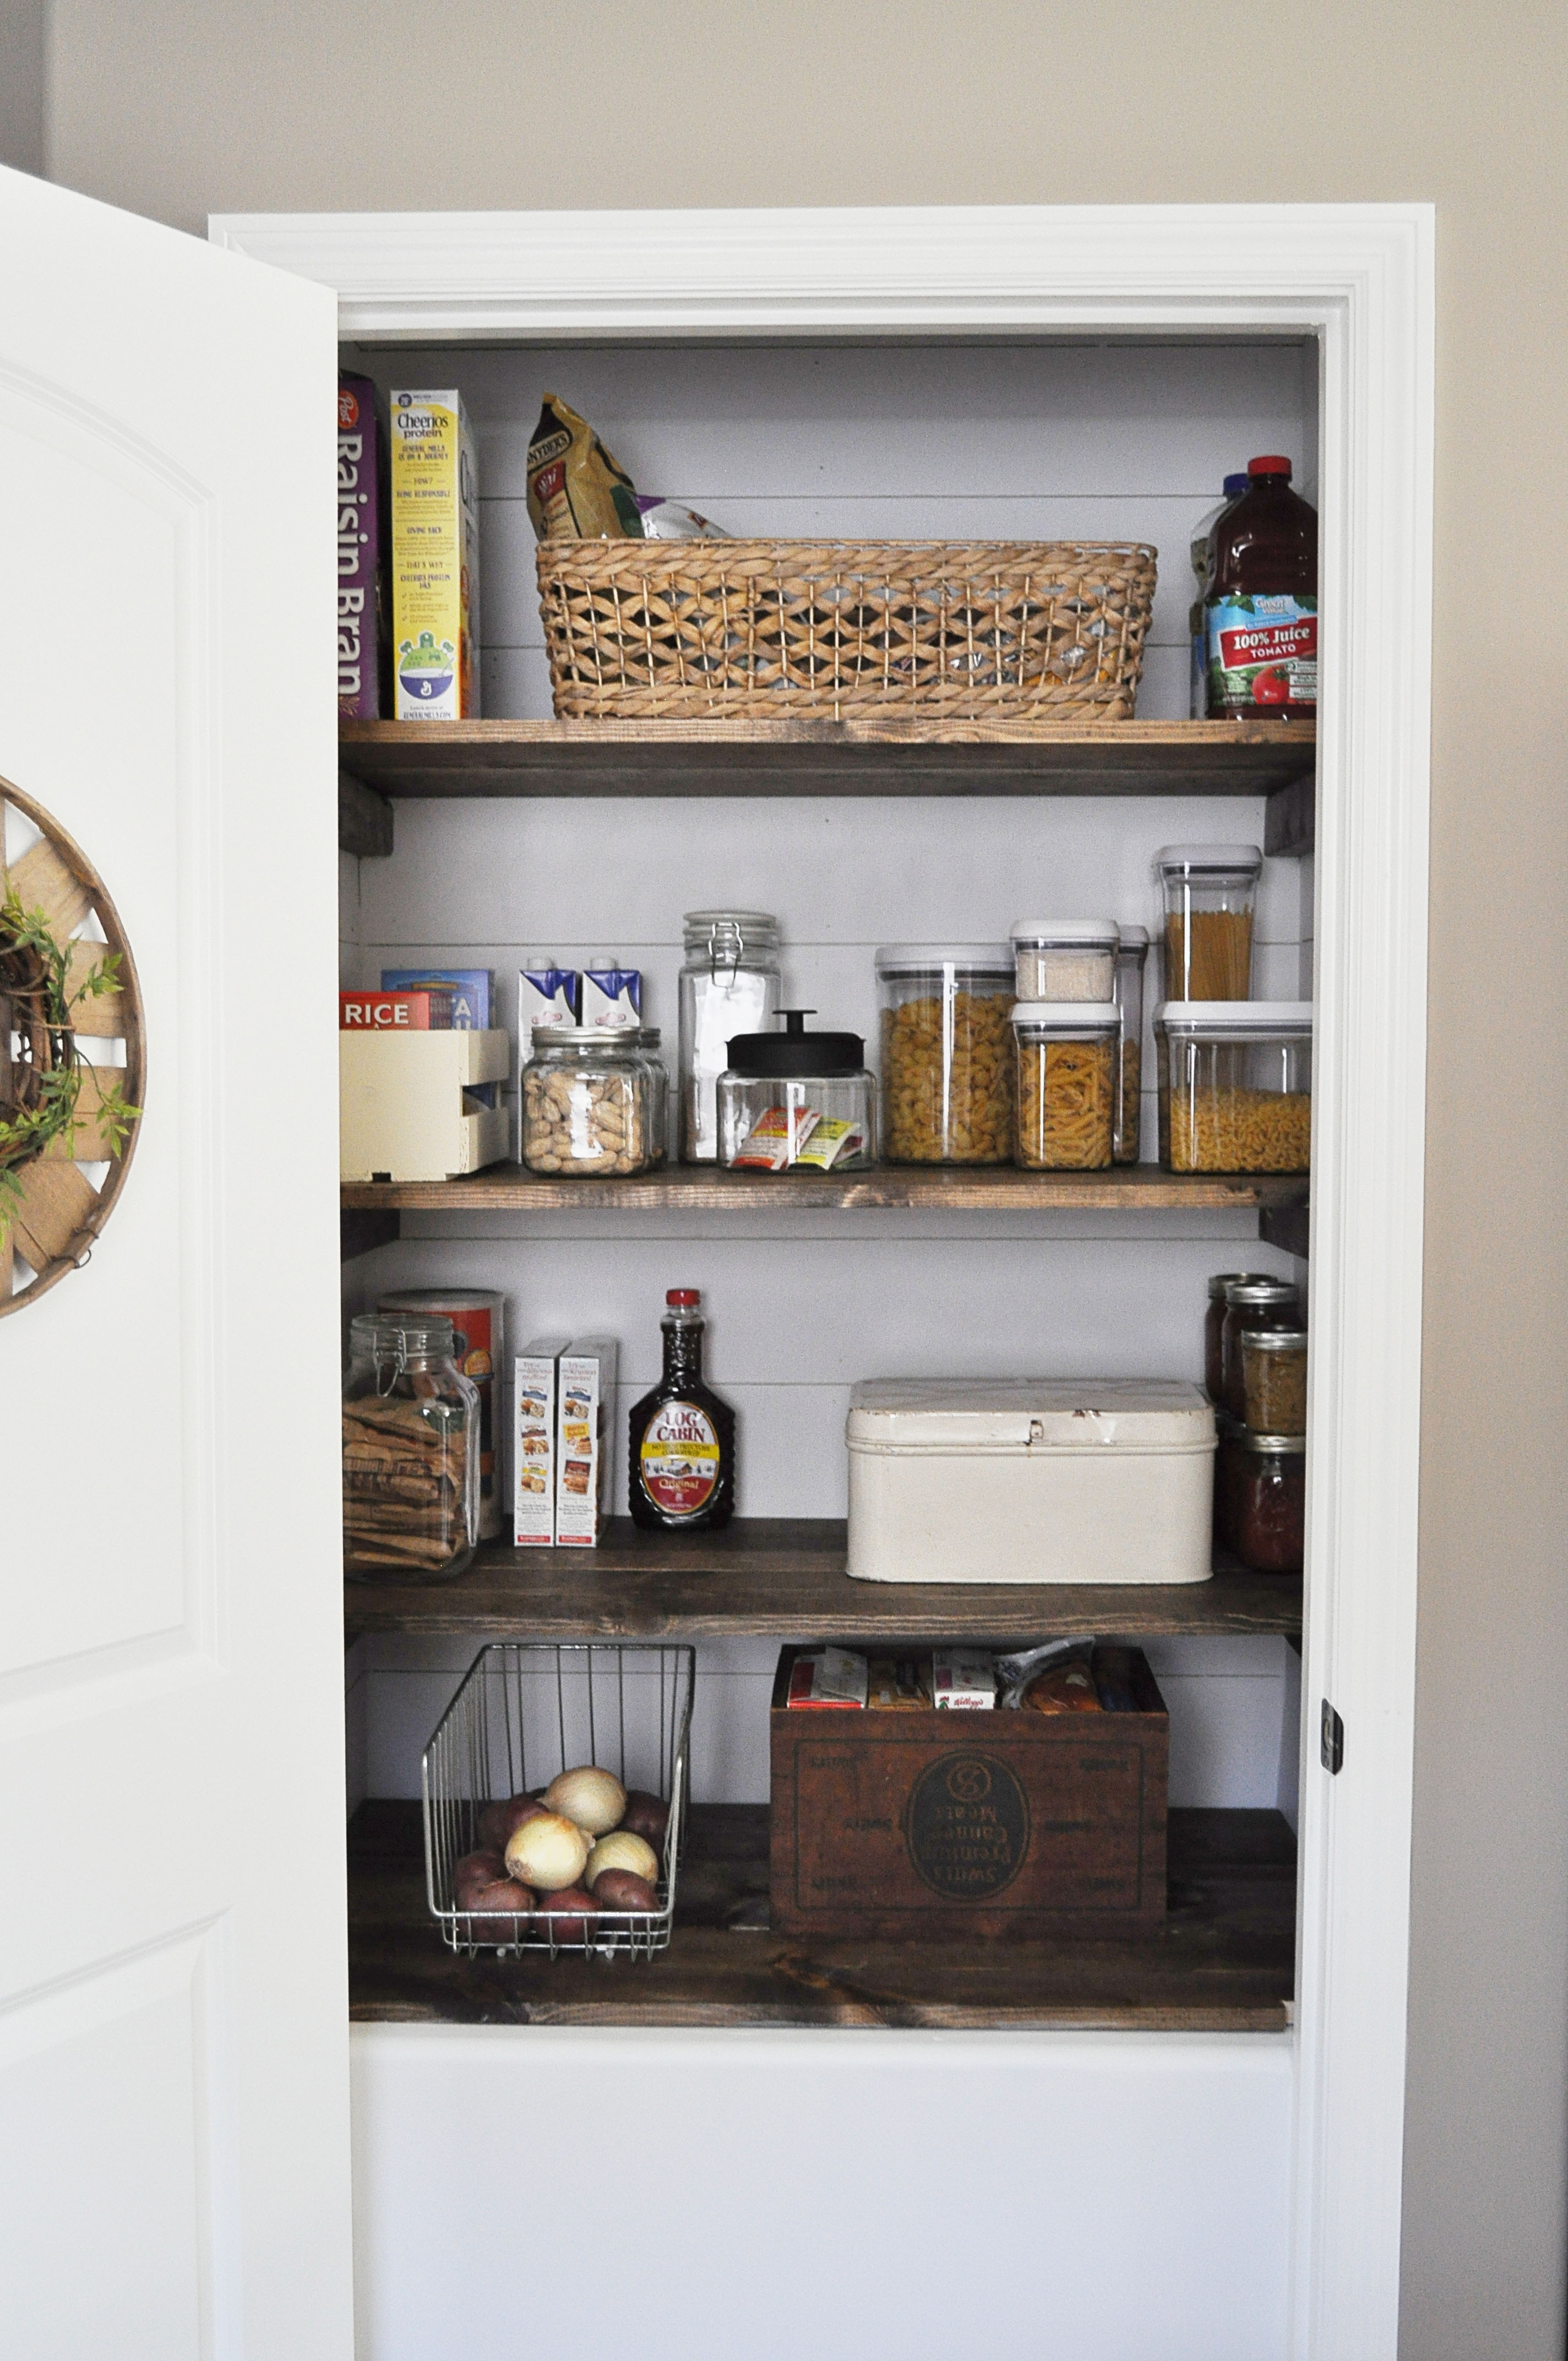
My plan was to add faux shiplap to all the walls, then add in some custom wood stained shelves. I kept the new shelves in pretty much the same spot as the old ones, but my goodness they look so much better now.

SUPPLIES NEEDED FOR FARMHOUSE PANTRY MAKEOVER
Affiliate links are provided below for your convenience. For more information, see my full disclosure here.
FOR THE SHIPLAP
- 2 sheets 8x4ft plywood underlayment at 1/4in thick
- Miter Saw
- Hand Sander
- Nail Gun and Nails
- 2 Nickels (used for spacers)
- Level
- White Paint
- Paintbrush/Paint Pail
FOR THE SHELVES
- 1inx8in white wood (for top of shelves)
- 1inx2in white wood (for top of shelves)
- 2inx3in white wood (for side support)
- Miter Saw
- Dark Wood Stain
- Stud Finder
- Drill
- 3 inch Screws
- Drywall Anchors
- Level
Instructions for farmhouse pantry makeover
FOR THE SHIPLAP
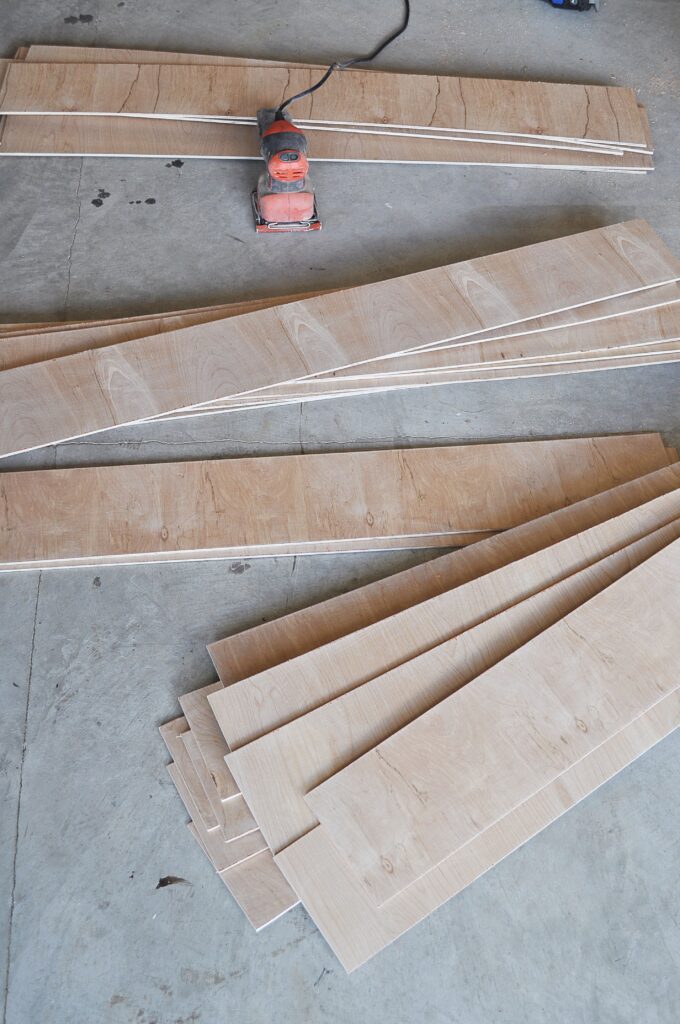
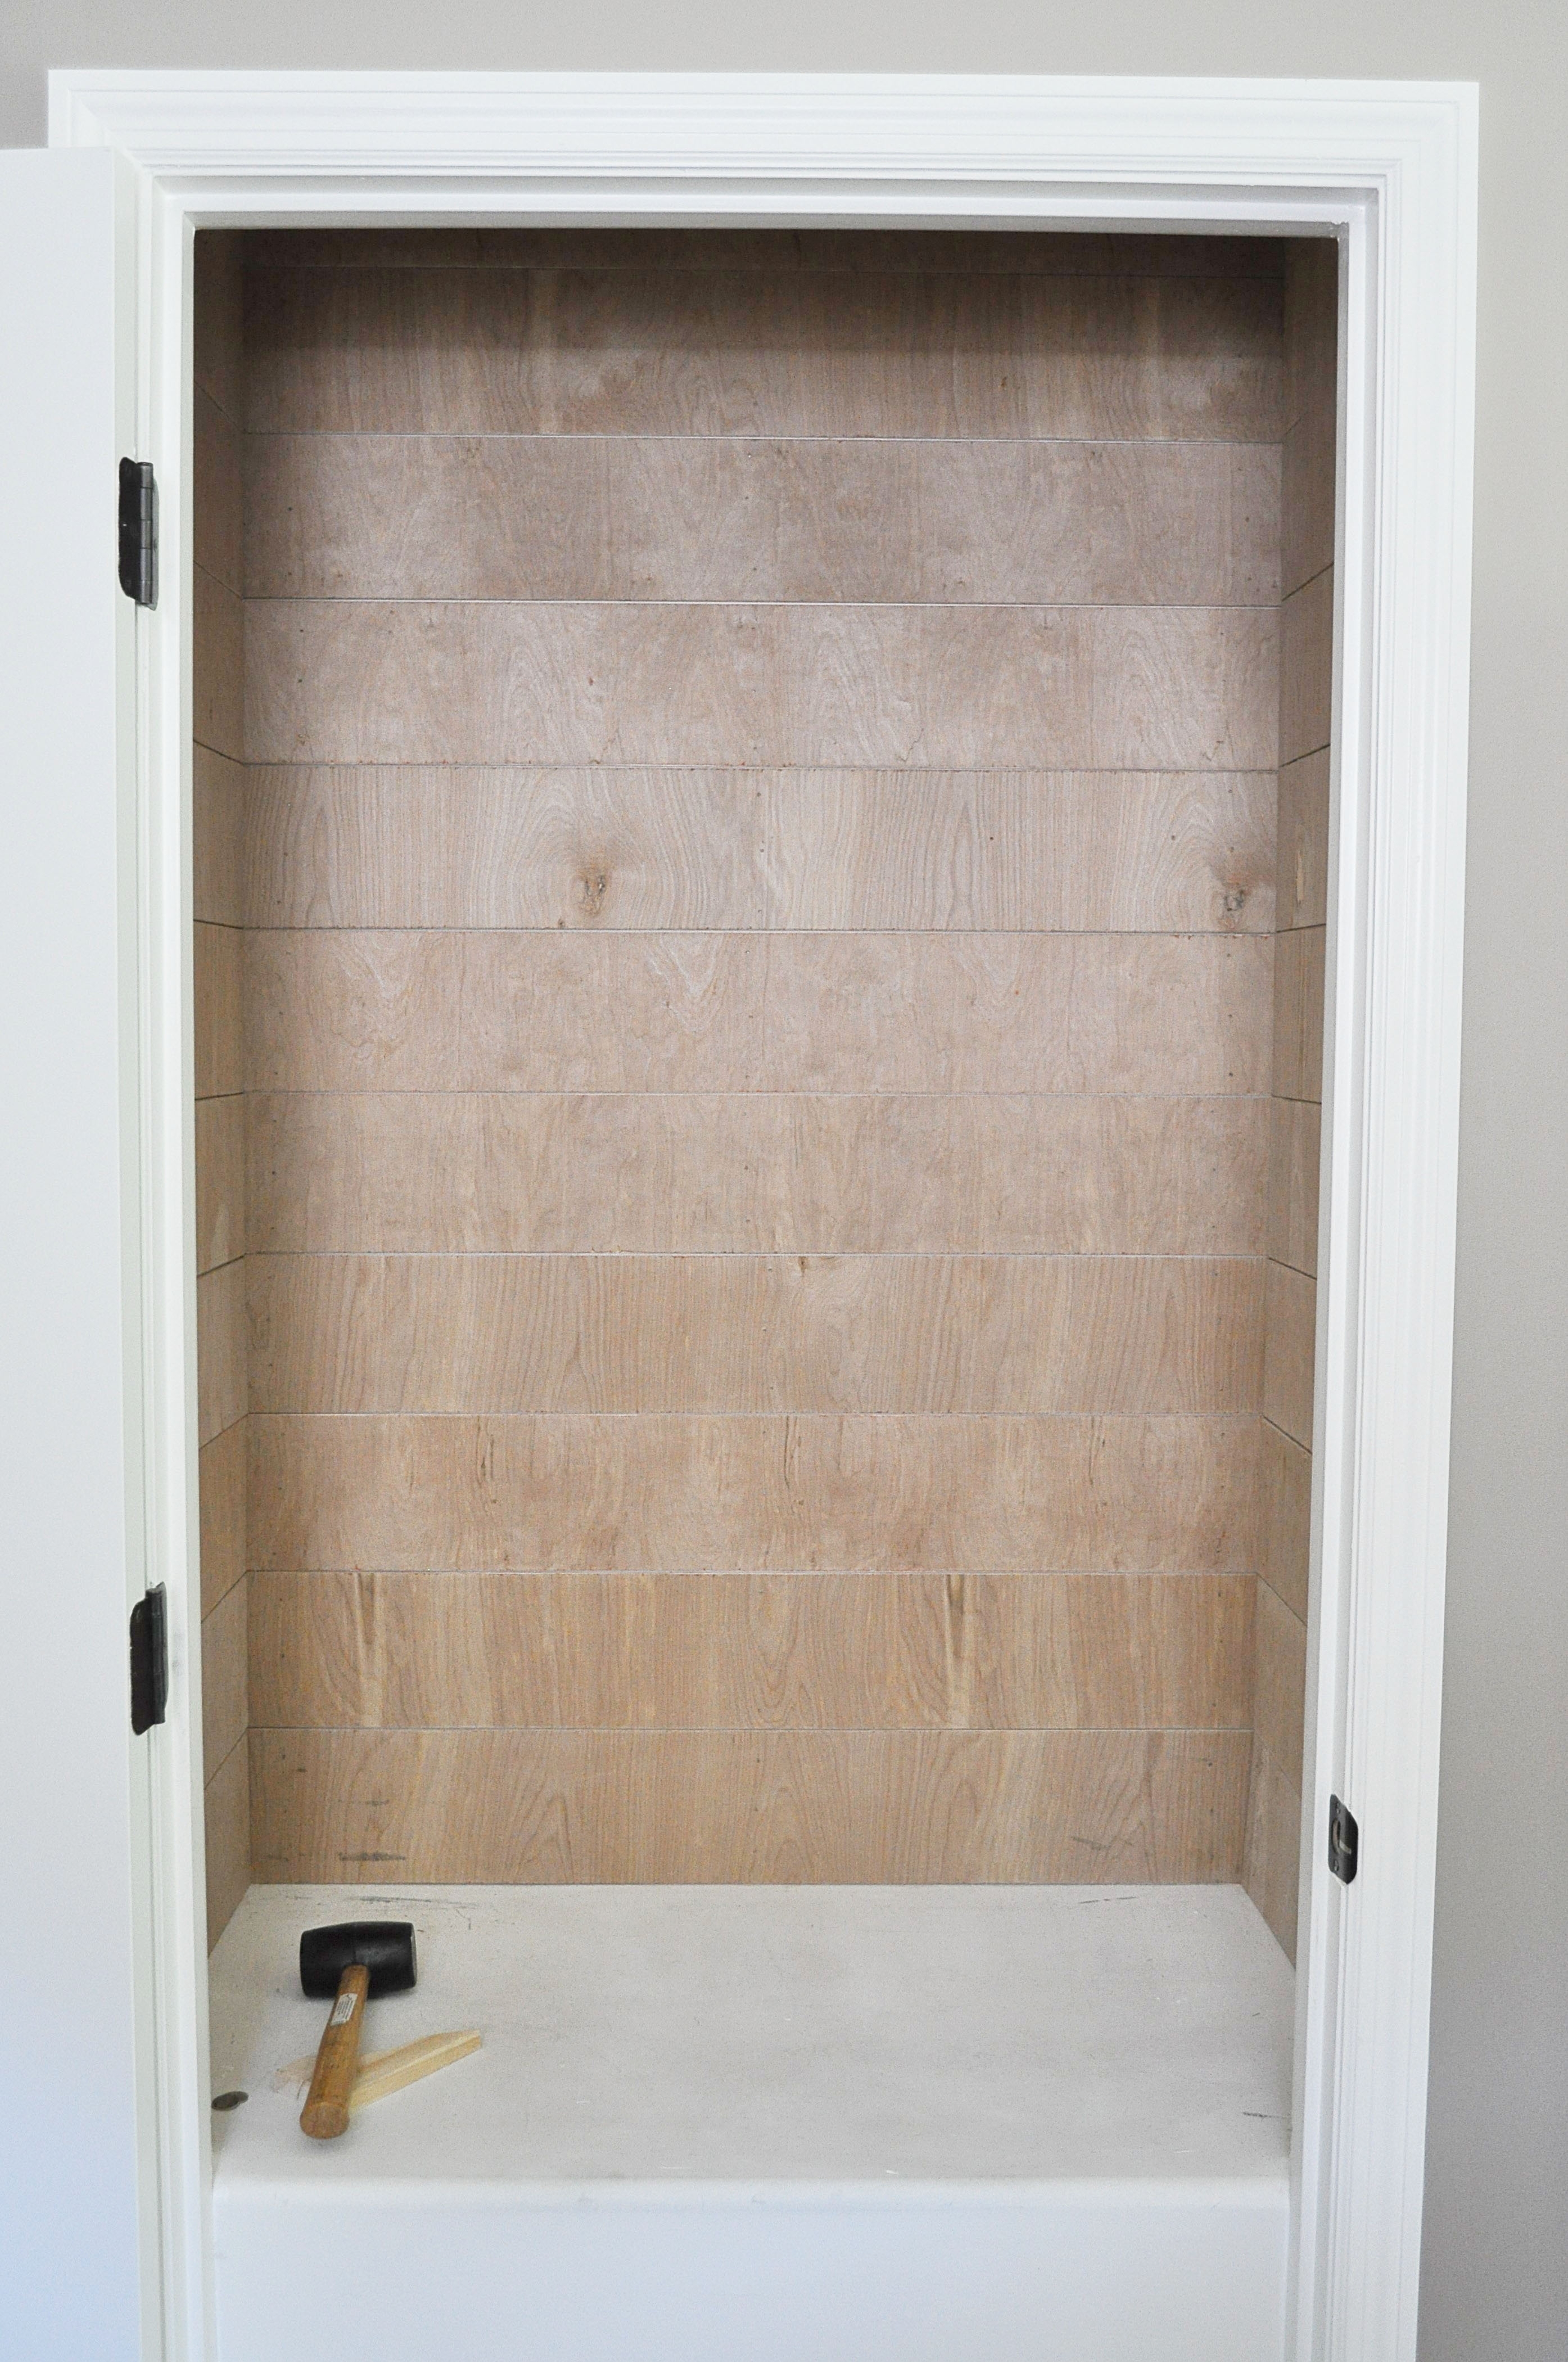
- From our local hardware store, we picked out a few 8x4ft sheets of plywood underlayment at ¼ inch thick. We took both sheets to the cutting center at the back of the store and had them cut the plywood into 6 inch wide strips since our pantry measured exactly 66 inches in height. We also picked up the 1x8in, 1x2in, & 2x3in pieces of wood for our DIY shelves.
- When we got home we measured and used our miter saw to cut the 6 inch plywood strips to the length needed for all three pantry walls. Afterwards, I sanded all of the cut edges of the plywood smooth with my hand sander.
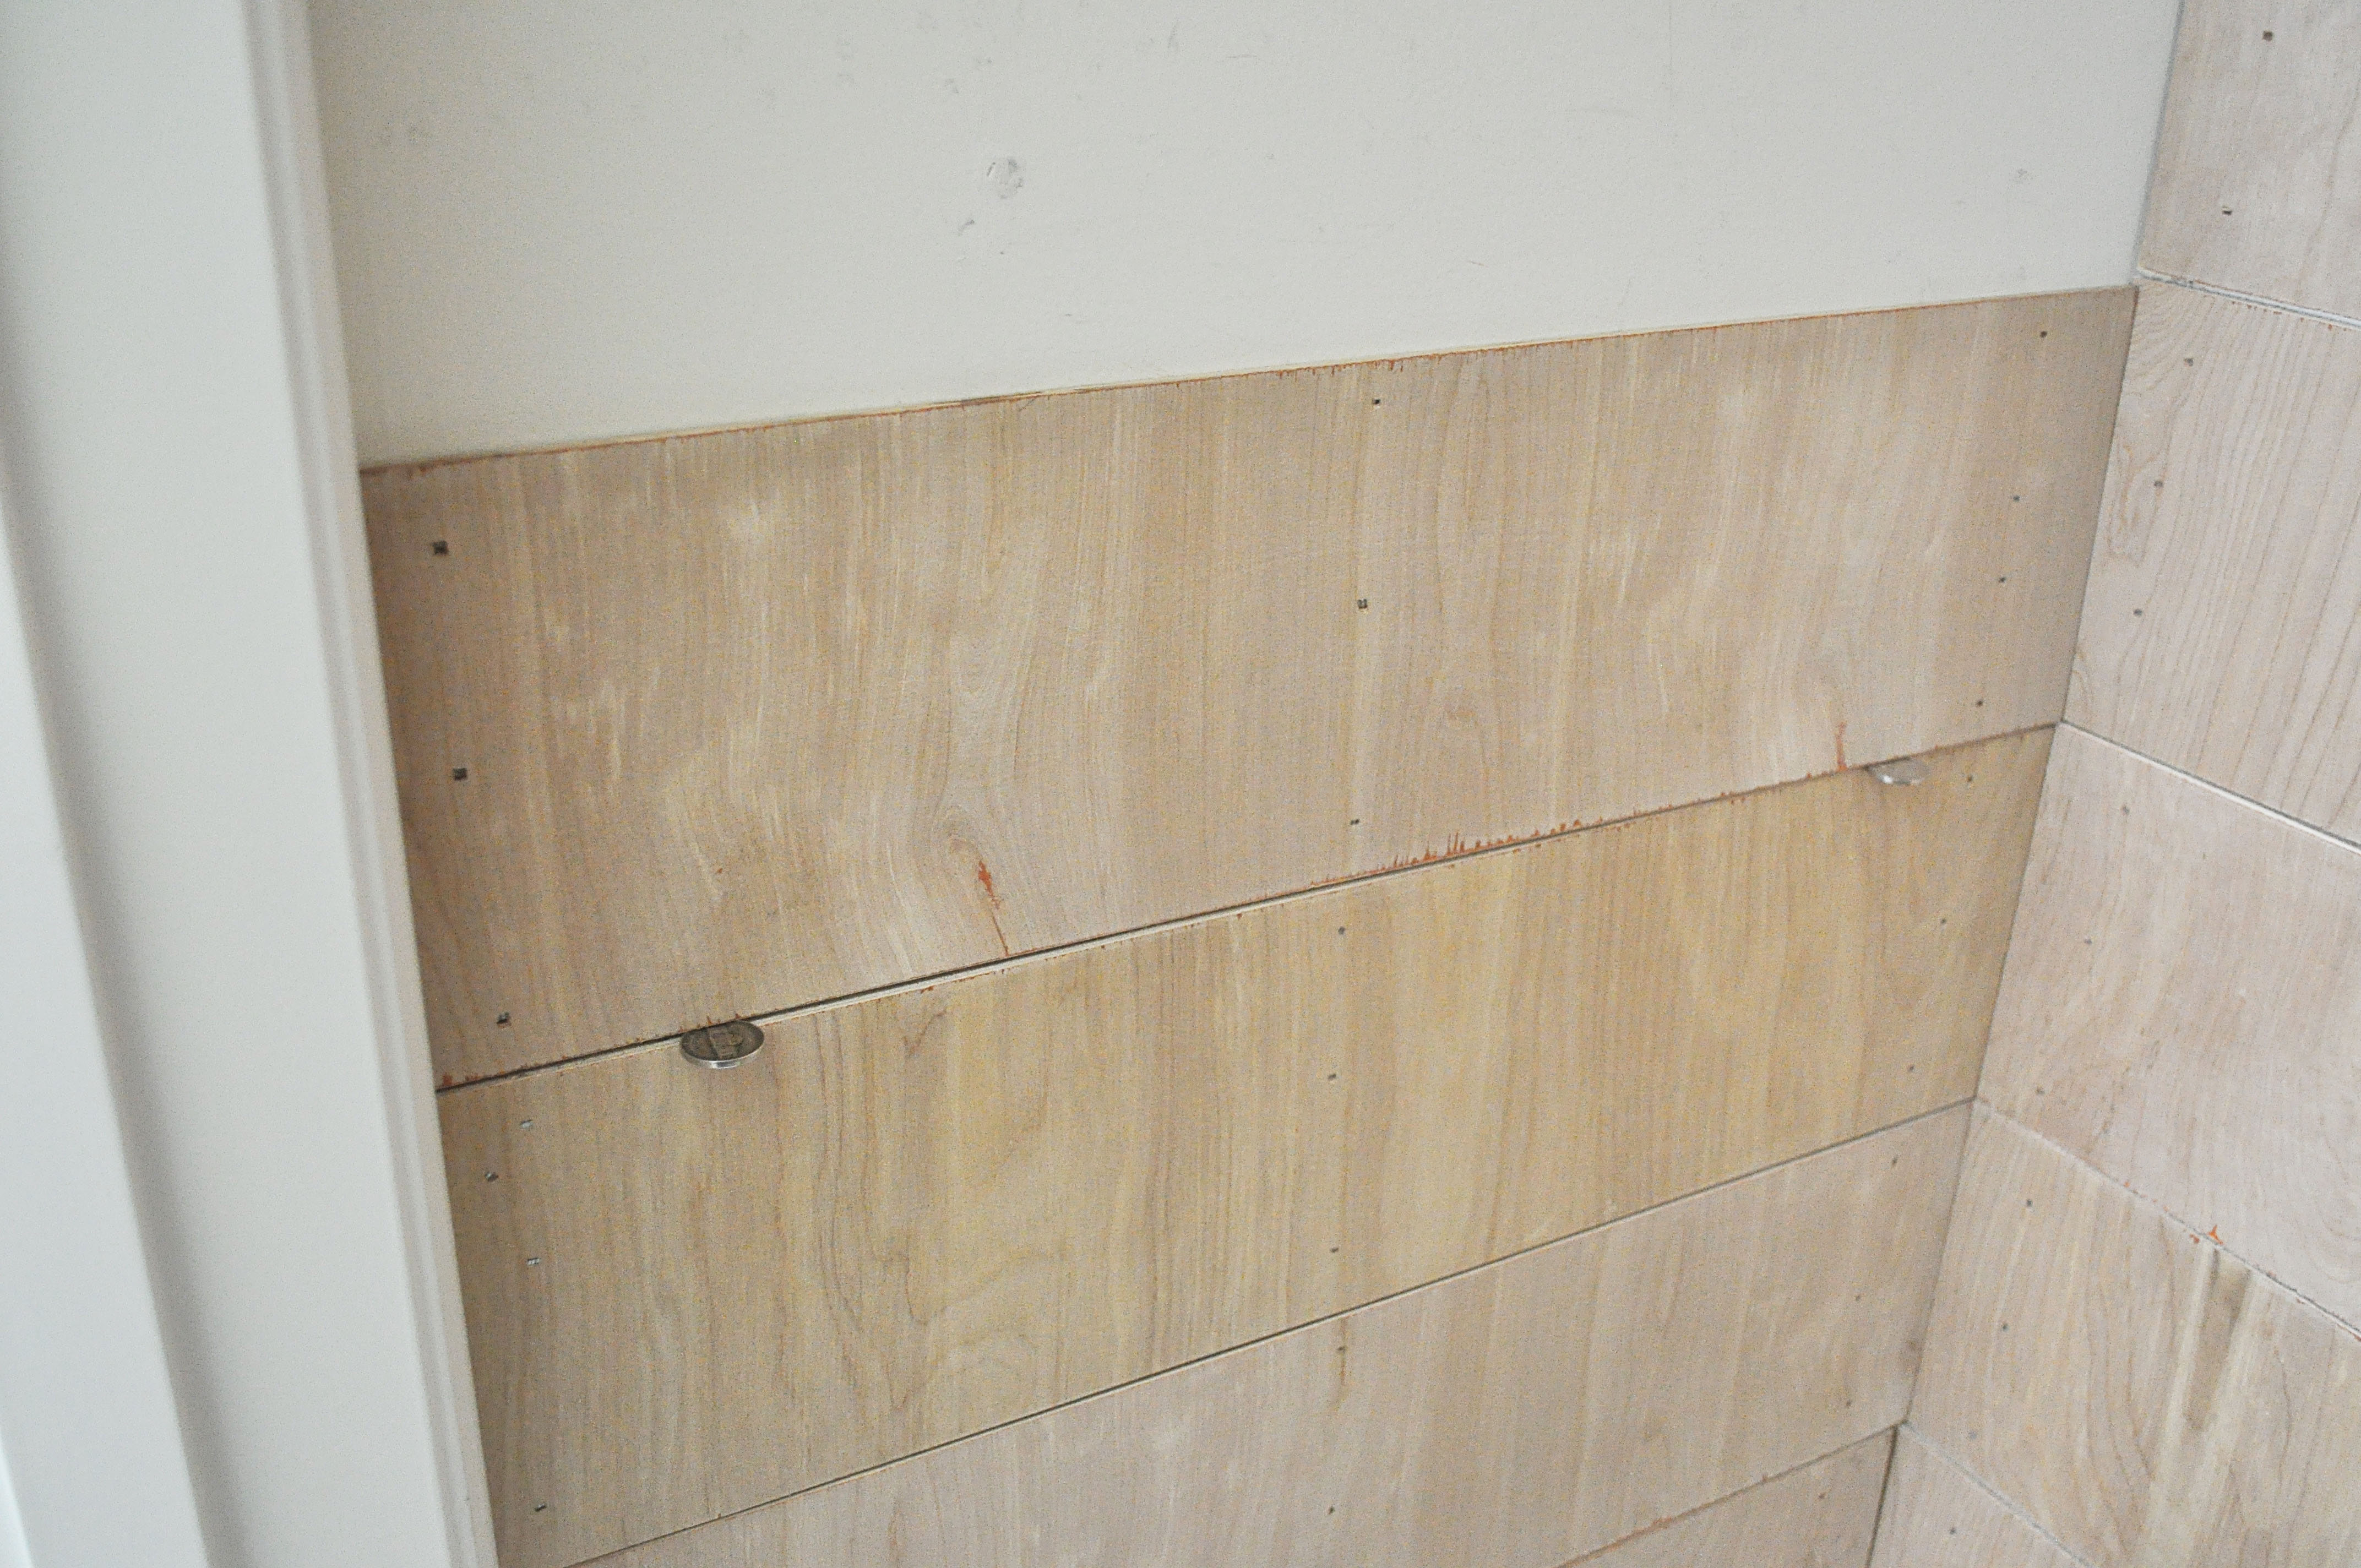
3. We started the shiplap install by securing the 6 inch plywood strips to the middle wall first, and worked our way from bottom to top. Using the nail gun, we put three nails in the left side, three in the middle, and three in the right side of each wood strip.
Once the first strip was done, it was all downhill from there. We used a nickel at each end as spacers, setting another board on top of them and using the level to make certain they were straight.
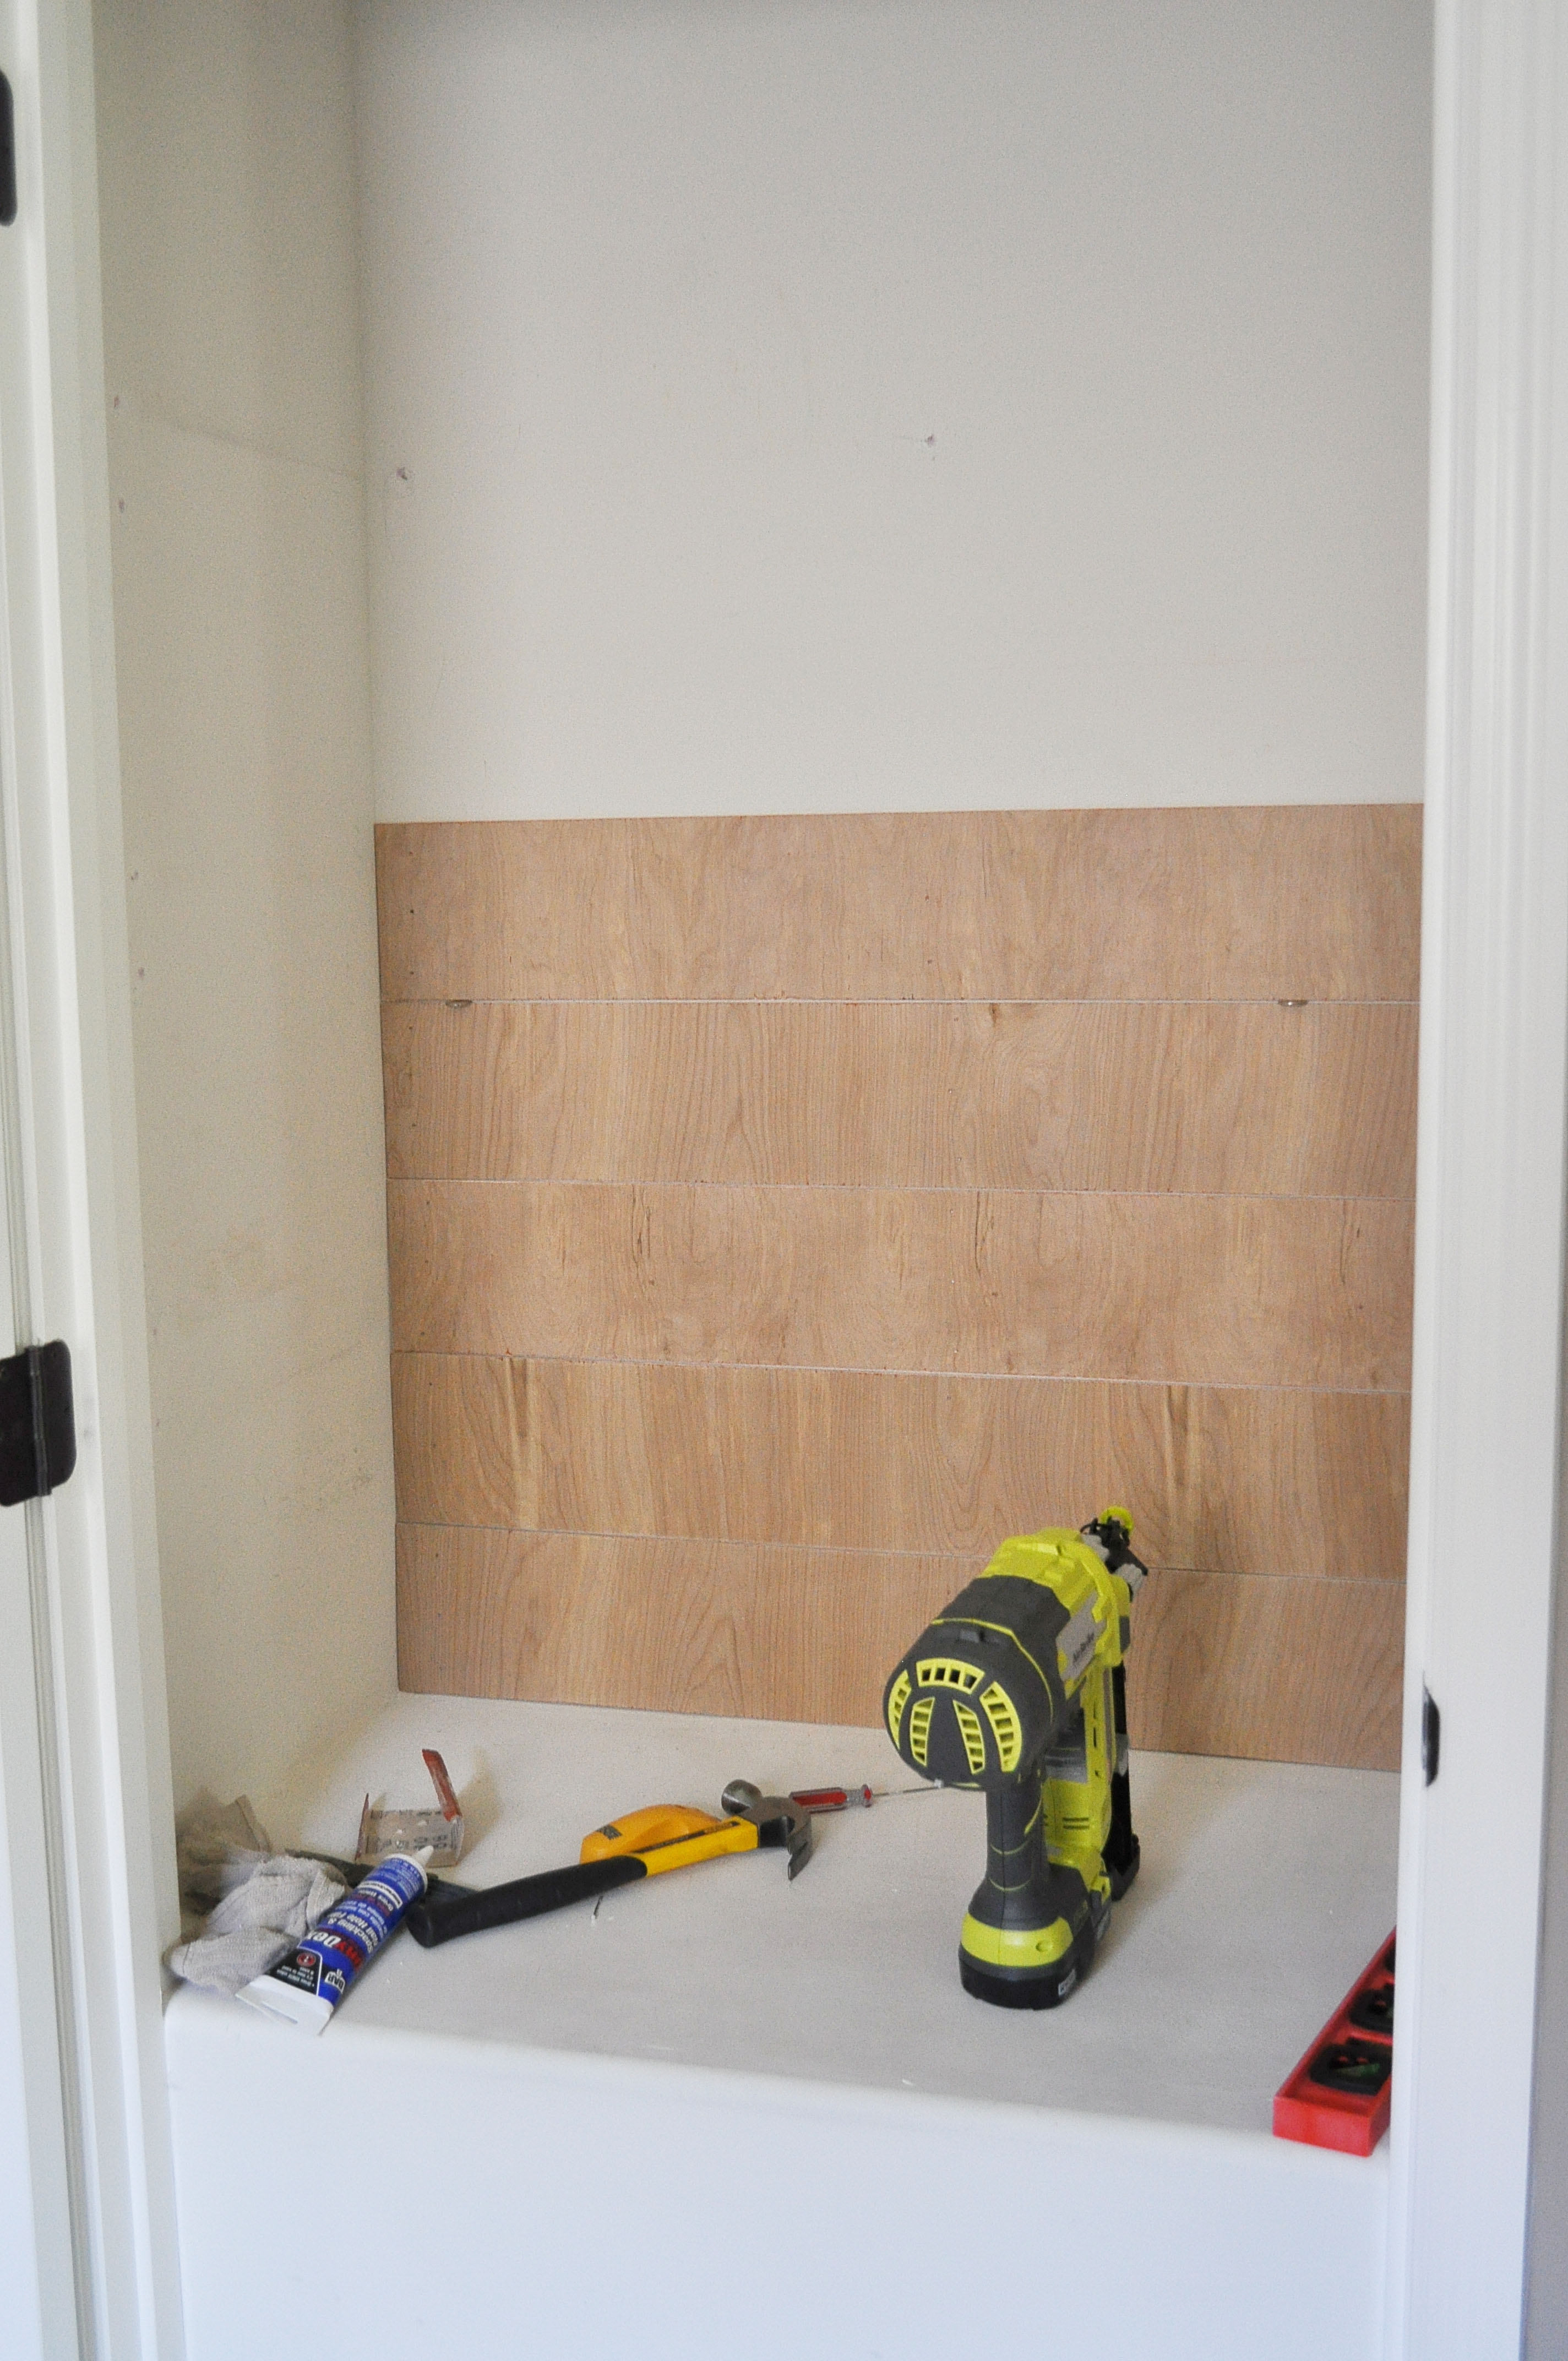
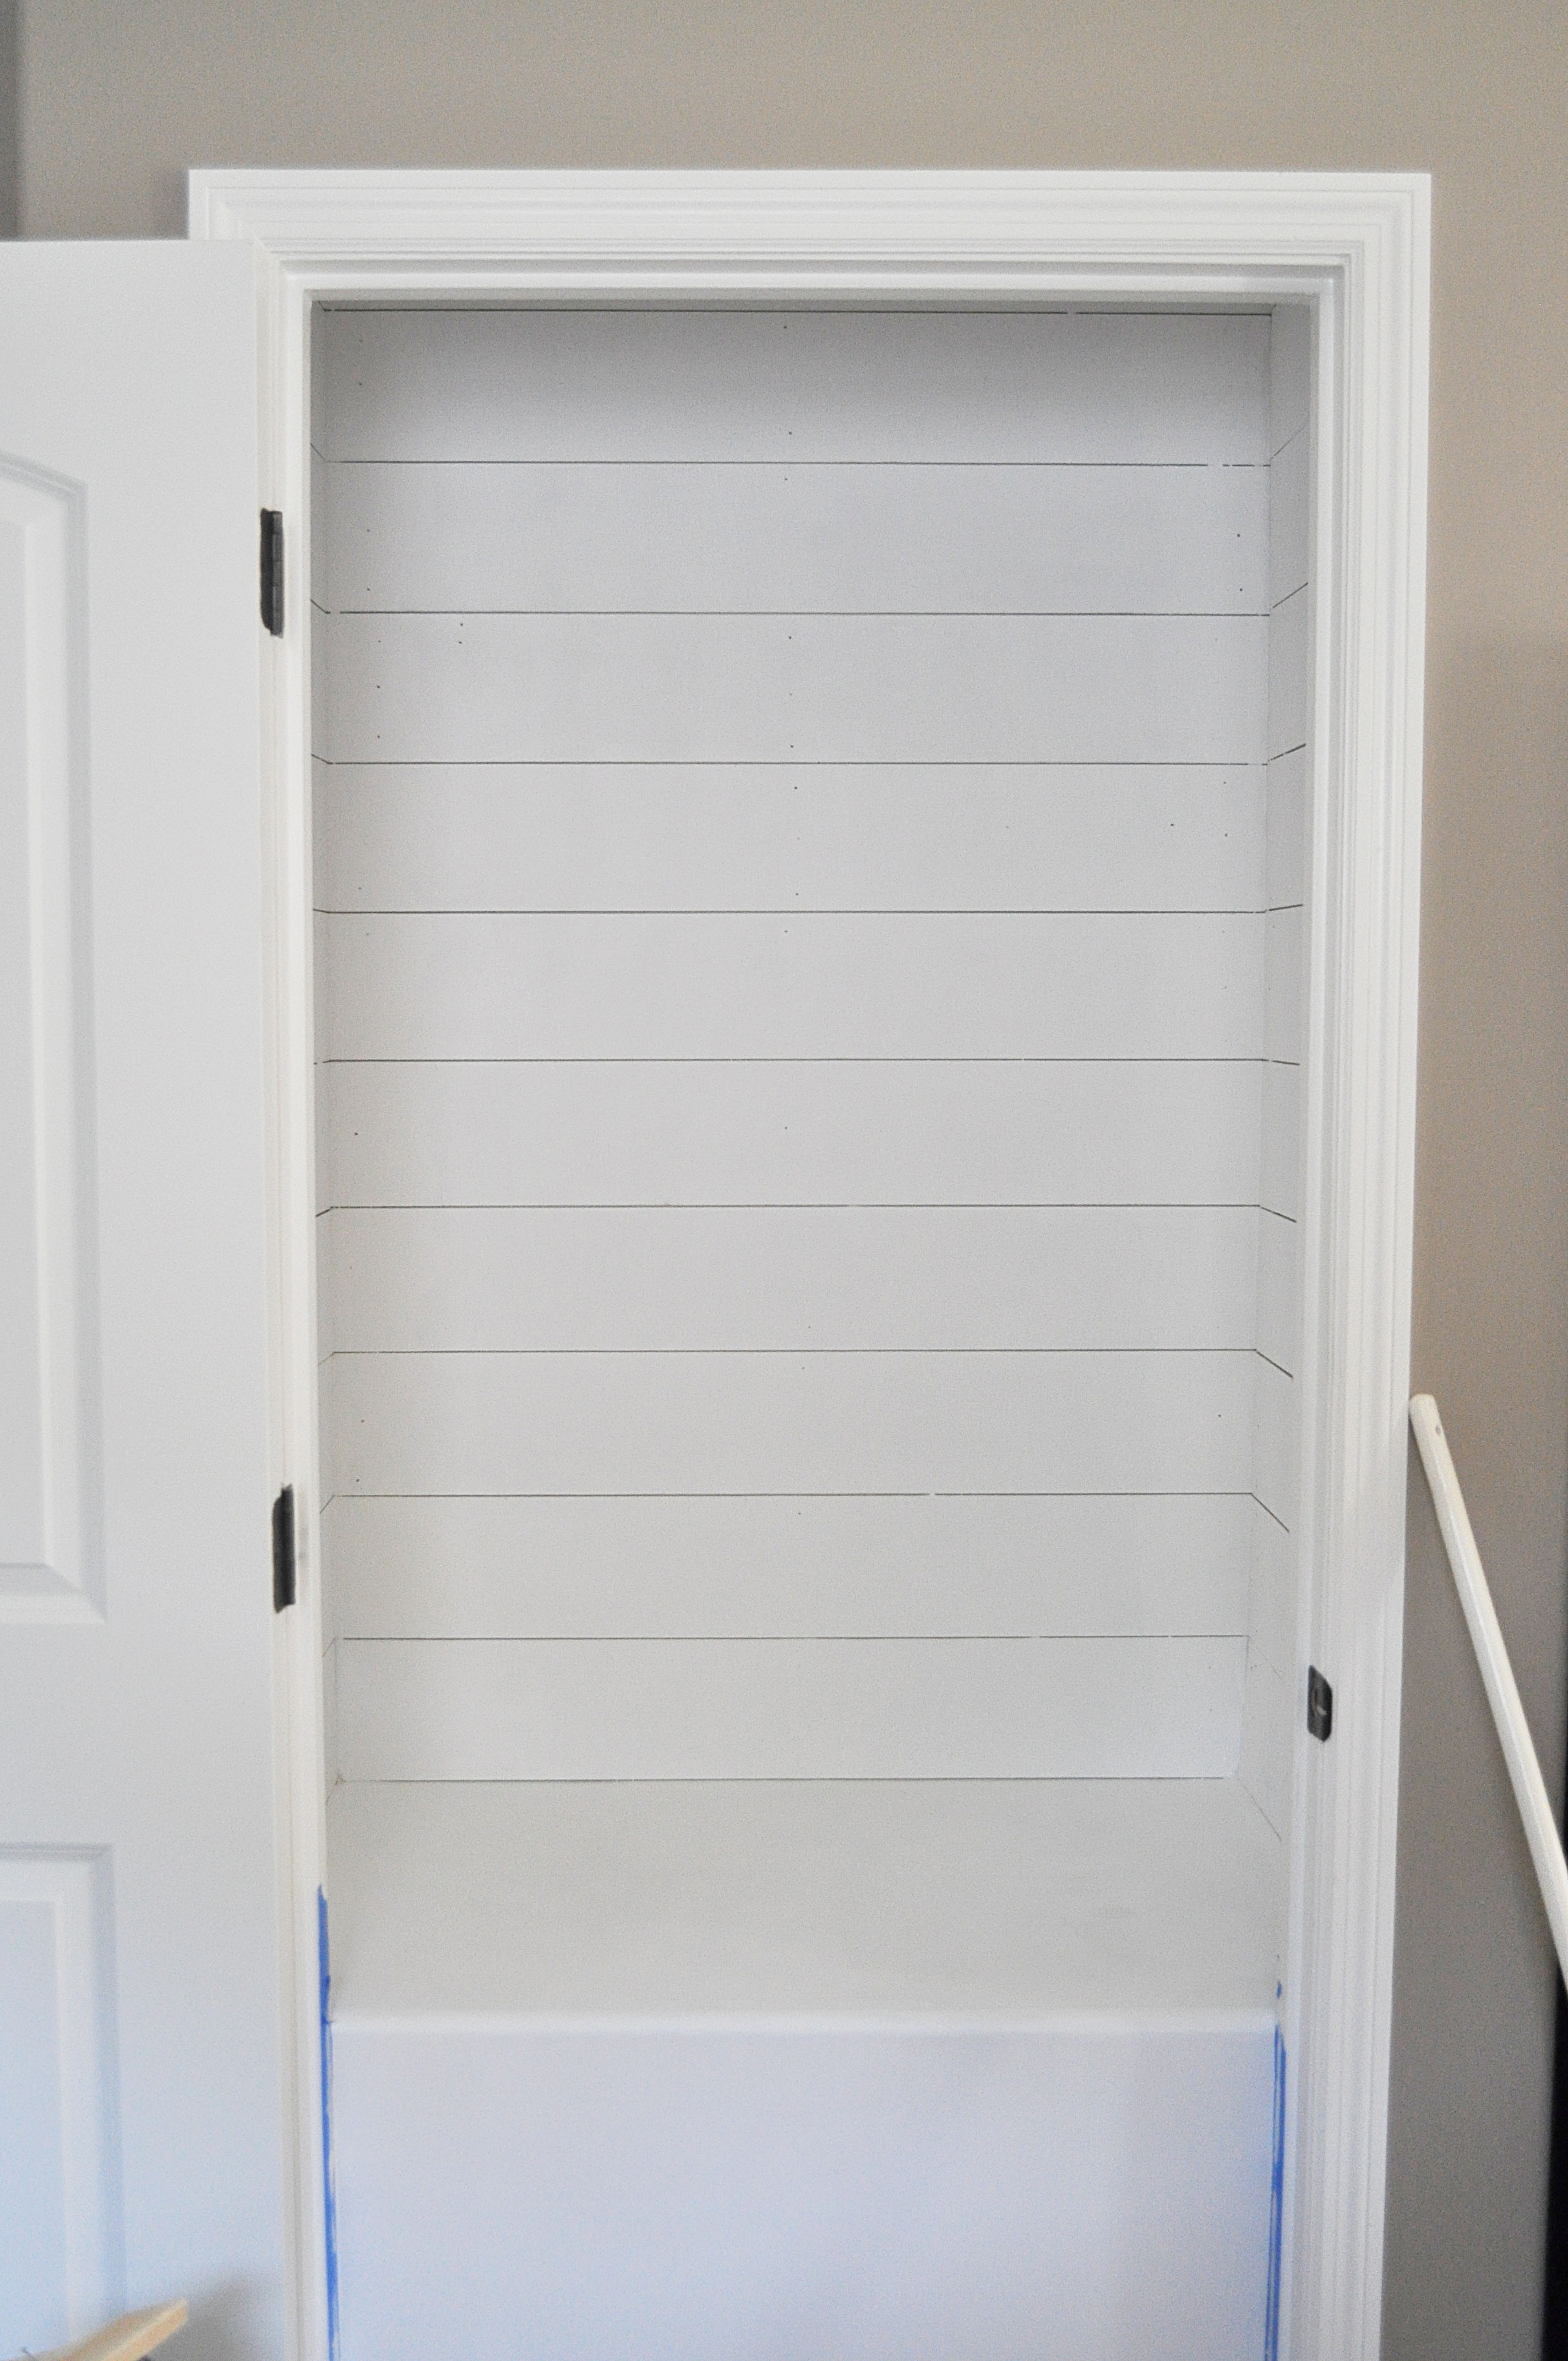
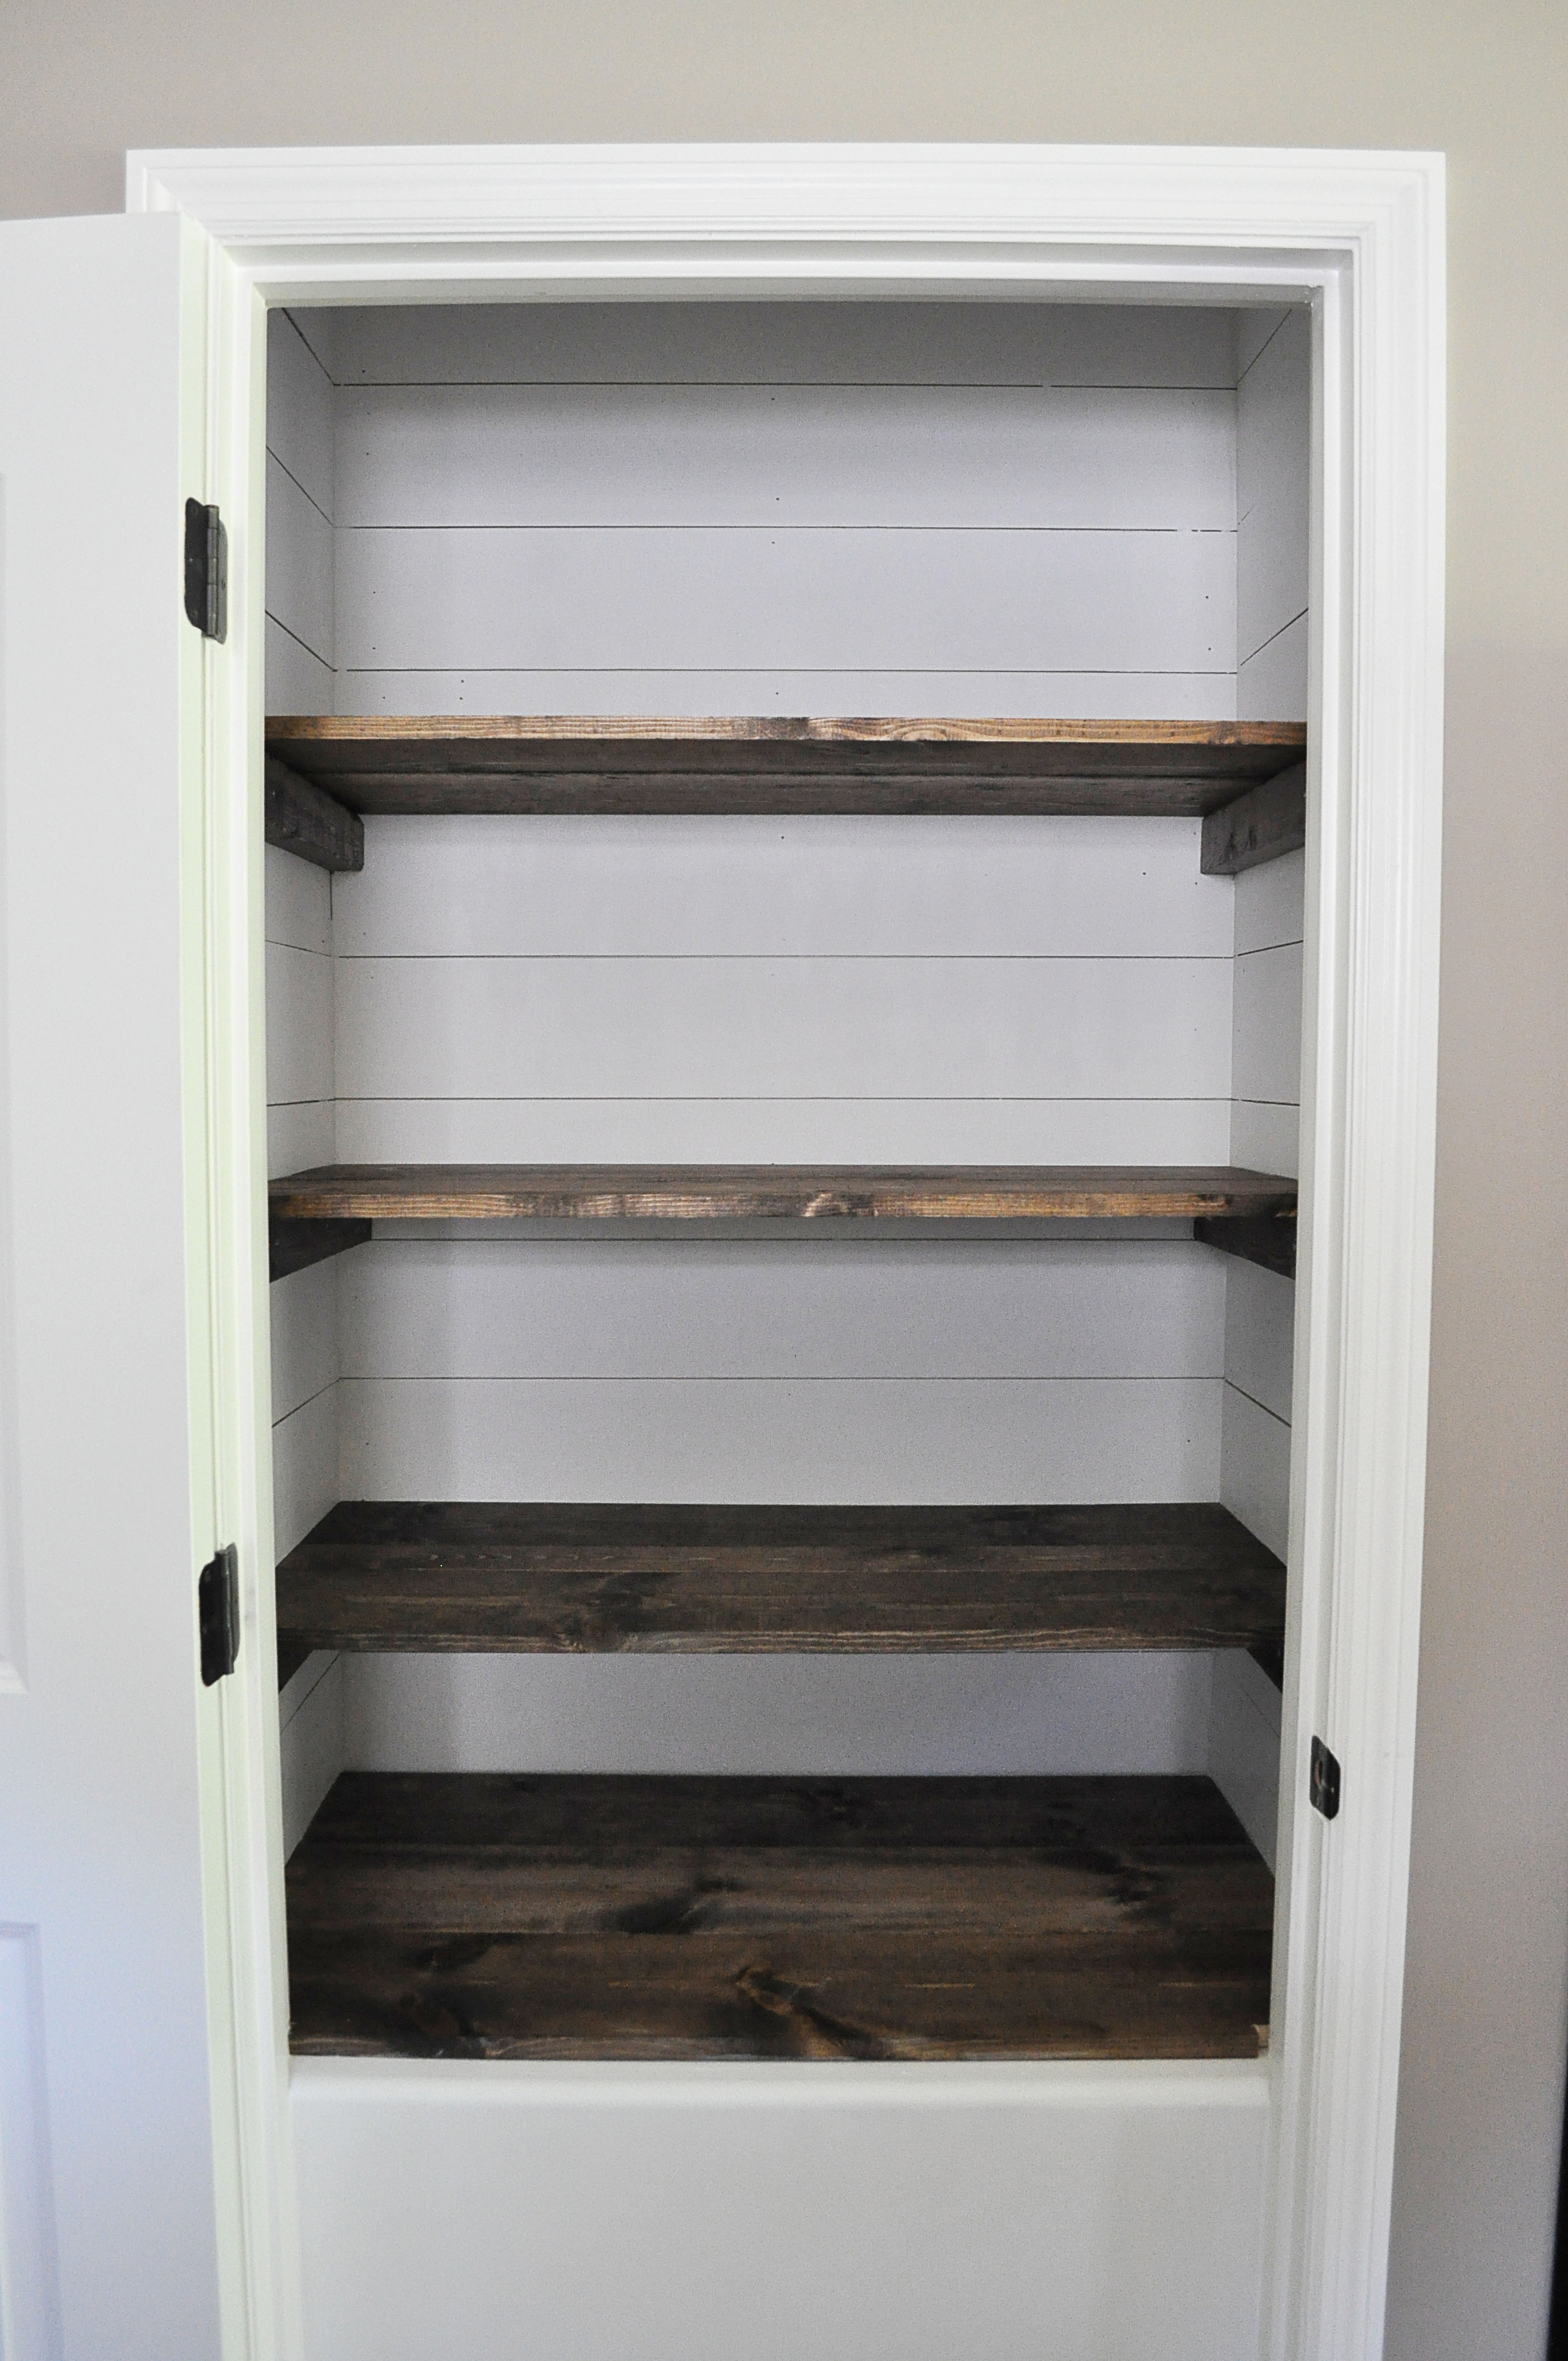
4. Once the shiplap on all three walls was complete, I painted over the plywood with white paint. I had to use about four coats to get a solid coverage. My handy paint pail was a lifesaver during this project, since I had to actually climb into the pantry to paint, so not having to get out every time I needed more paint was super convenient.
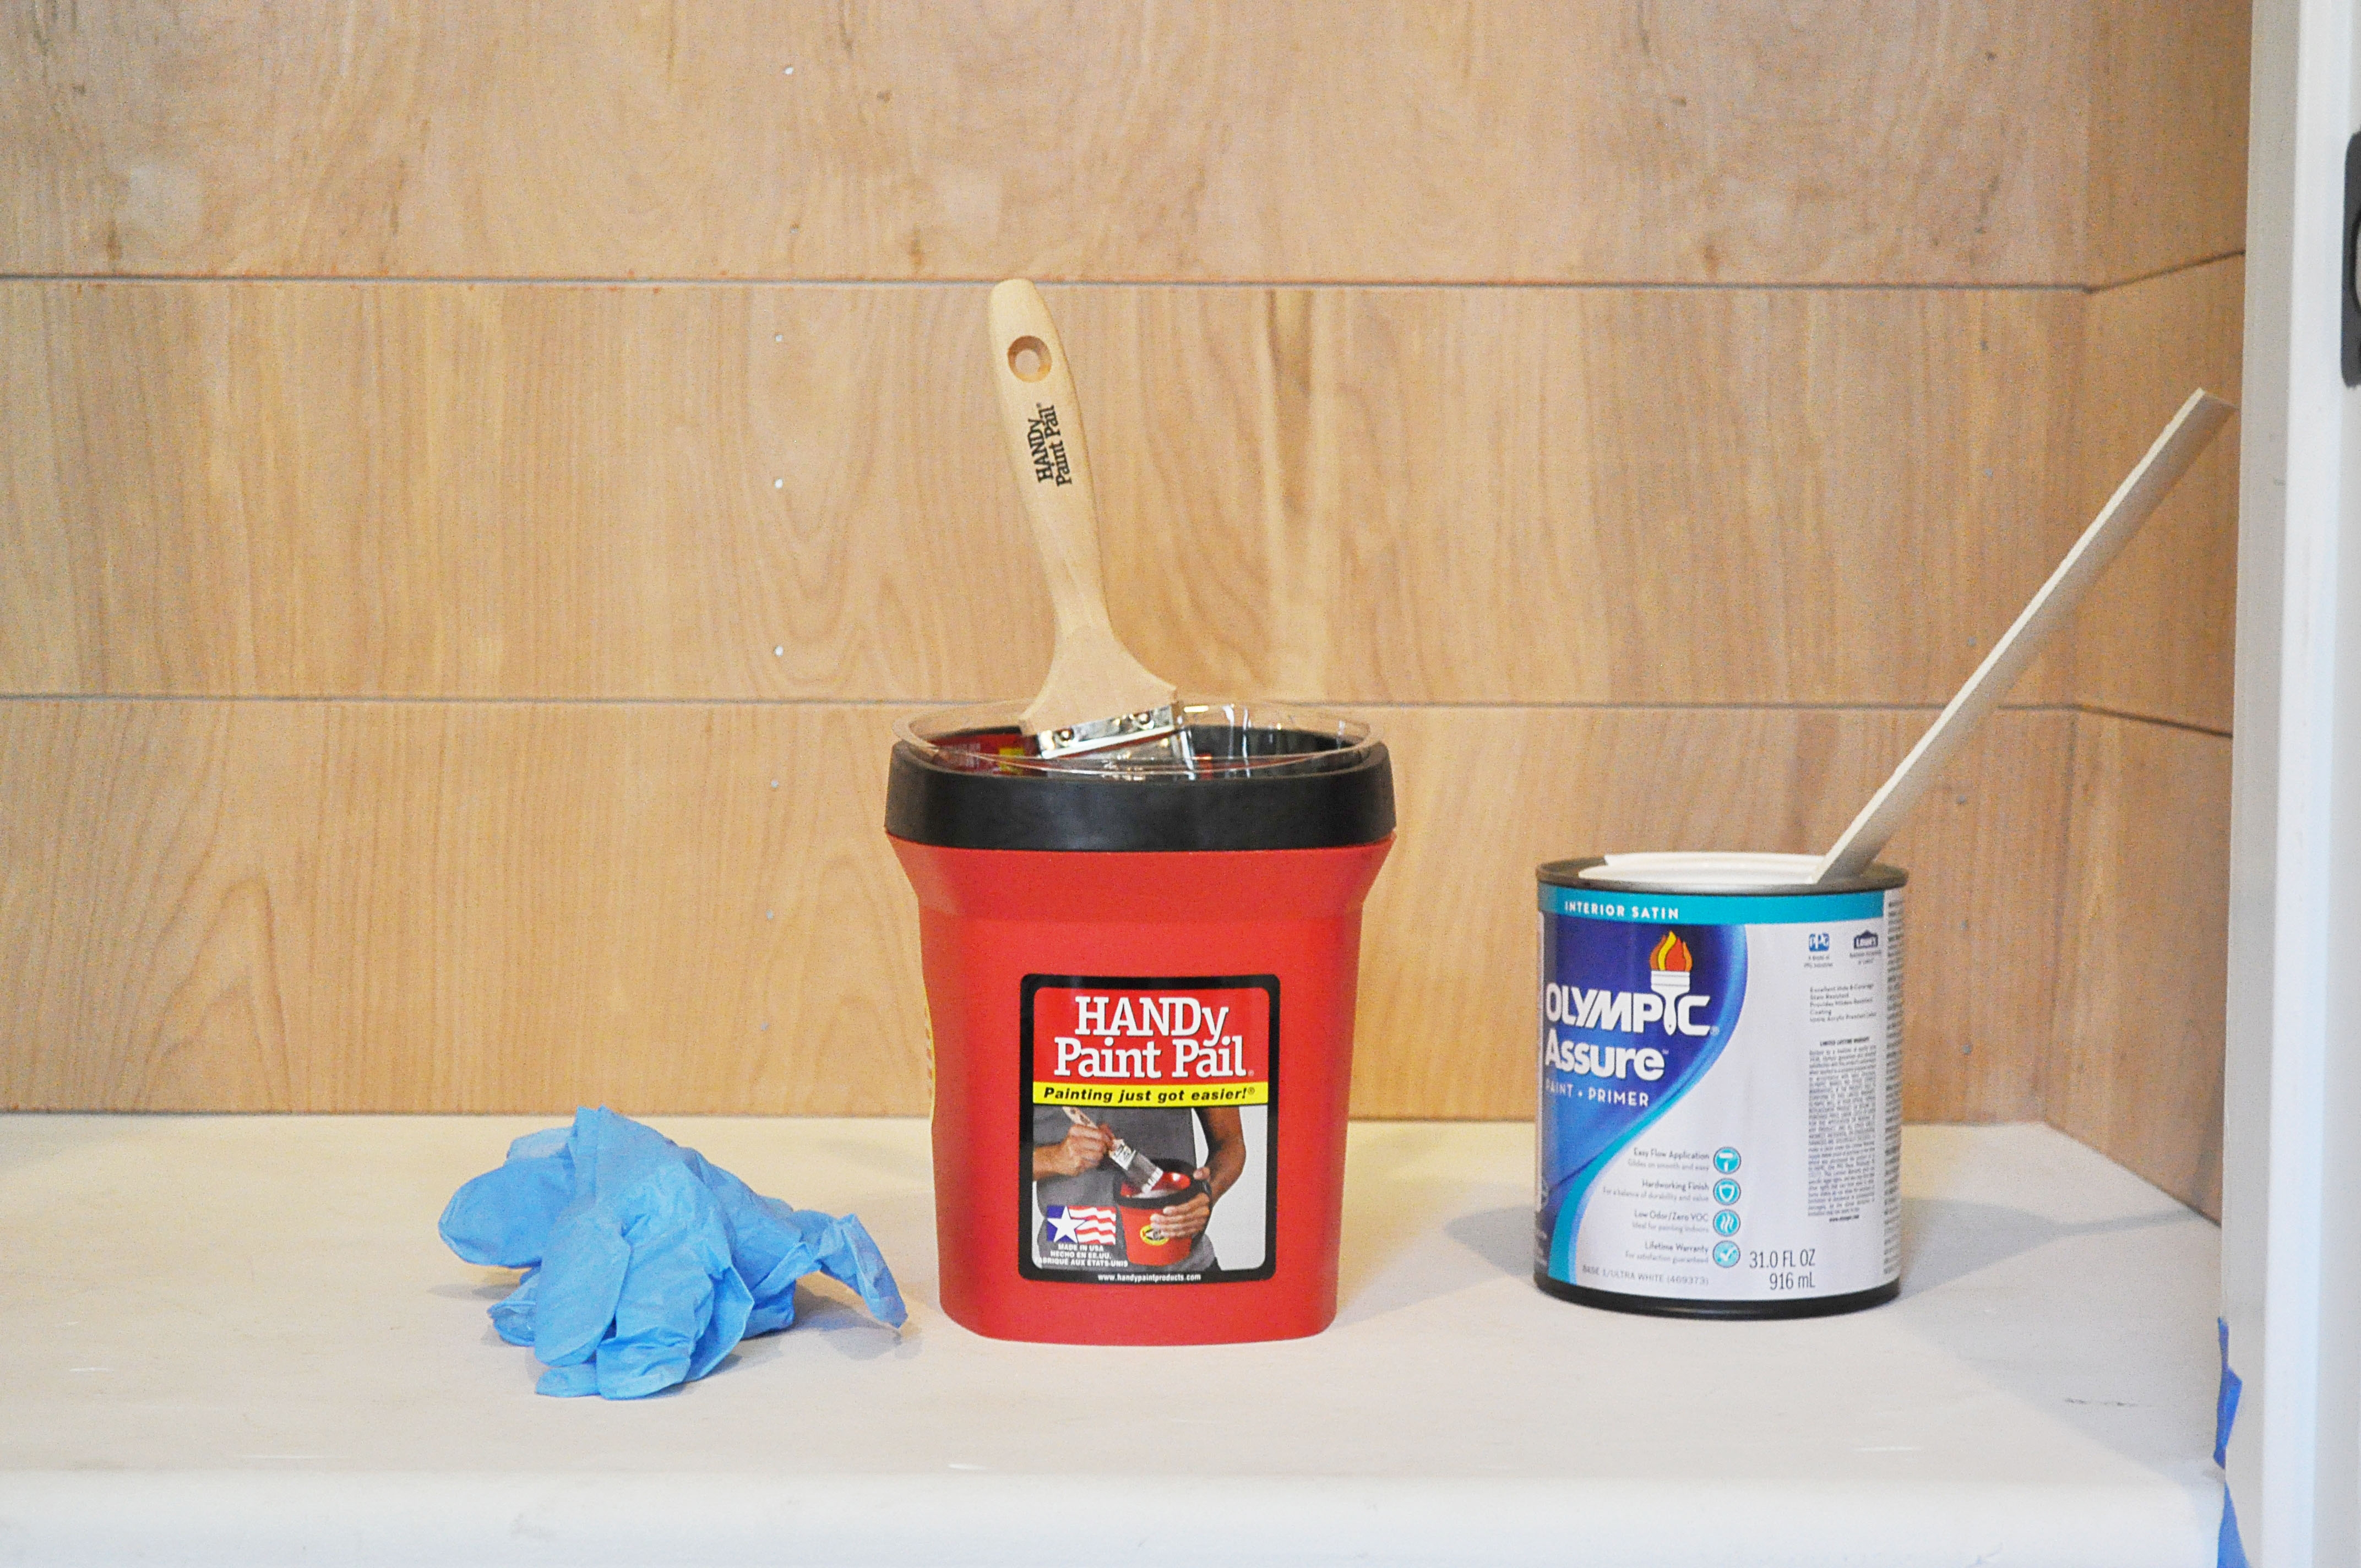
FYI: You can use wood filler or putty to fill in any shiplap seems or nail holes you don’t want seen, but I love the rougher look so I chose not to.
FOR THE WOOD SHELVES
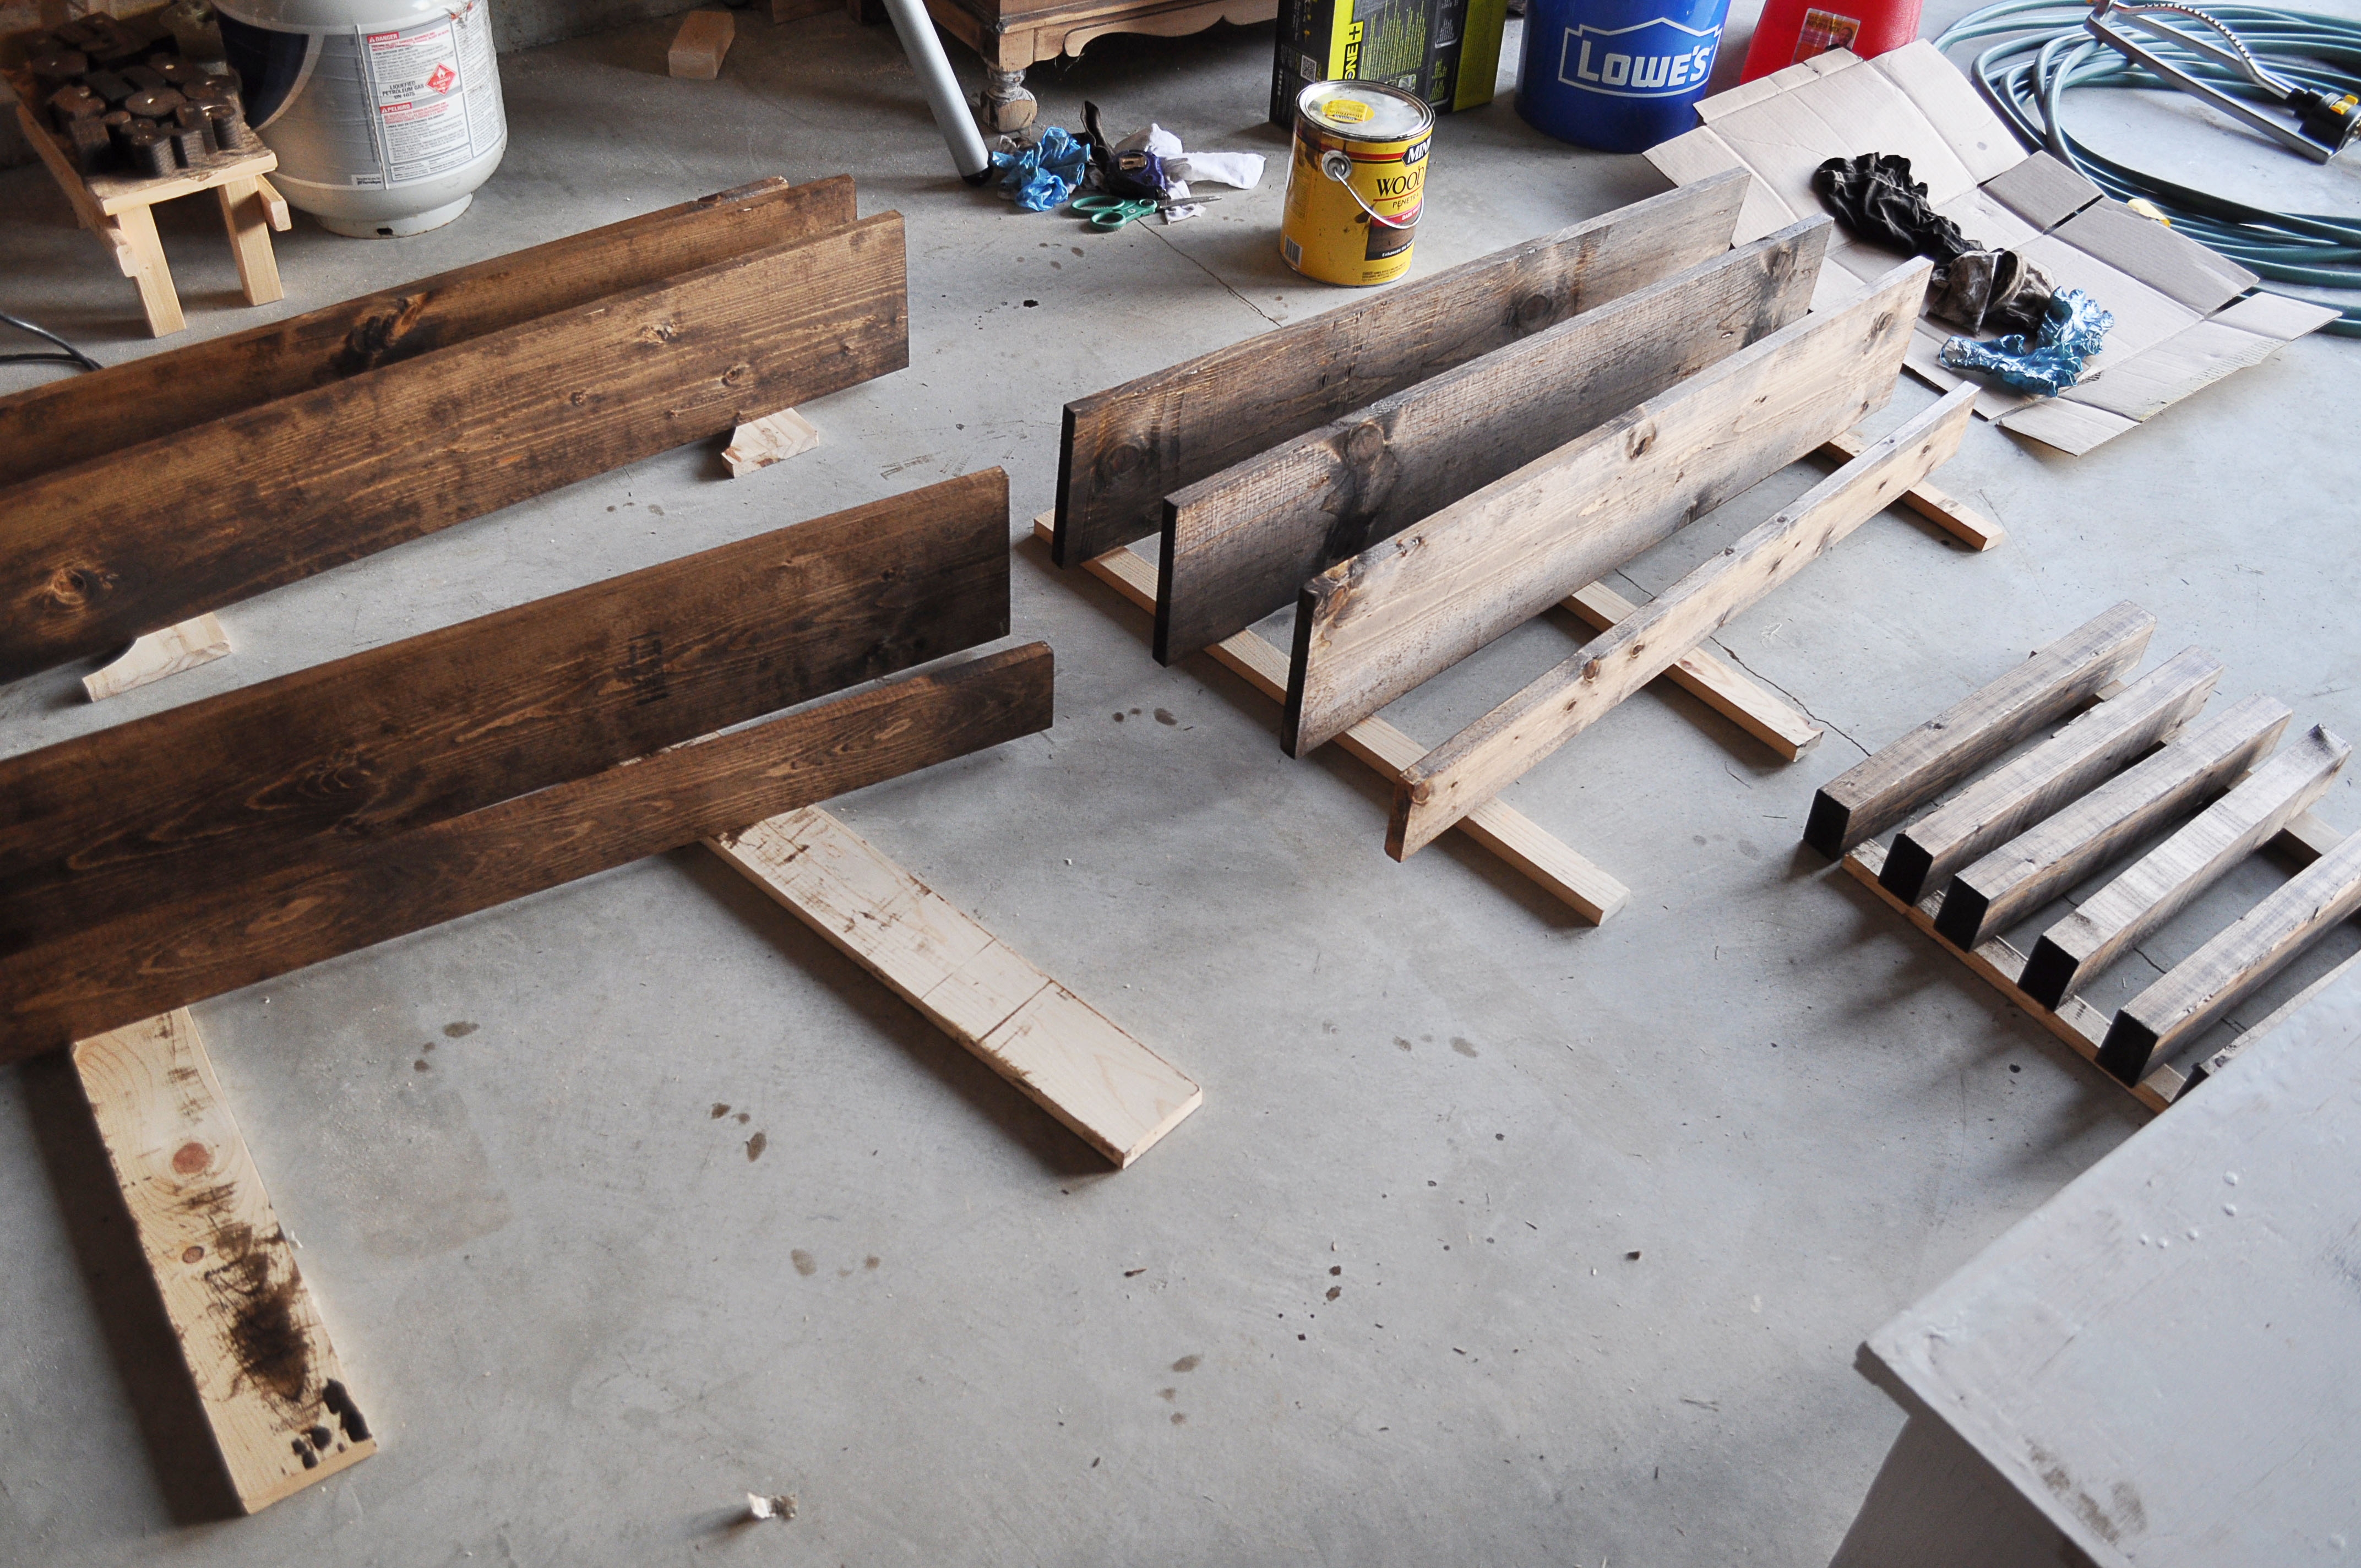
- Our pantry measured 23 inches deep and 39 inches wide, so for the side supports of the wood shelves, we used our miter saw and cut the 2x3in’s into 18 inch pieces for the side supports. For the actual shelf tops, we cut the 1x8in & 1x2in into 39 inch pieces.
- Once all the wood for the shelves was cut to size, I stained all of the pieces with my favorite dark wood stain and let them dry entirely.
3. We used a stud finder and marked the wall where we found the studs. Because we were replacing wire shelves with heavier wooden ones, we wanted to assure these shelves would be attached to studs for adequate support.
Unfortunately, our pantry only had two, so we had to use drywall anchors in the areas lacking them.
4. Using our drill, we attached the wooden 2x3in side supports with 3 inch screws, making sure to drill directly into the studs or the drywall anchors.
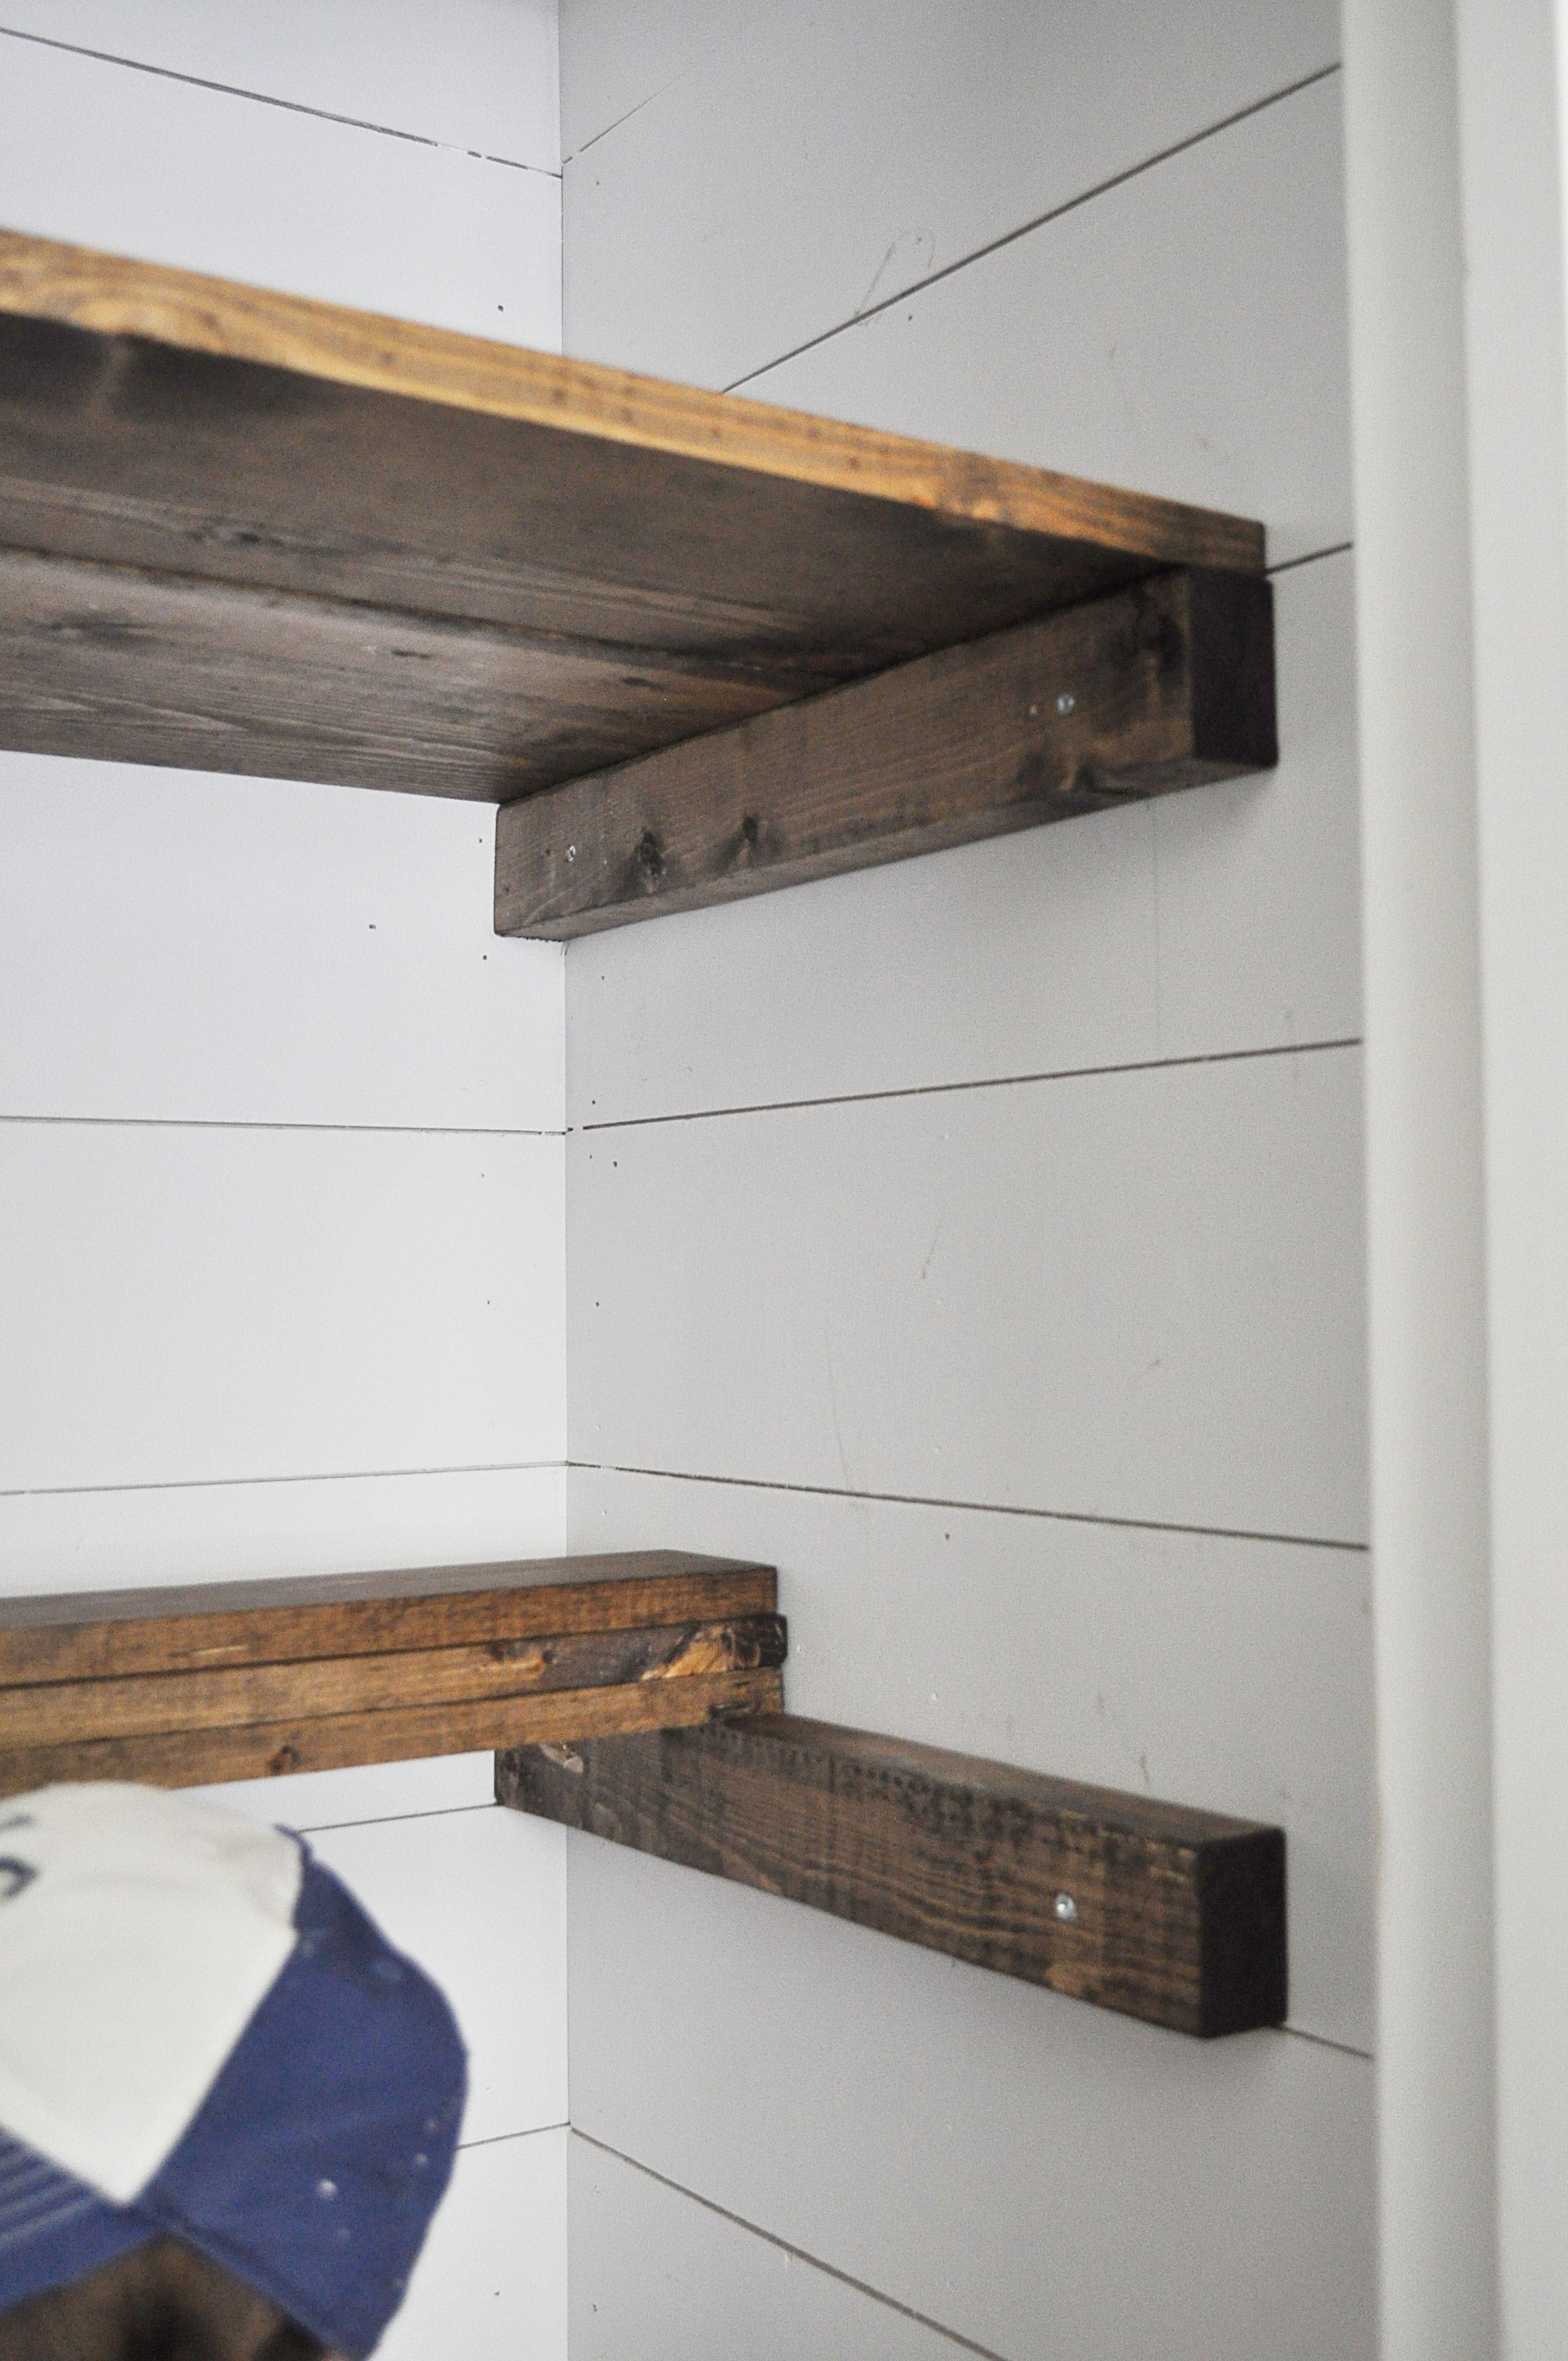
FYI: As you can tell in the above picture, white walls and stained wood don’t mix well, so I had to do ALOT of touch ups with my white paint after installing the shelves! But again, well worth it!
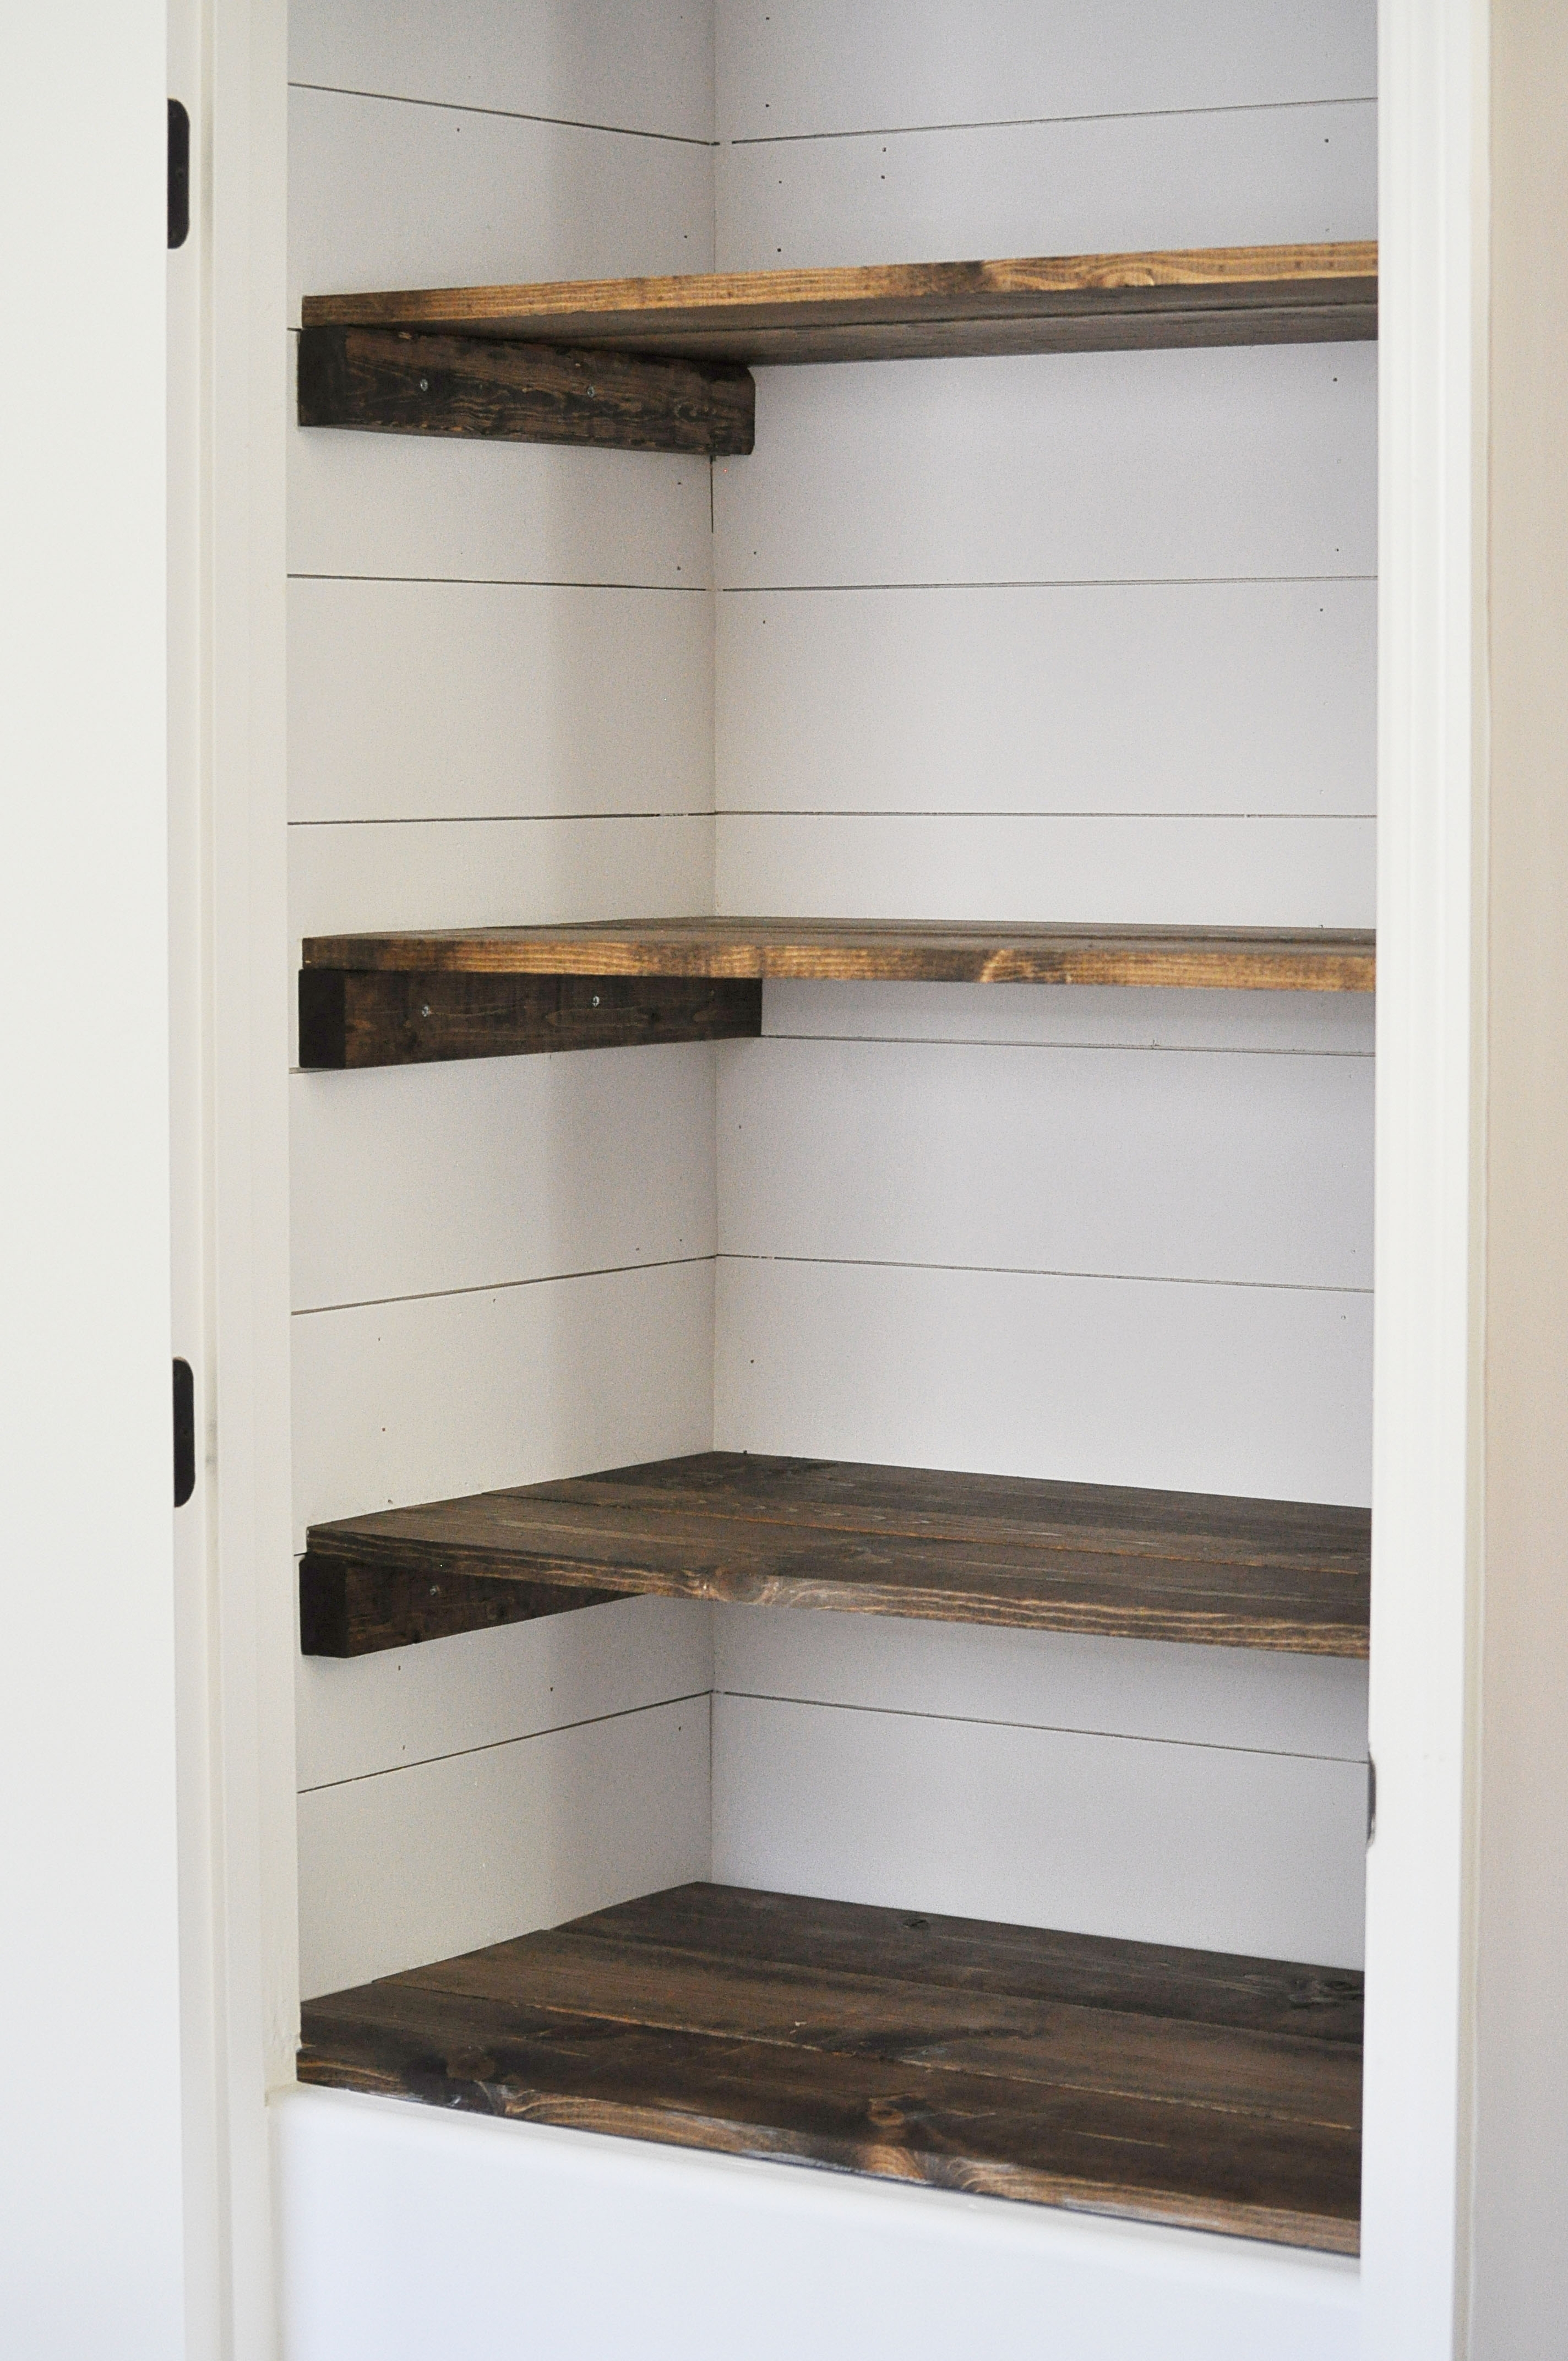
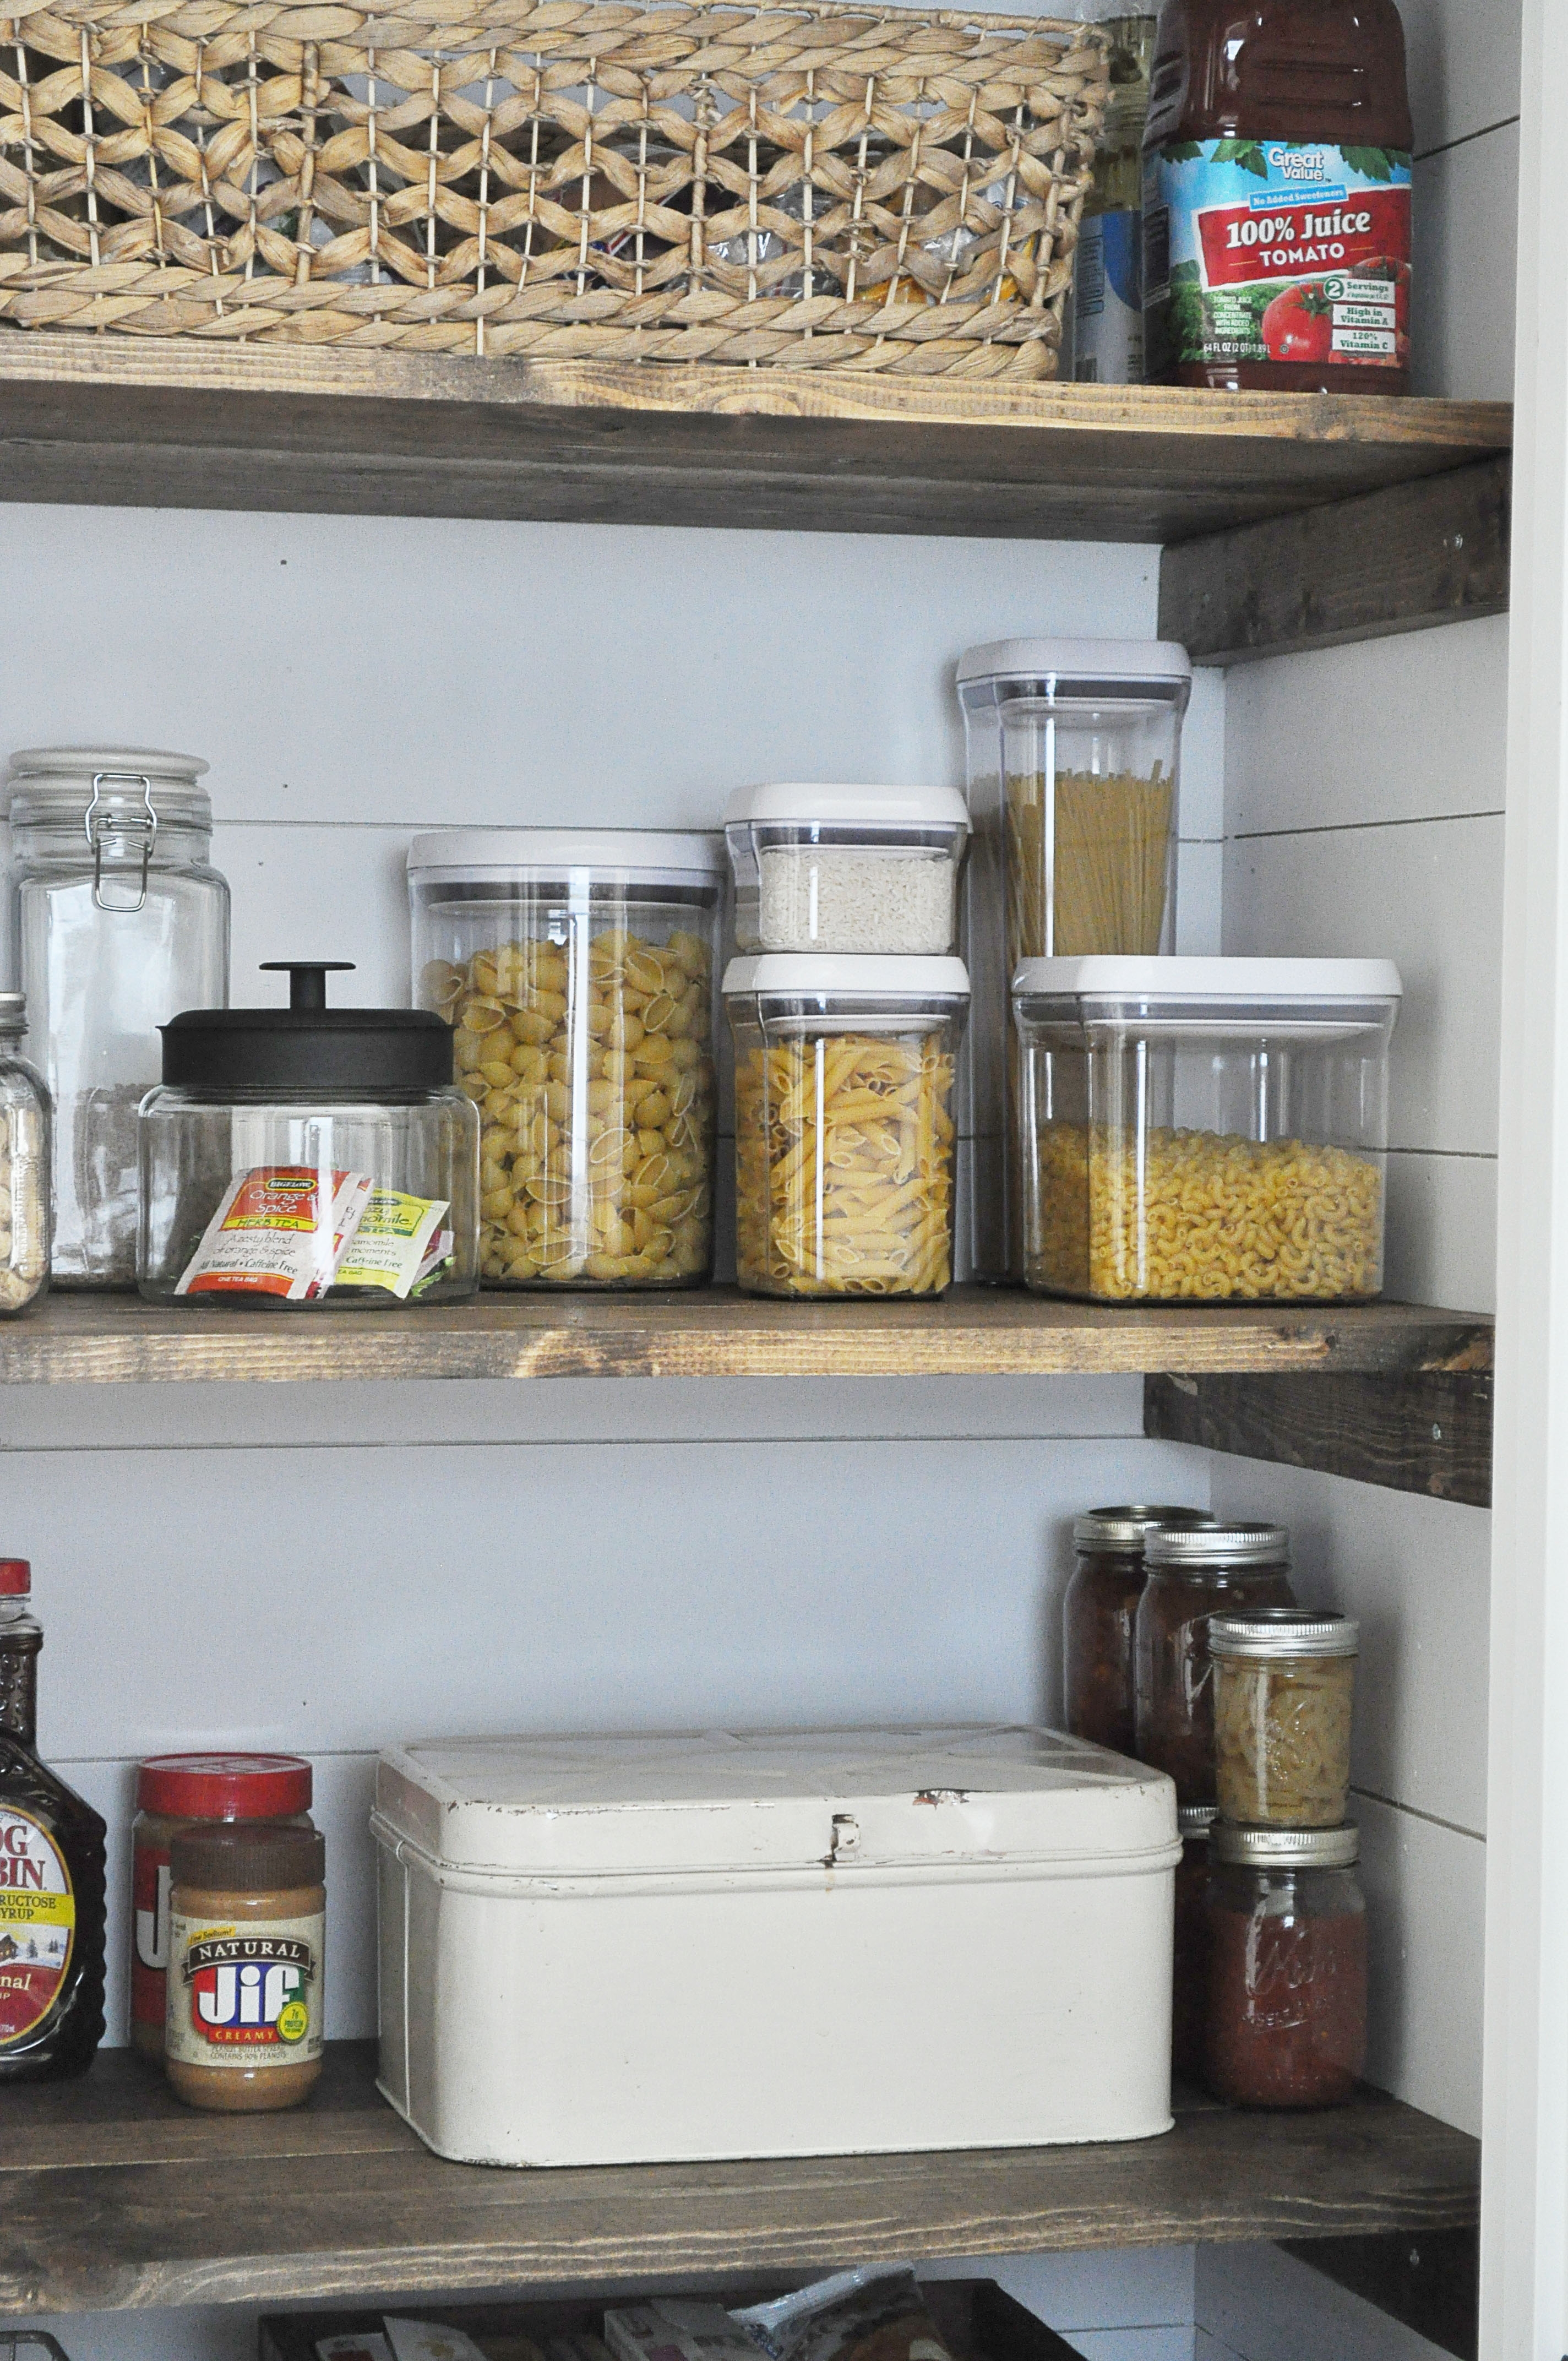
5. Once all six side supports were attached to our newly shiplapped pantry walls, we just set one 1x8in, then a 1x2in, then another 1x8in to get the total 18 inch shelves, on top to create the finished shelf. We choose not to screw them into the side supports, but rather just let them sit on top just in case we wanted to take them out at any point.
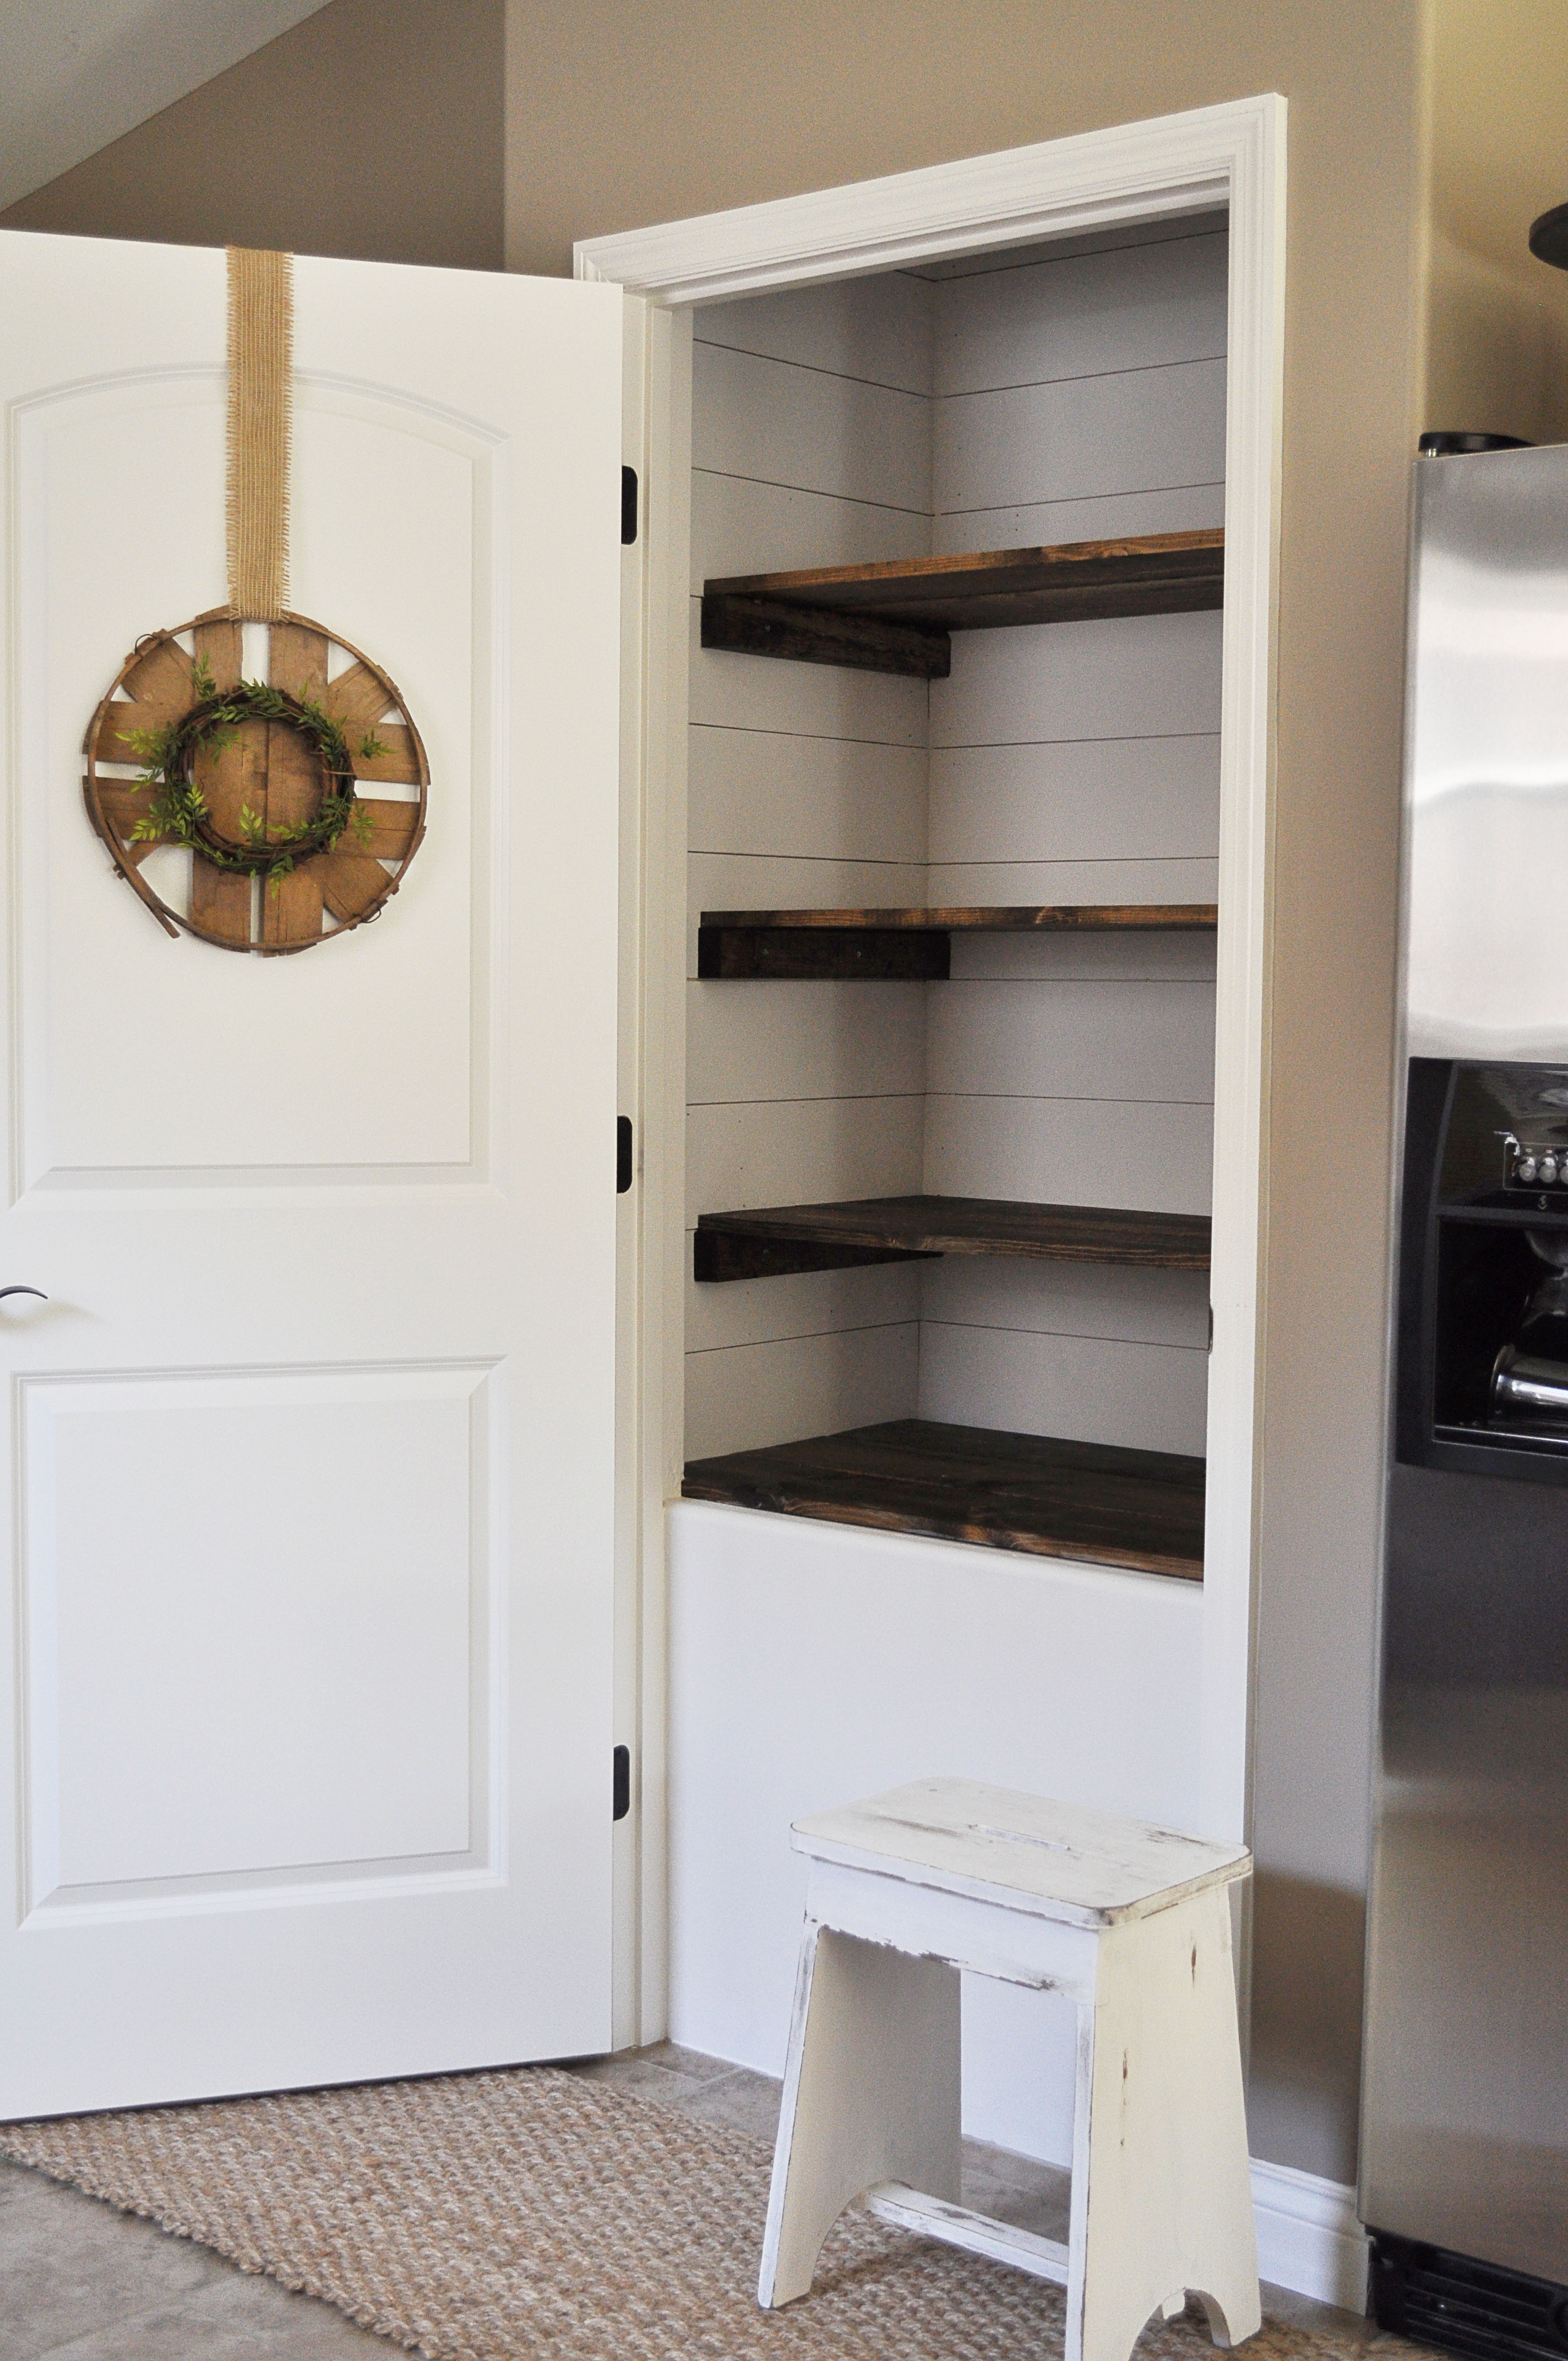
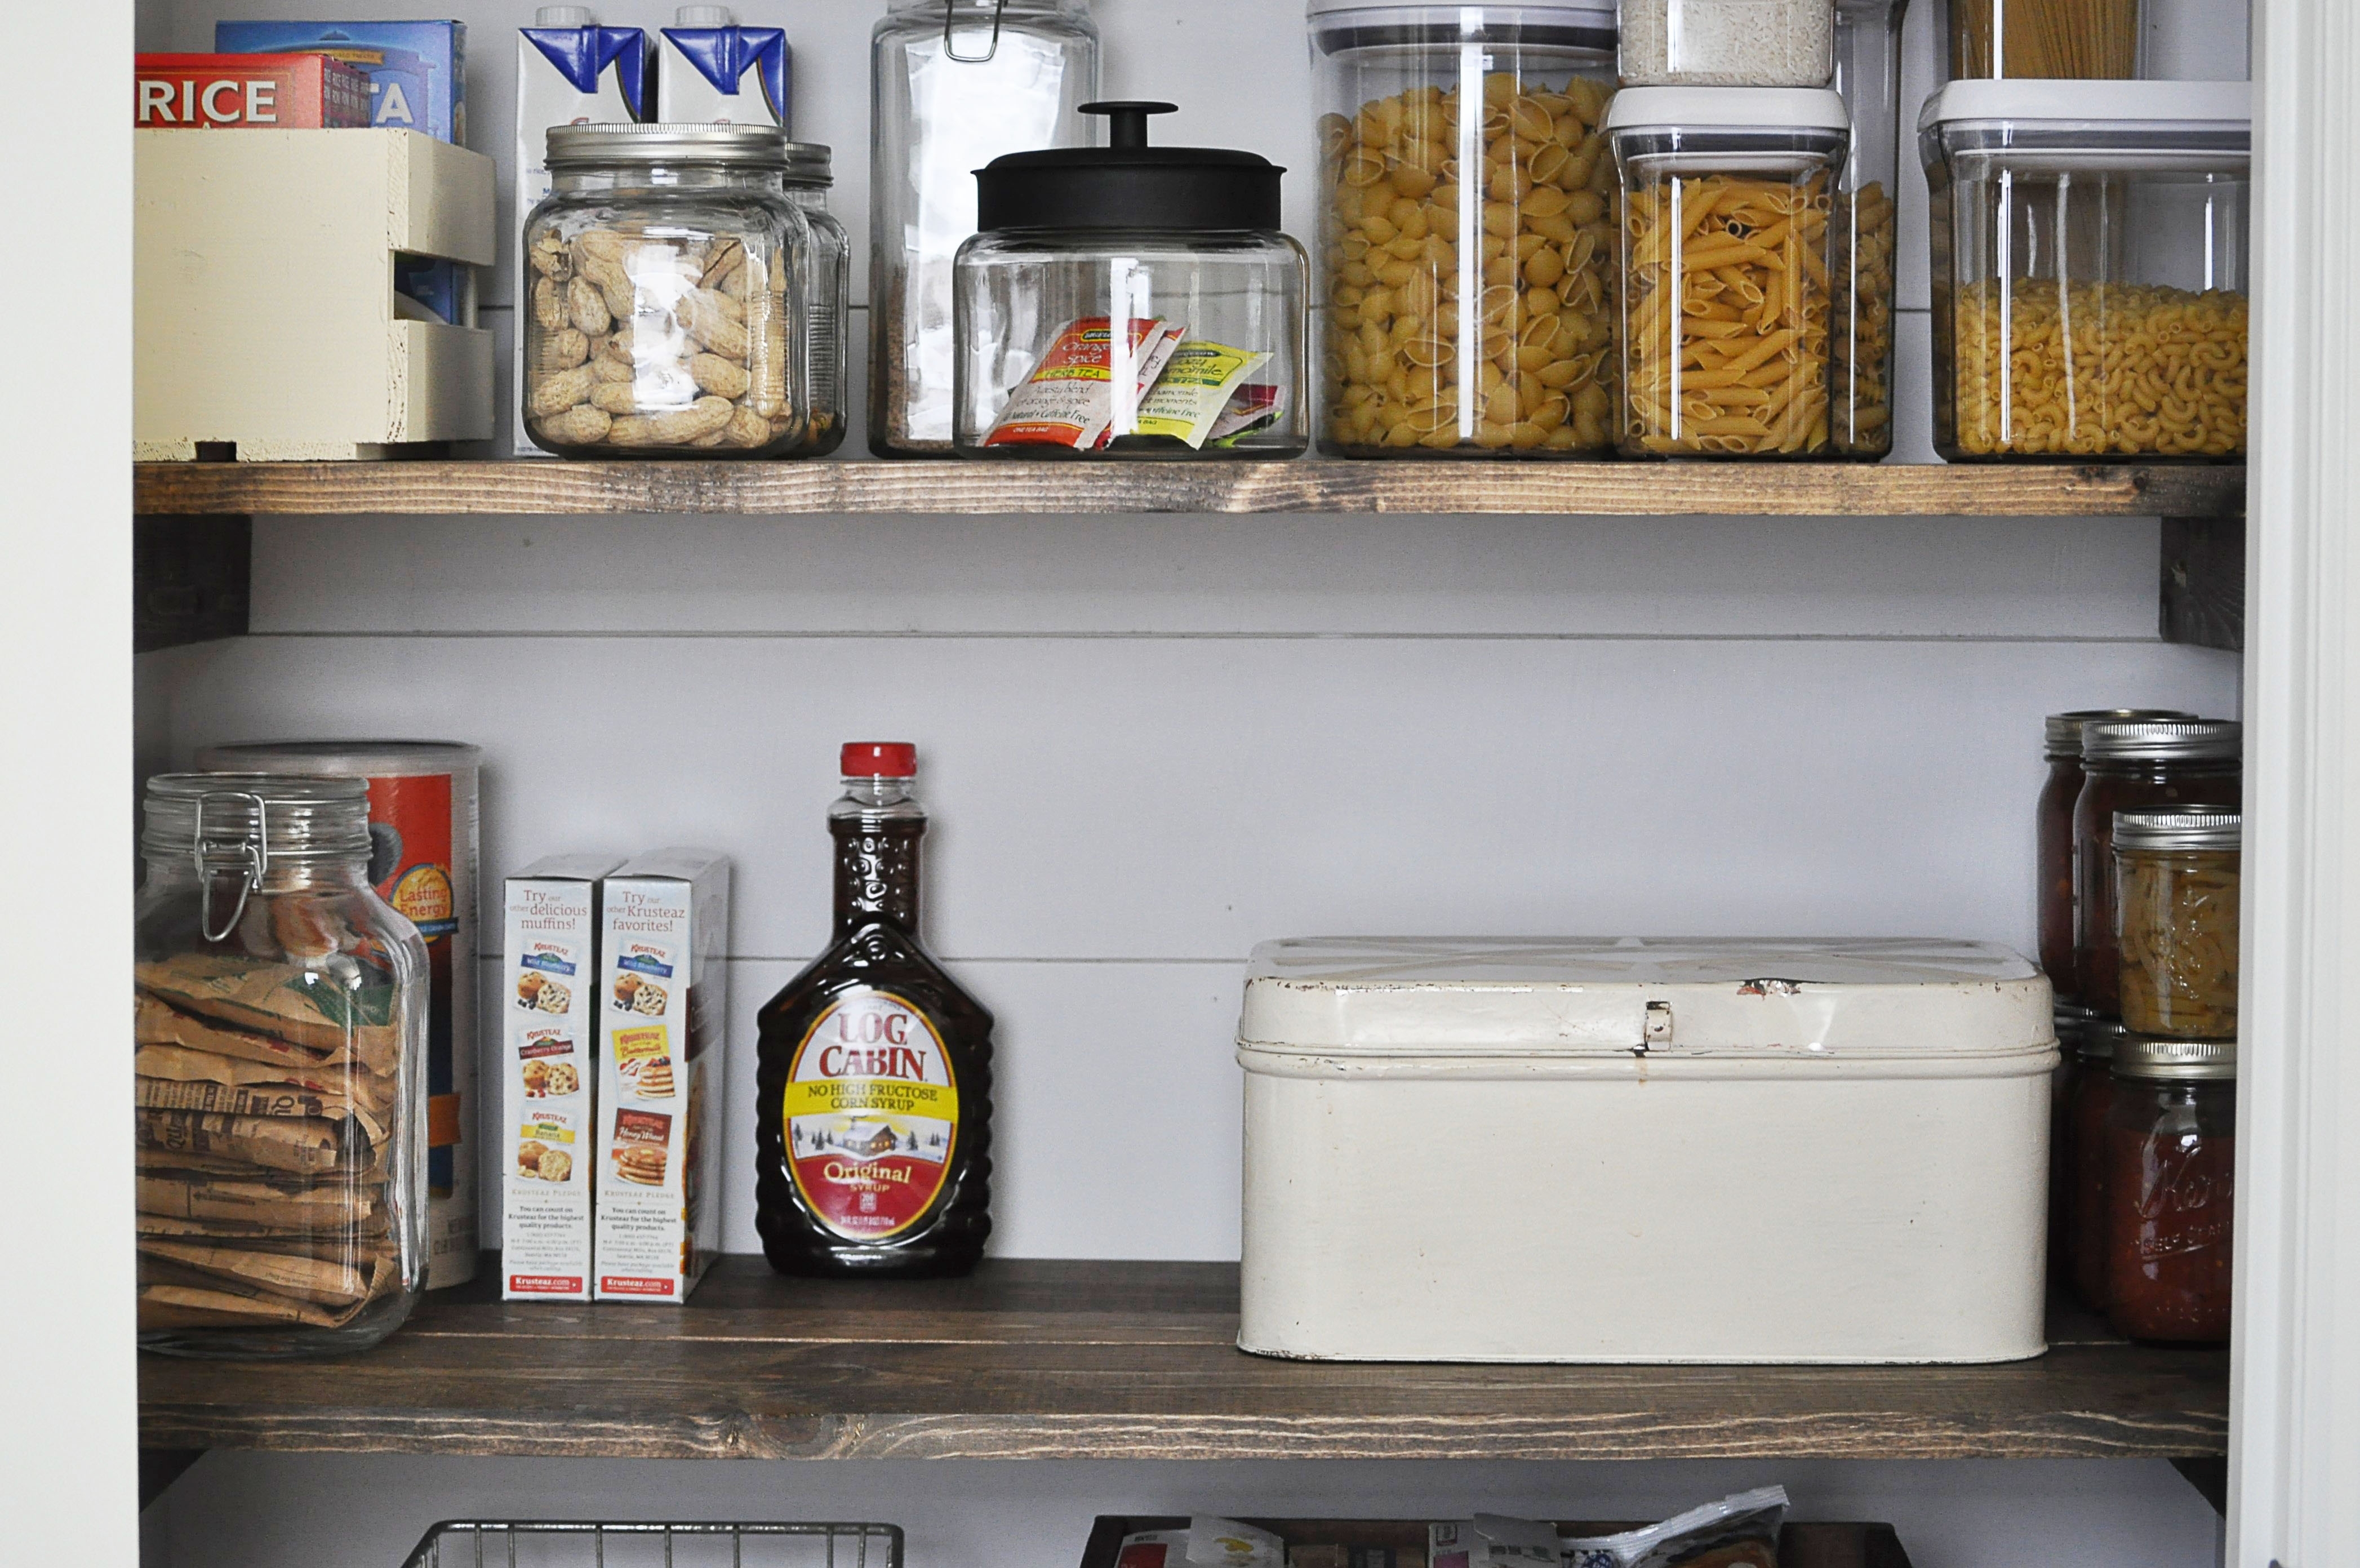
And then the fun part, decorating! But, who decorates their pantry? I do! I have been collecting different jars and baskets to do this pantry makeover for a long time. And I absolutely love the end result! What do you think!?
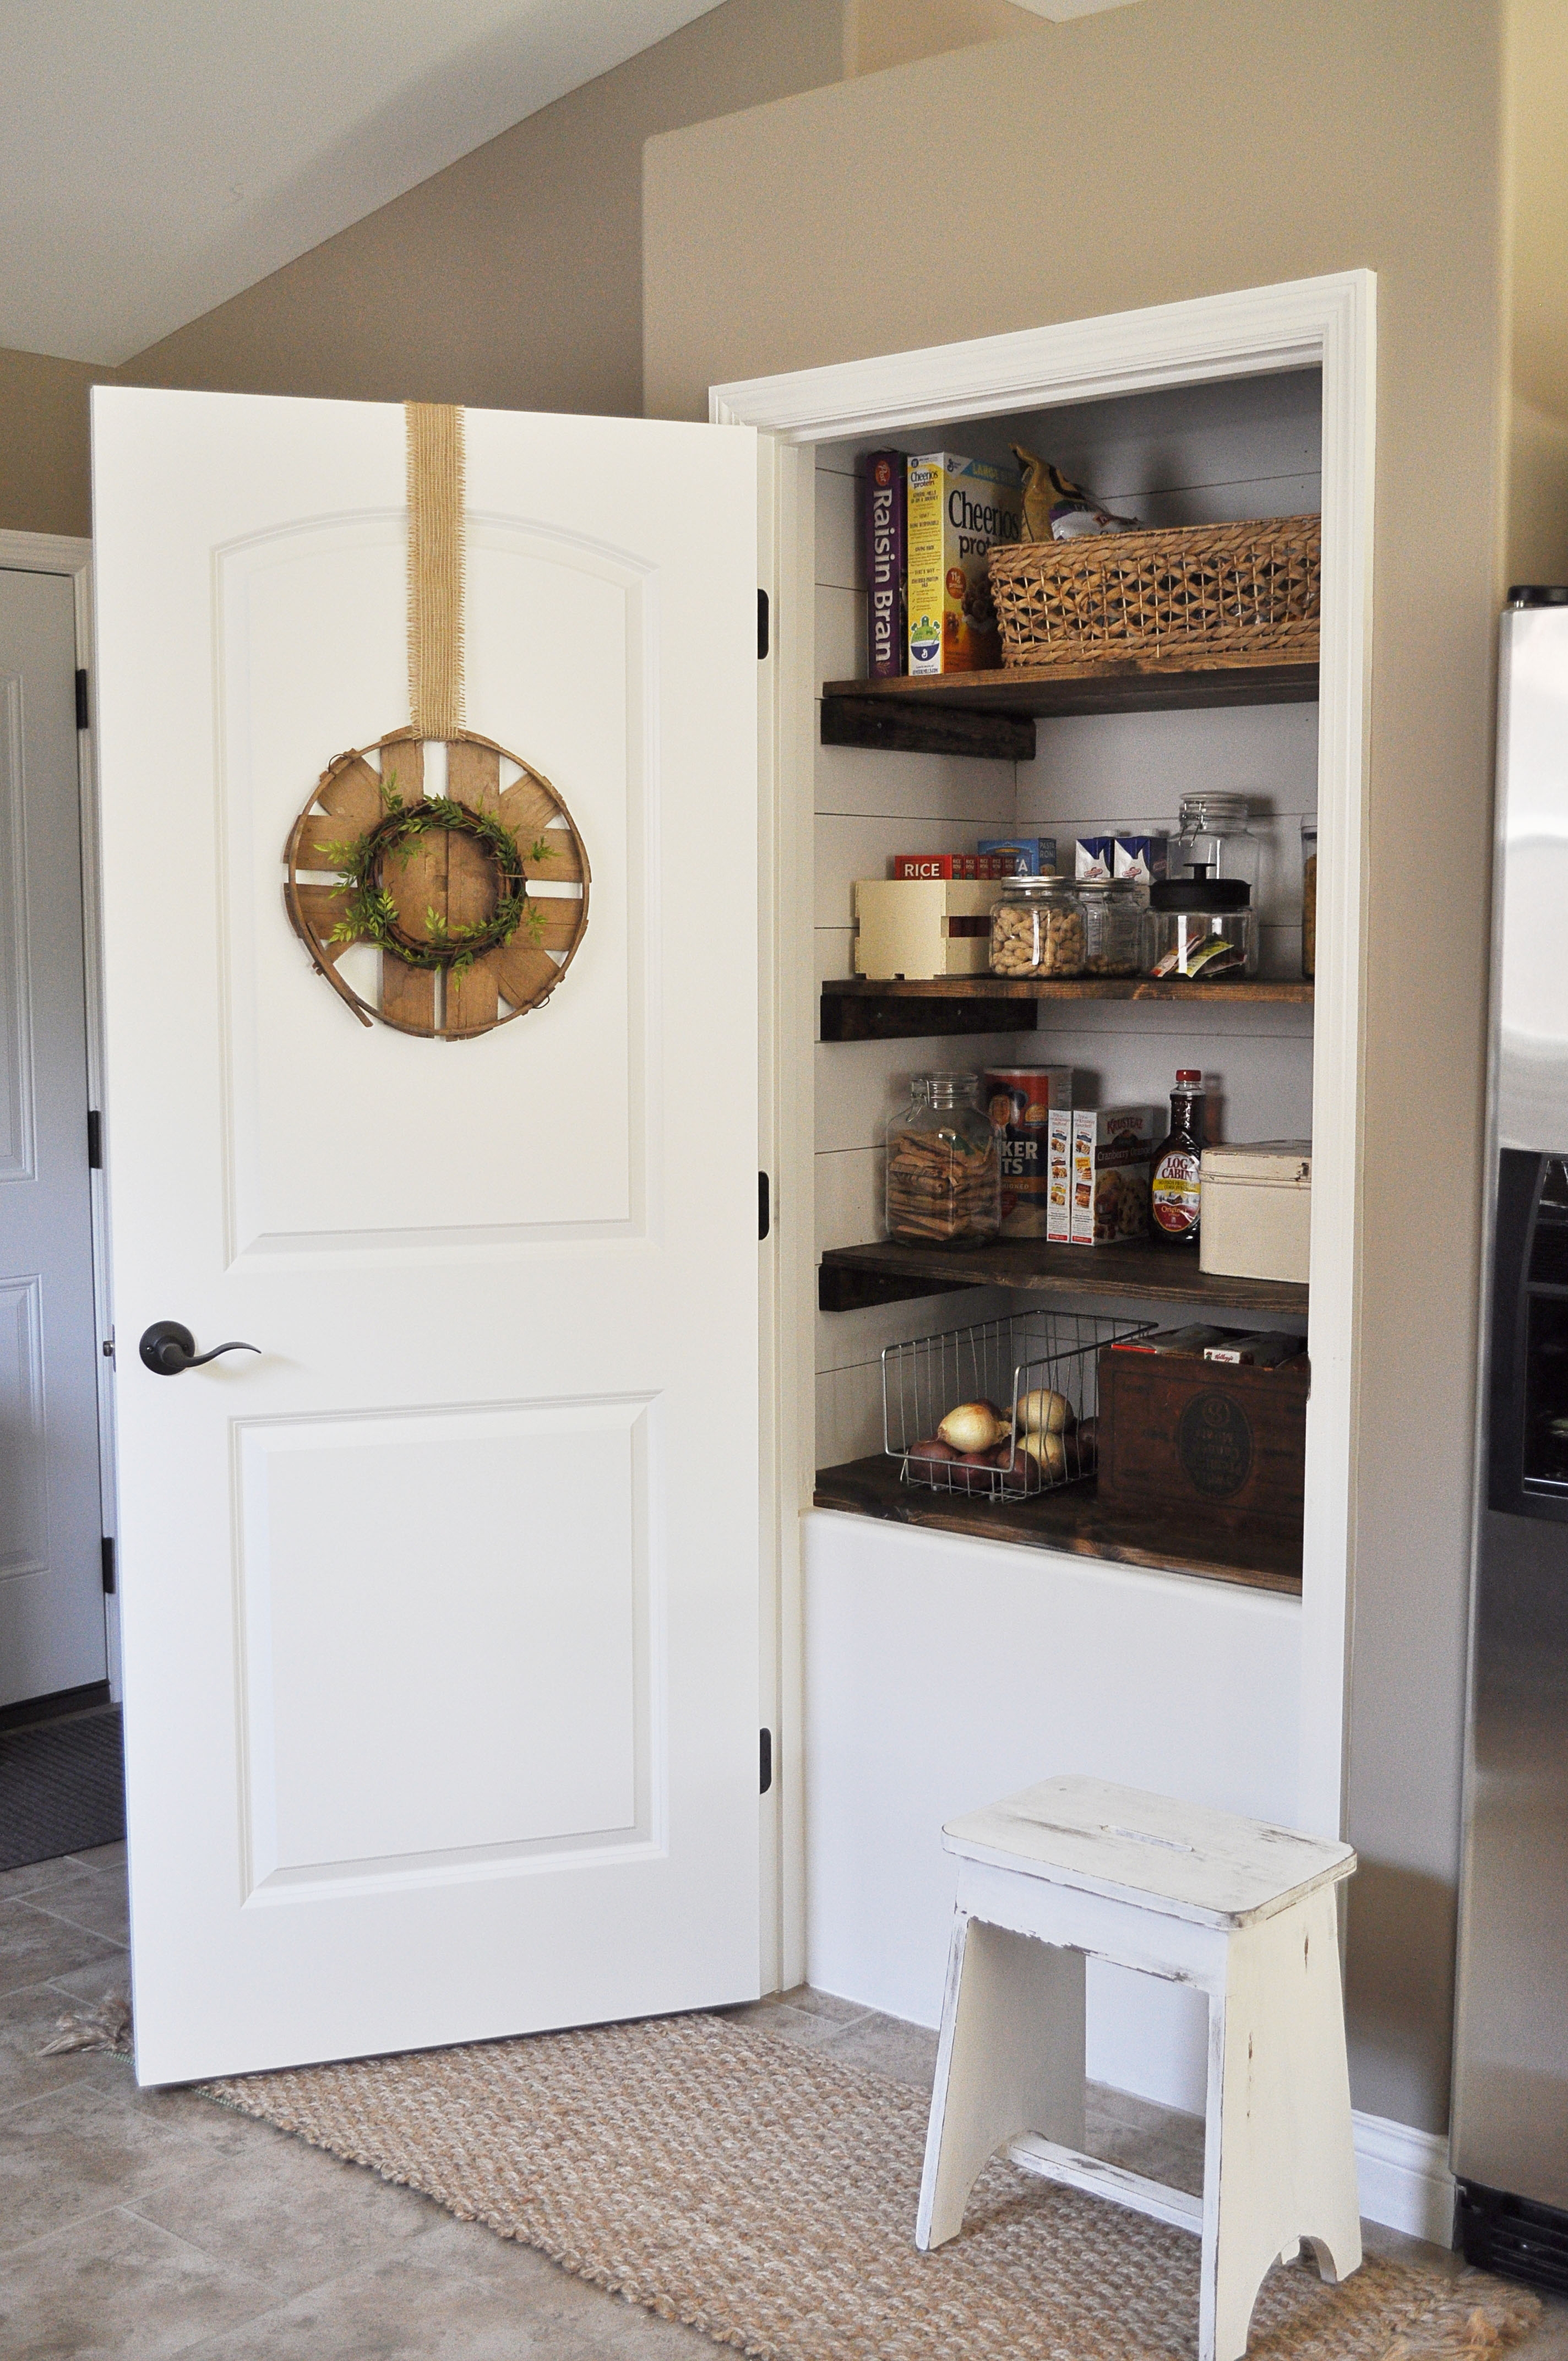
She’s pretty, isnt she?
SHOP THIS POST


Do you have a video of the very bottom of the pantry. As I get older I am finding it difficult to bend over and would like to block the bottom off.
What type of drywall anchor did you use to attach the 2x3s to the wall? I am using your tutorial but with a different layout and one of the shelves is just small enough it barely reaches one stud.
Great tutorial . Love the look of my new pantry!
Hi!
What size nails did you use for the ship lap? Did you go directly into the drywall?
Currently buying allllll the supplies to do this project! 🙂
Thanks!
Our nails were 1 inch, directly into the drywall for the shiplap. For the shelves we tried to hit studs where we could but used drywall anchors when we couldn’t. Hope this helps!
Great tutorial! Thank you for this!
You are so welcome!
This is beautiful! I noticed that you painted the shiplap after it was placed in the pantry. Do you think it would make a difference if you paint it before placing?
This is helpful. Thanks for this. However, hiring the professional and right contractor is really important because it will surely get the job done right without any accident or damage.
Gorgeous! Fantastic how you transformed something utilitarian into a thing of beauty. Well done.
When you used the Minwax Dark Walnut, just one coat, did you also put on some type of sealant? LIke poly of some sort or did you just use the stain?? Just wondering …thanks!
Ahhh, I love this tutorial so much! We live in a split level and are super limited on space in the kitchen so I’m actually using this tutorial to turn our coat closet into a kitchen pantry. The only thing I can’t figure out now is whether or not I’ll leave the door on it if it’s this pretty!!
Hi, what kind of wood did you use for the shelves? they don’t look like plywood, are they?
is this what you mean when you say whitewood
https://www.homedepot.com/p/1-in-x-8-in-x-8-ft-Premium-Kiln-Dried-Square-Edge-Whitewood-Common-Board-914835/100065210
Hi, I have recently done my walk in pantry as well. I like the fact that you wanted to decorate it. I had the same 6 panel door, which I hated, so I searched and found a old door with a glass window that was rounded at the top. It was a terrible color of peach, so I striped it down but left some of the 4 layers of paint. I LOVE it, now I can enjoy the inside while the door is still shut.
Carol
A pessimist sees the difficulty in every opportunity; an optimist sees the opportunity in every difficulty.
Love love love!! I have two long cabinets off my mudroom and i want to make them into pantries! I was planning on using the wood shelves but this is on another level!!!
Can you tell me the stain you used? Ive been trying to figure out this color!
Awesome! I used Minwax Dark Walnut! It’s my very favorite stain to use, can’t go wrong! 🙂
Looks so beautiful!!! I’m so excited for you, Ashley. Now confess…since completing the project, how many times a day do you go in the kitchen just to look at the beauty inside that pantry? Love, love, love!
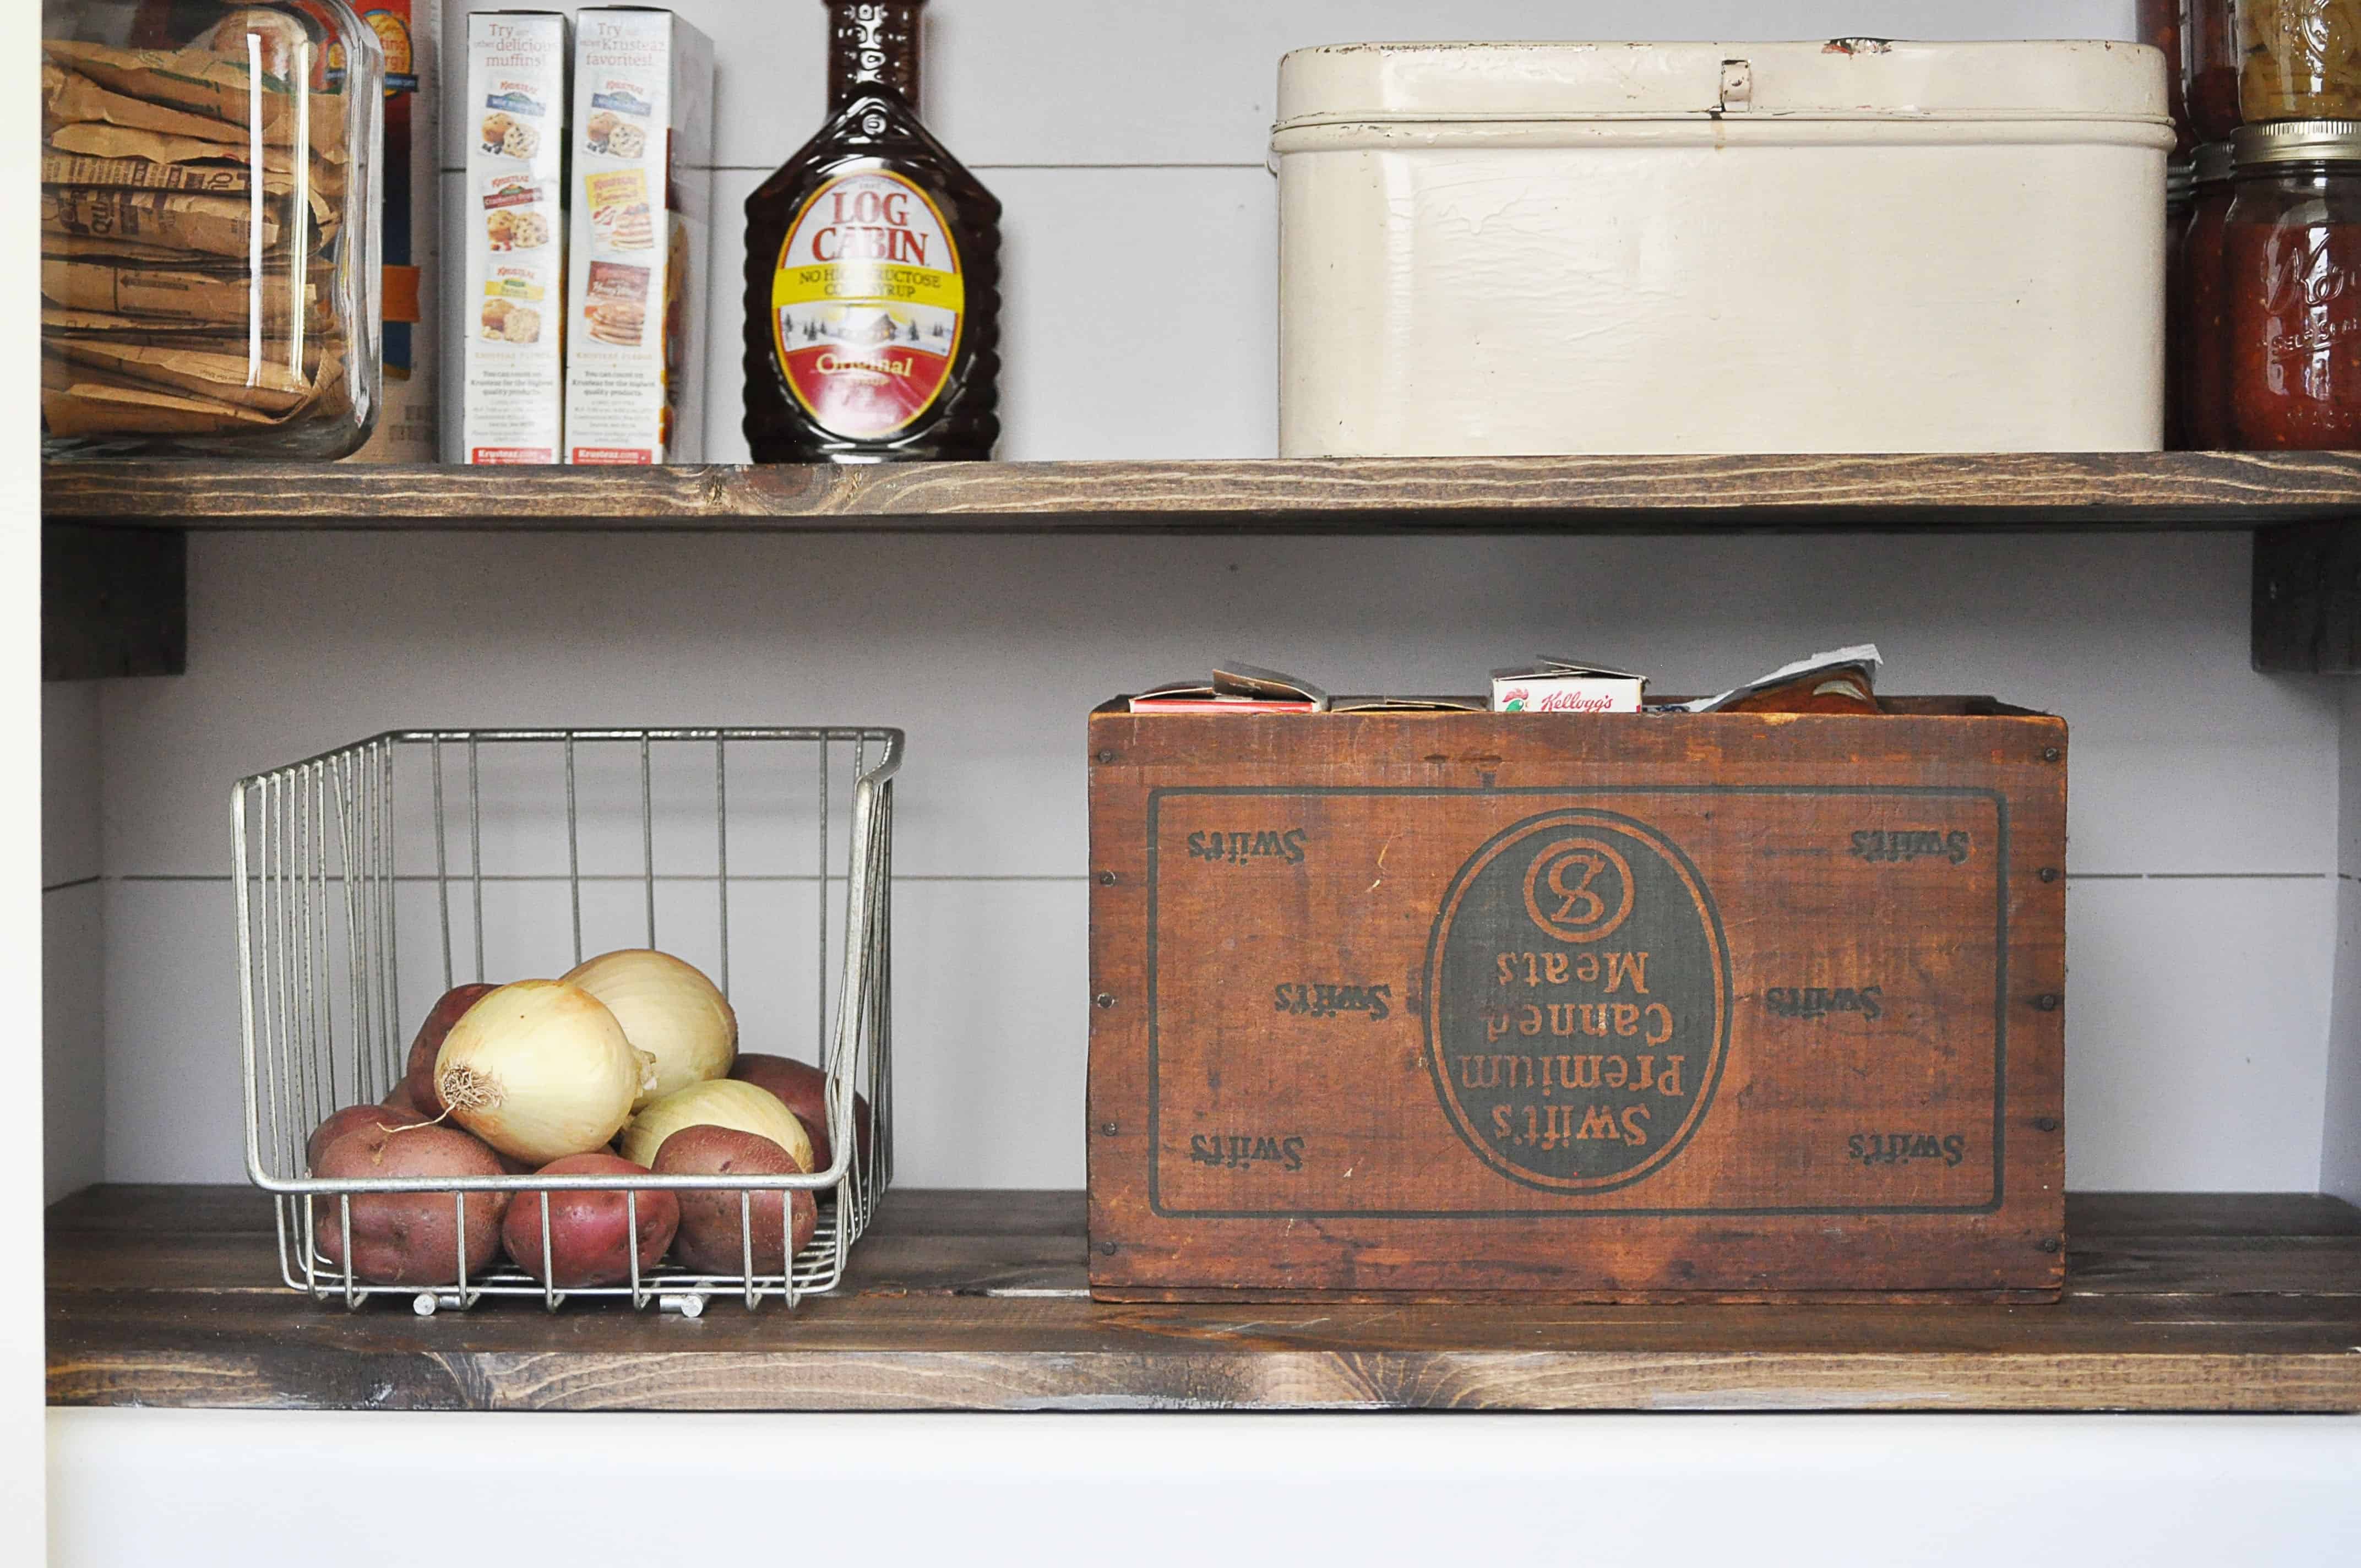
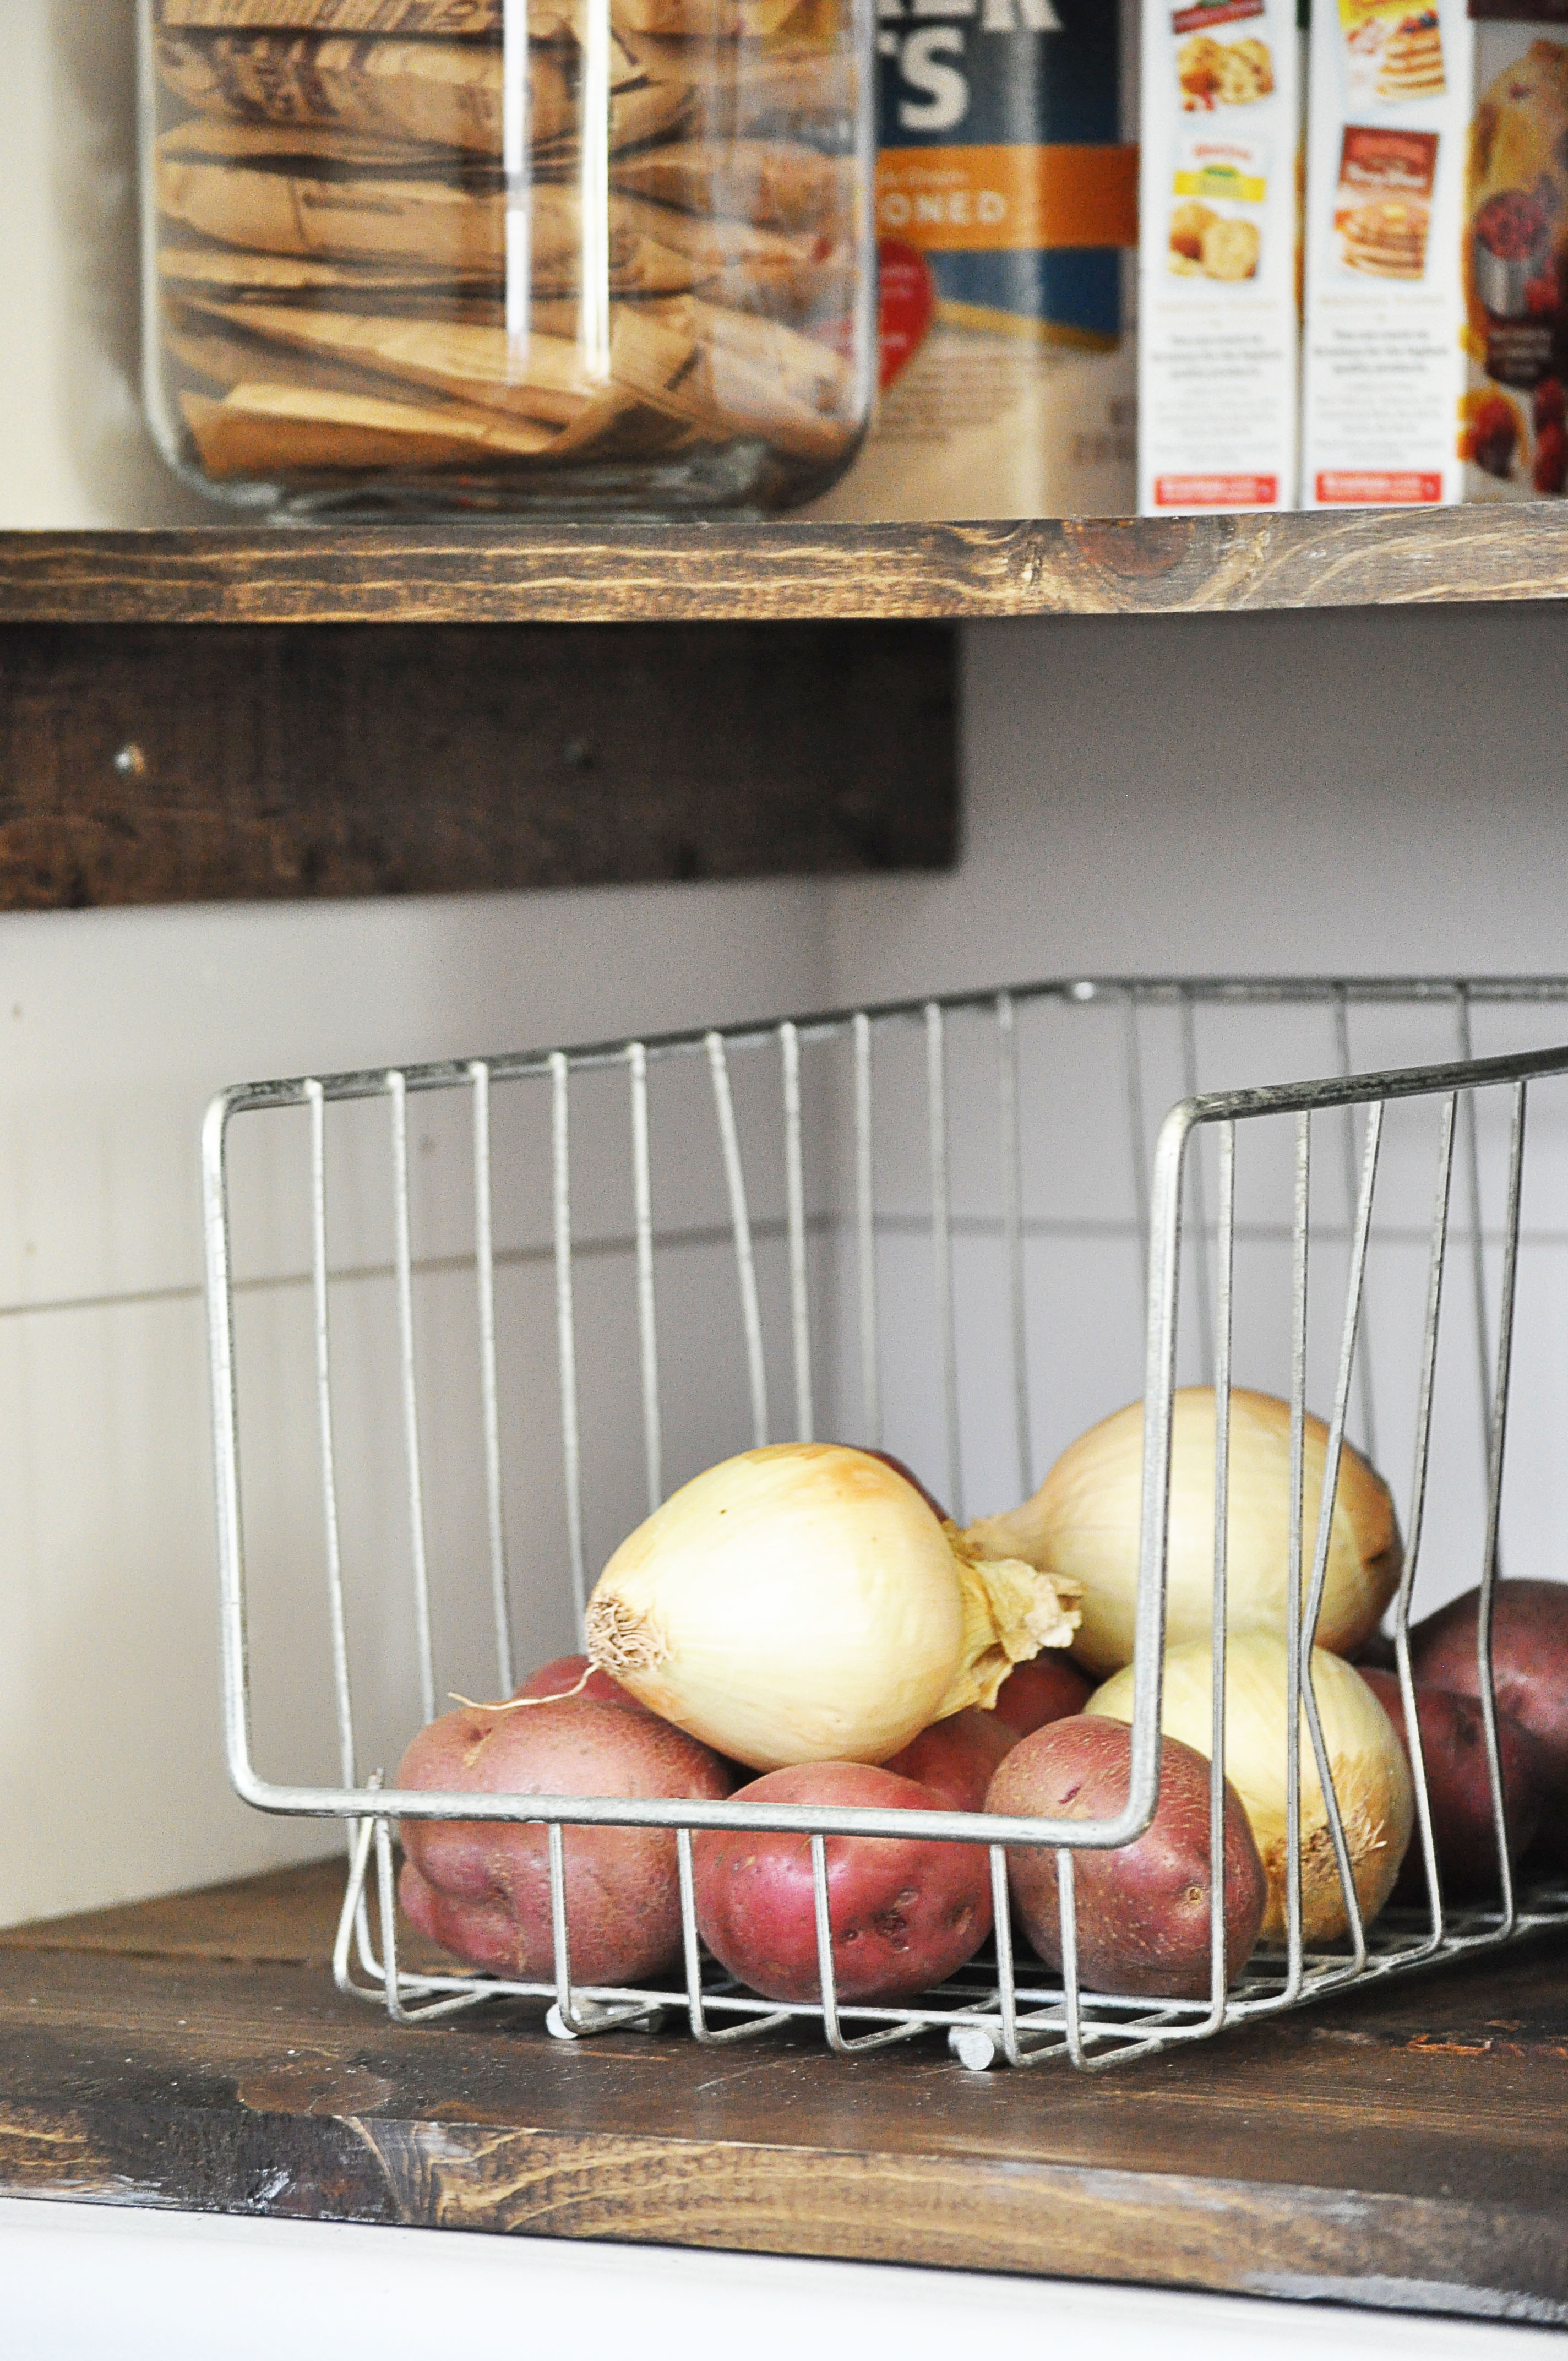
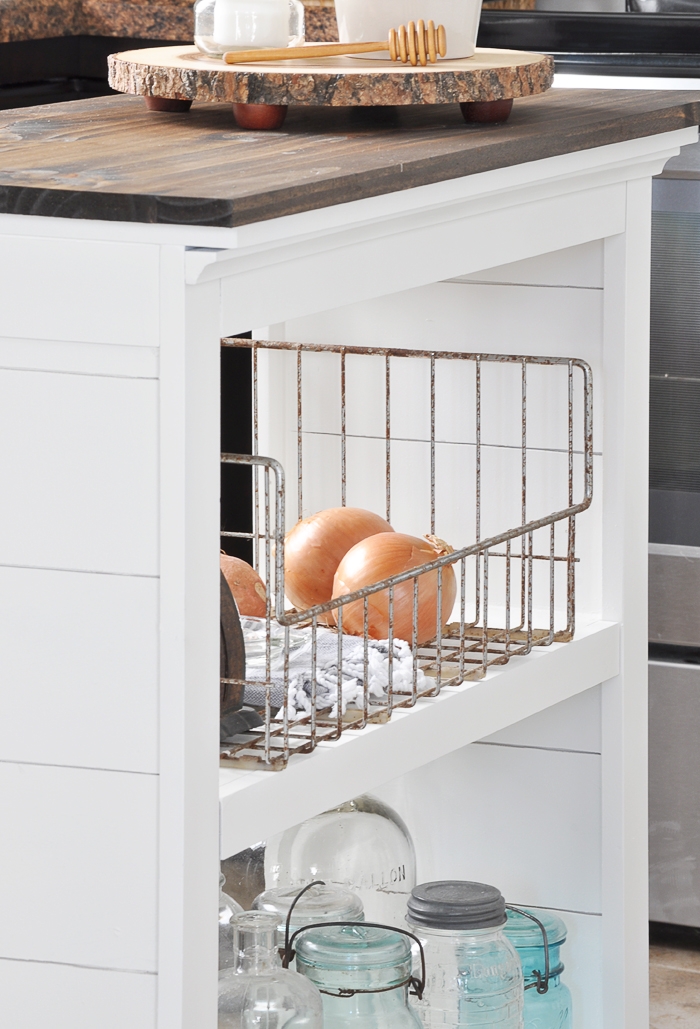
(BTW, you may wish to separate your onions from your potatoes. They will stay fresher longer. There is something about the gases they emit that will make them rot more quickly. I learned that the hard way….and it stinks when it happens. Literally!)
Haha! I did do that for a while if we are being honest 🙂 And I actually didn’t know this about the potatoes and onions! Thanks for the tip Sara!!! 🙂
Question. What is the cream metal box. I have seen pictures before and wondered…antique bread box?
Yep! Its an old metal bread box! We actually keep our trash bags in it and it works great. I am a sucker for antiques!
Looks beautiful but … I’d think carefully before using shiplap on larger areas – painting will drive you crazy! we’ve used a lot of it in 2 houses we’ve renovated and while it’s great to cover all types of surfaces painting is slow and requires many coats. We’ve also limewashed and that’s by far the best way to go 🙂
Yes, I’ve totally heard all the stories about how many coats these take! I don’t think we’ll do any really large walls, but I wouldn’t mind doing a few closets or something. Baby steps right? Lol.
I’m in the middle of doing this. I didn’t do the shiplap look, but my Chip & Jo guy (he’s that awesome) used 100+ year old trees lost in a tornado for my shelving. I stained it using Minwax Driftwood and waxed with Fiddes & Sons Clear & Jacobean Wax. They are YUMMY! Still a little bit to do – including touch up on the white, but it is fabulous. Also going to have hinged barnhouse doors.
Oh my goodness, this sounds amazing!!!!! All of my favorite things in one place! Would love to see the finished result! Thanks so much for sharing!
Looks great Ashley. After some time have the boards started to sag?
Thanks so much! They haven’t sagged at all! I think they might be too short so not a ton of weight in the middle, and if you were to do longer ones you could always add a support to the back as well! 🙂
I have never heard of shiplap but I will be shiplapping soon! You have motivated me Miss Ashley. Absolutely LOVE this look. Thanks for sharing your creativity so others like me can “steal” your idea!
Oh Lisa, you are too kind! This makes my day. And yes, shiplap is the BEST!
Nice job. I would ditch the door and enjoy looking at it every time I walked by
Hehe, I agree with you! Hopefully I make that happen sometime in the near future 😉
Gorgeous pantry makeover Ashley! Wow, it’s a small pantry for sure but you glammed it up. I love and I enjoyed looking around your lovely blog and would love for you to share this great post at a linky party I am co-hosting. I hope to see you there. http://diy180site.blogspot.com/2016/08/dishing-it-and-digging-it-link-party-109.html
Thank you so much for all of the kind comments! I will definitely have to stop by your link party and check it out!
I LOVE it and my pantry is decorated too.
Glad I am not the only one! 🙂
great job! it’s too pretty to hide behind the door…. thinking, a glass door? to see through this beautiful pantry?
Thank you! I was thinking the same thing! Maybe I need to keep an eye out for one!
Or an old fashioned screen door would look great. Beautiful job!
Wowza! This makeover looks so amazing totally a different look now! I love how your shared step by step pictures so helpful, pinning!
Awesome! Thank you so much for the sweet comment and for stopping by!
Love it! I just might be a copycat! Can you explain what the wood on the very bottom is for? I can’t quite figure it out.
I hope you do! So that wood on the bottom is just a few pieces of the same board we used for the shelves, we just sat it on the awkward bottom “bumpout” part to make it flow a little better. Its not mailed or anything either. Our pantry is kind of awkward since it doesn’t go all the way down to the floor!
Very creative! I think it’s time for my wire shelving to be replaced! Clever ship lap idea, too.
Thank you Karen! It makes me want to repeat this in all of my closets now too! Hate that wire stuff!
O.K. this is fabulous! I love the stained shelves against the white shiplap. Thanks for the inspiration, I just may have to revamp my pantry! Great, great job!
Thanks Kathy! You are so sweet! I sure hope you do, it makes a world of a difference!
Perfection! I have never left a comment before, but I just had to. Your tutorial and all of the photographs are terrific! Now I can go to the hardware store and bring it all home for hubby to install…he can’t say no if I’ve got all the materials right? Thank you for the great post!
Where did you get the little wreath hanging on the door?
You are so kind! And I mean, I don’t think he can say no if you already have everything needed….shopping for the stuff is the hardest part isn’t it!? Lol! The wreath is just a little grapevine wreath that I stuffed with some fake greenery and hung over a basket top! Random, right?
Love this.
So glad, Debbie! Thanks so much!
So beautiful! Love the addition of the shiplap! found you via thriftydecorchick
Thank you so so much Carli! So glad you found me from Thrifty Decor Chick too! XO!
Oh my goodness! This looks absolutely incredible! I can’t wait to see the other DIYs that you have done.
I just found your website and am totally obsessed already!
Oh my goodness, how sweet are you! So glad you found me! Welcome! And thank you so much for the great compliment!
What kind of stain did you use? I’ve been attempting that color for a while now & can’t get it right.
It’s Minwax Dark Walnut! My favorite stain to use on just about EVERYTHING!
Love this, beautiful job! Have you considered putting in a glass door so you can enjoy seeing it all the time?
Oh my gosh! YES! I love that idea! I just need to find the perfect door to fit there now!
Oh, I’d love to see a picture if you do it! I’m thinking one that has glass in just the top half. You could cut out the existing panel and have seeded glass put in, but going on a treasure hunt to find a vintage one would be more fun!
Ashley,
BEAUTIFUL! And yes, a pantry can be beautiful! Love it!
~Bobbie
Bobbie, thanks so much! XO!
This is the prettiest pantry! I love the rustic shelves mixed with the white shiplap!
Oh my, that is the best compliment ever! Thanks girl!
Obsessed!
Hehe, thanks girlfriend! XO!
Looks amazing, Ashley! I would LOVE to do this to my pantry one day. Love that shelving!
Thanks so much sweet friend! I am dying to see your kitchen all done girl! XO!
Love it! Pinned it! Hope to try it some day soon!
You absolutely should try it out! Thanks for stopping in!
This. Is. Gorgeous! What an amazing transformation, Ashley!
Meg! Thank you so so much! That means a lot!
Looks great!!!!! Now I want to try out shiplap!
It is SO SIMPLE! You should absolutely try it out girl, it makes a huge impact!
Great job! Who knew a pantry could look so cool, so rustically beautiful. Cheers, Ardith
Oh thank you! That is too sweet! Xo!
Really liking the pantry. In neck deep in a small pantry myself. What is your measurement between shelves?
Jana
Love love love
Well, thank you! As always 😉
I made a pantry out of a tv cabinet, love it!