Repainting Old Wooden Furniture [Part Two]
I’m back to share part two of how I repaint old wooden furniture. If you missed part one, you can find it [here]! There are so many methods to repainting old pieces, and like I said in part one, this is one method that works for me. I am a lover of chipped paint and that old distressed look, but sometimes even if the piece is already old looking, it may still need some TLC to get that look you want. In my case, I purchased this little old step stool and knew immediately I wanted to repaint it. And by repaint it, I don’t mean just slap another coat of paint on top, I mean really do some work on it to get it looking great again!
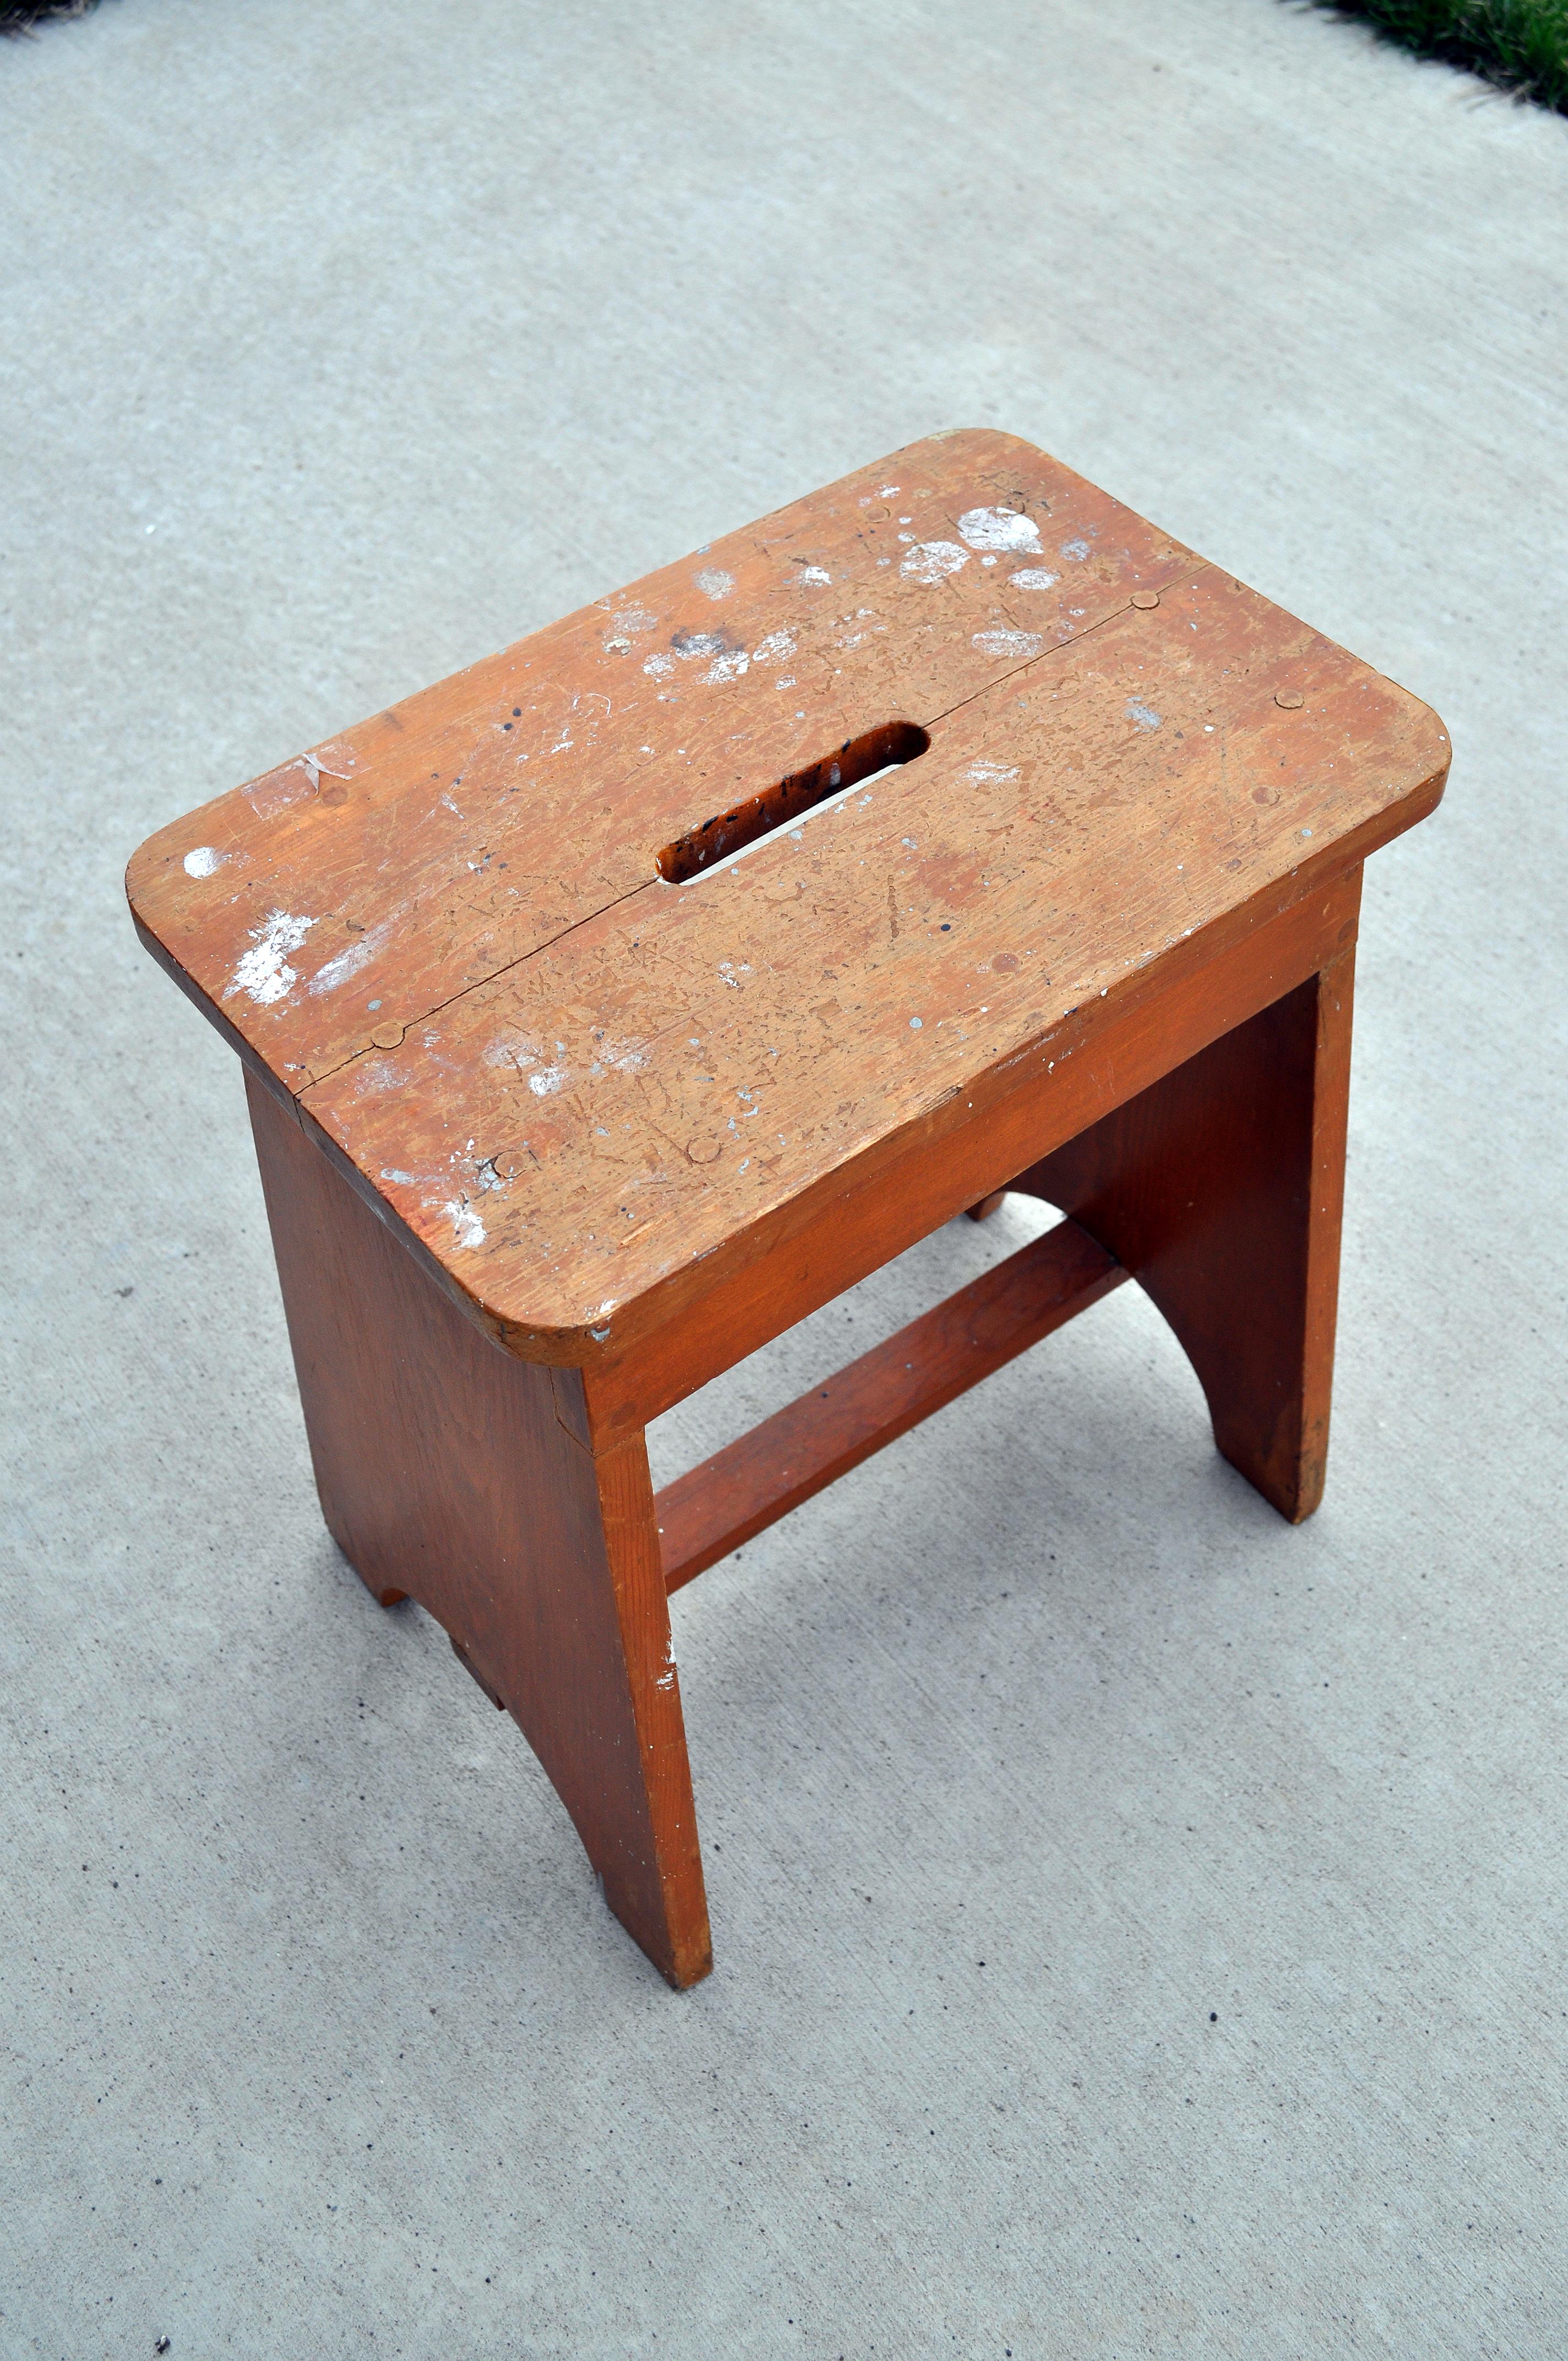
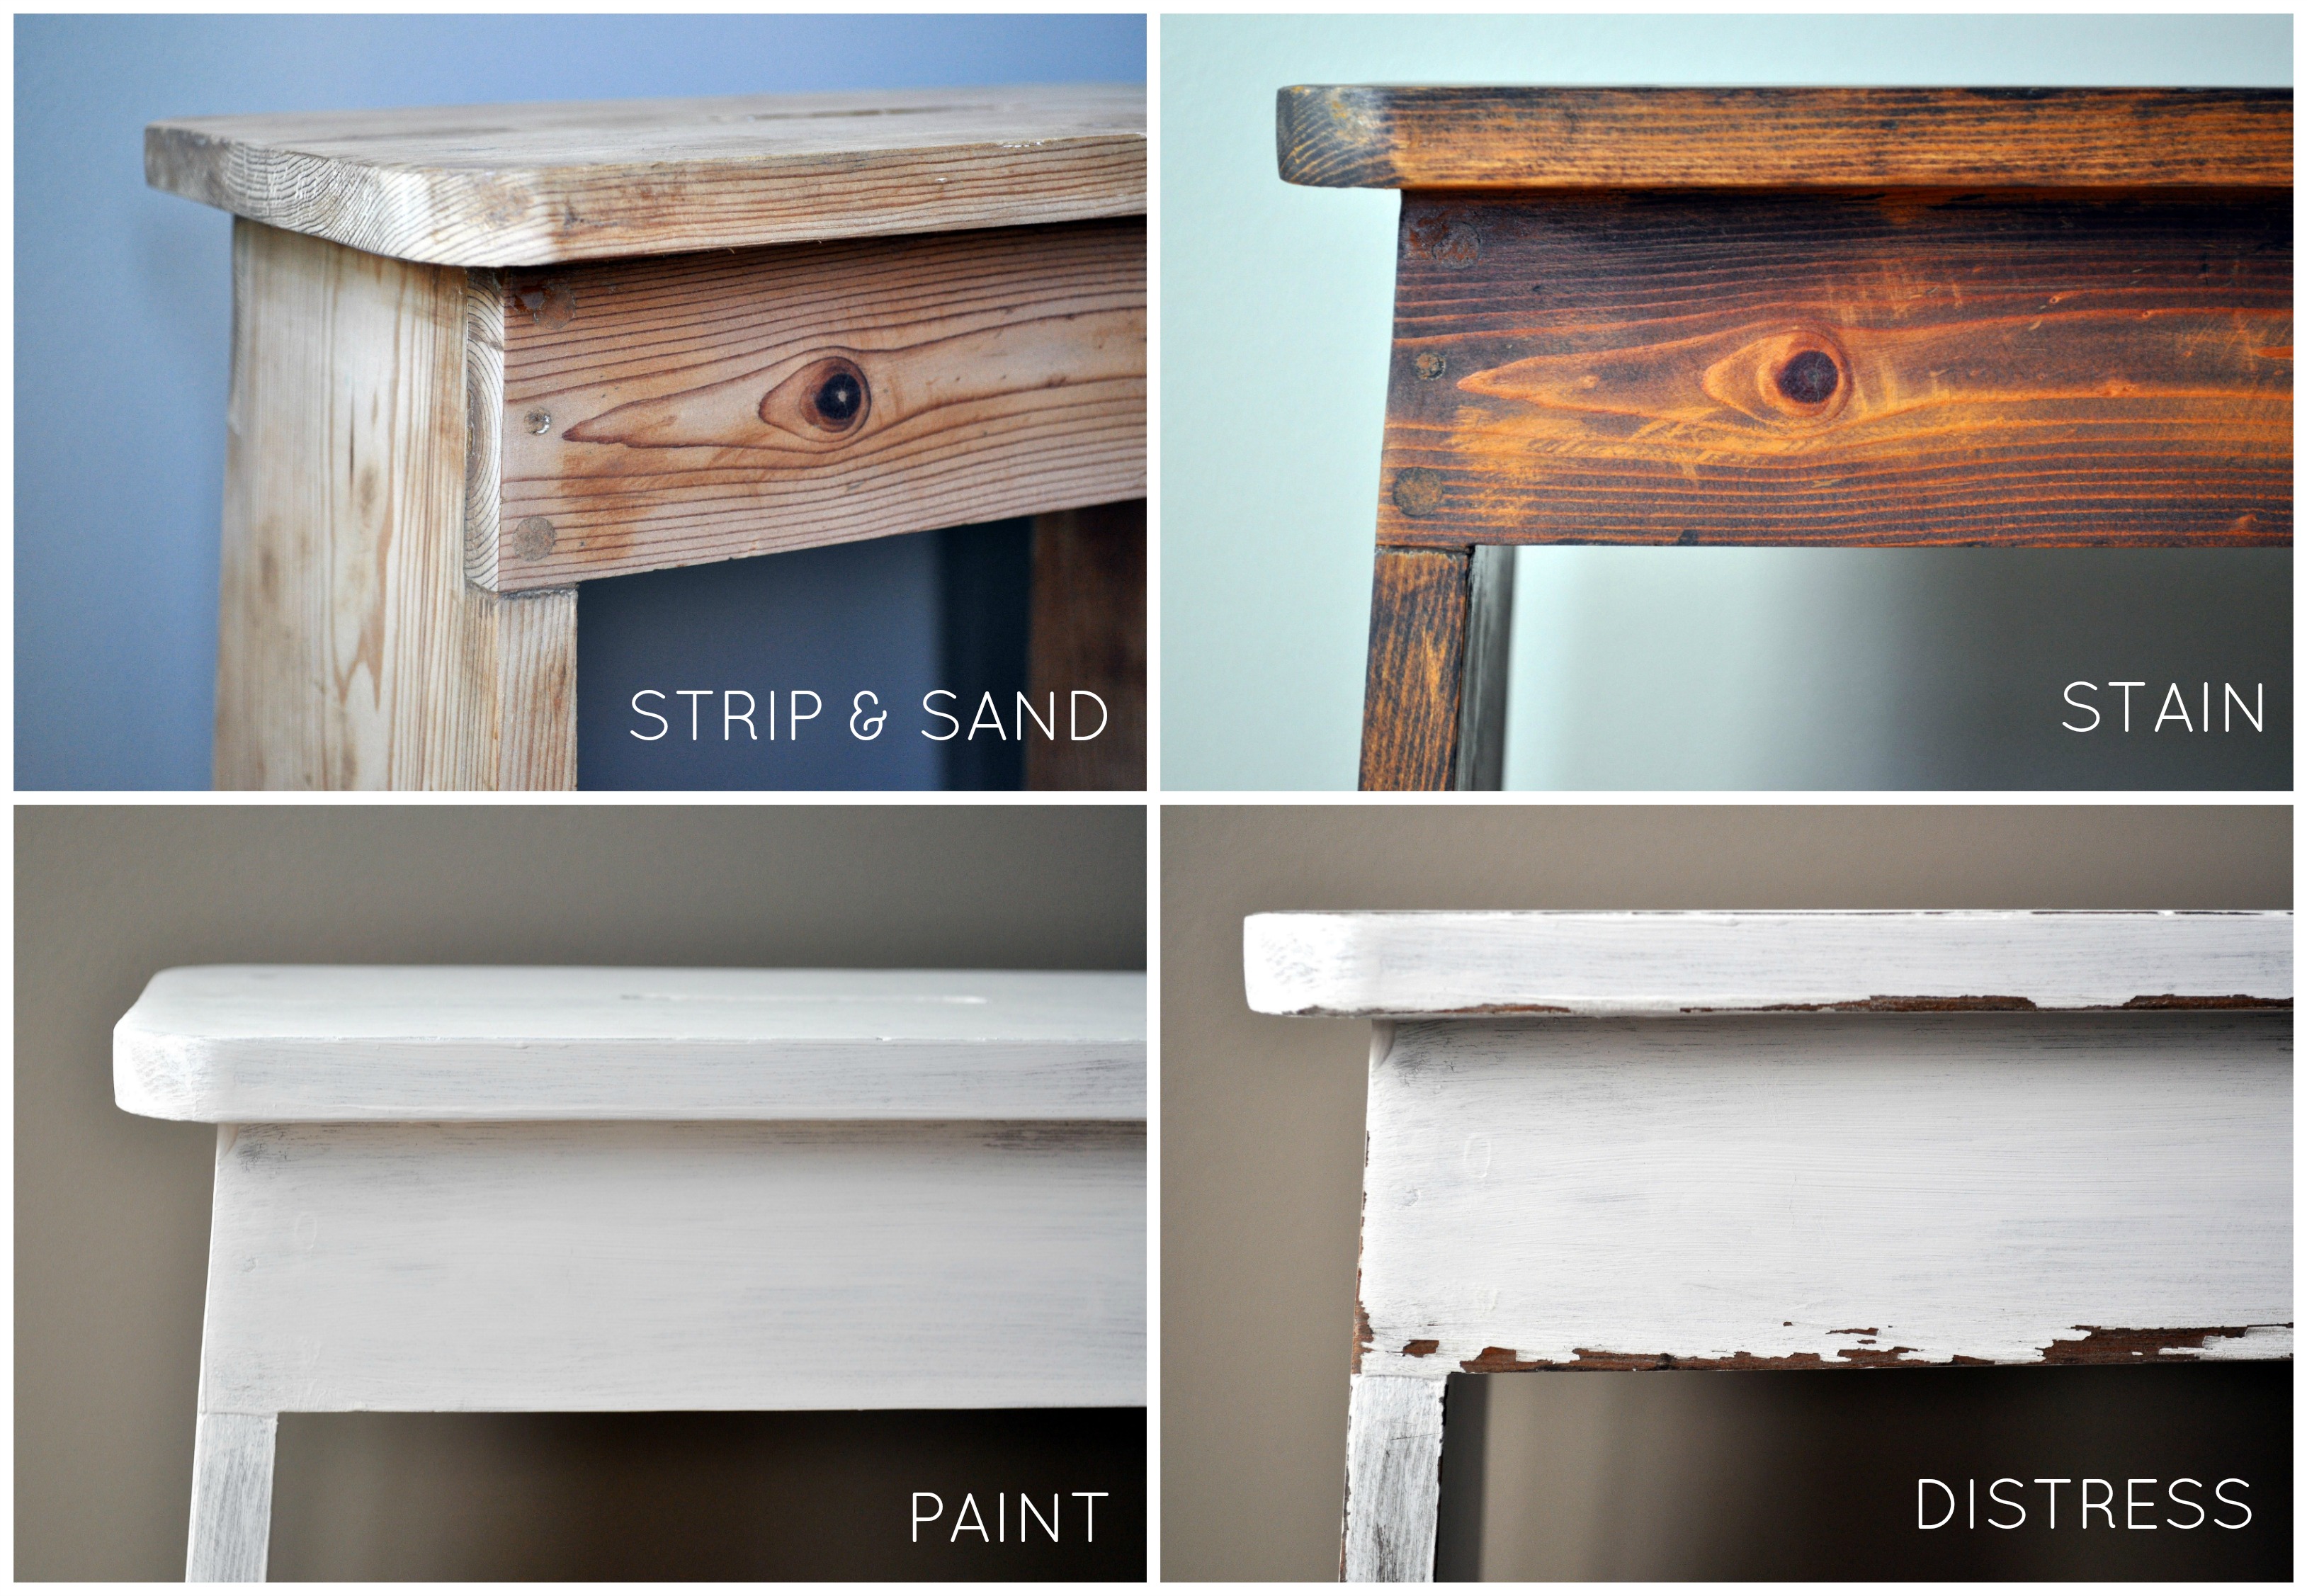
In part one, I showed you how I stripped the old paint off of the stool and sanded it down to the raw wood. This is how the stool looked at the end of that post, just to refresh! Beautiful, right!
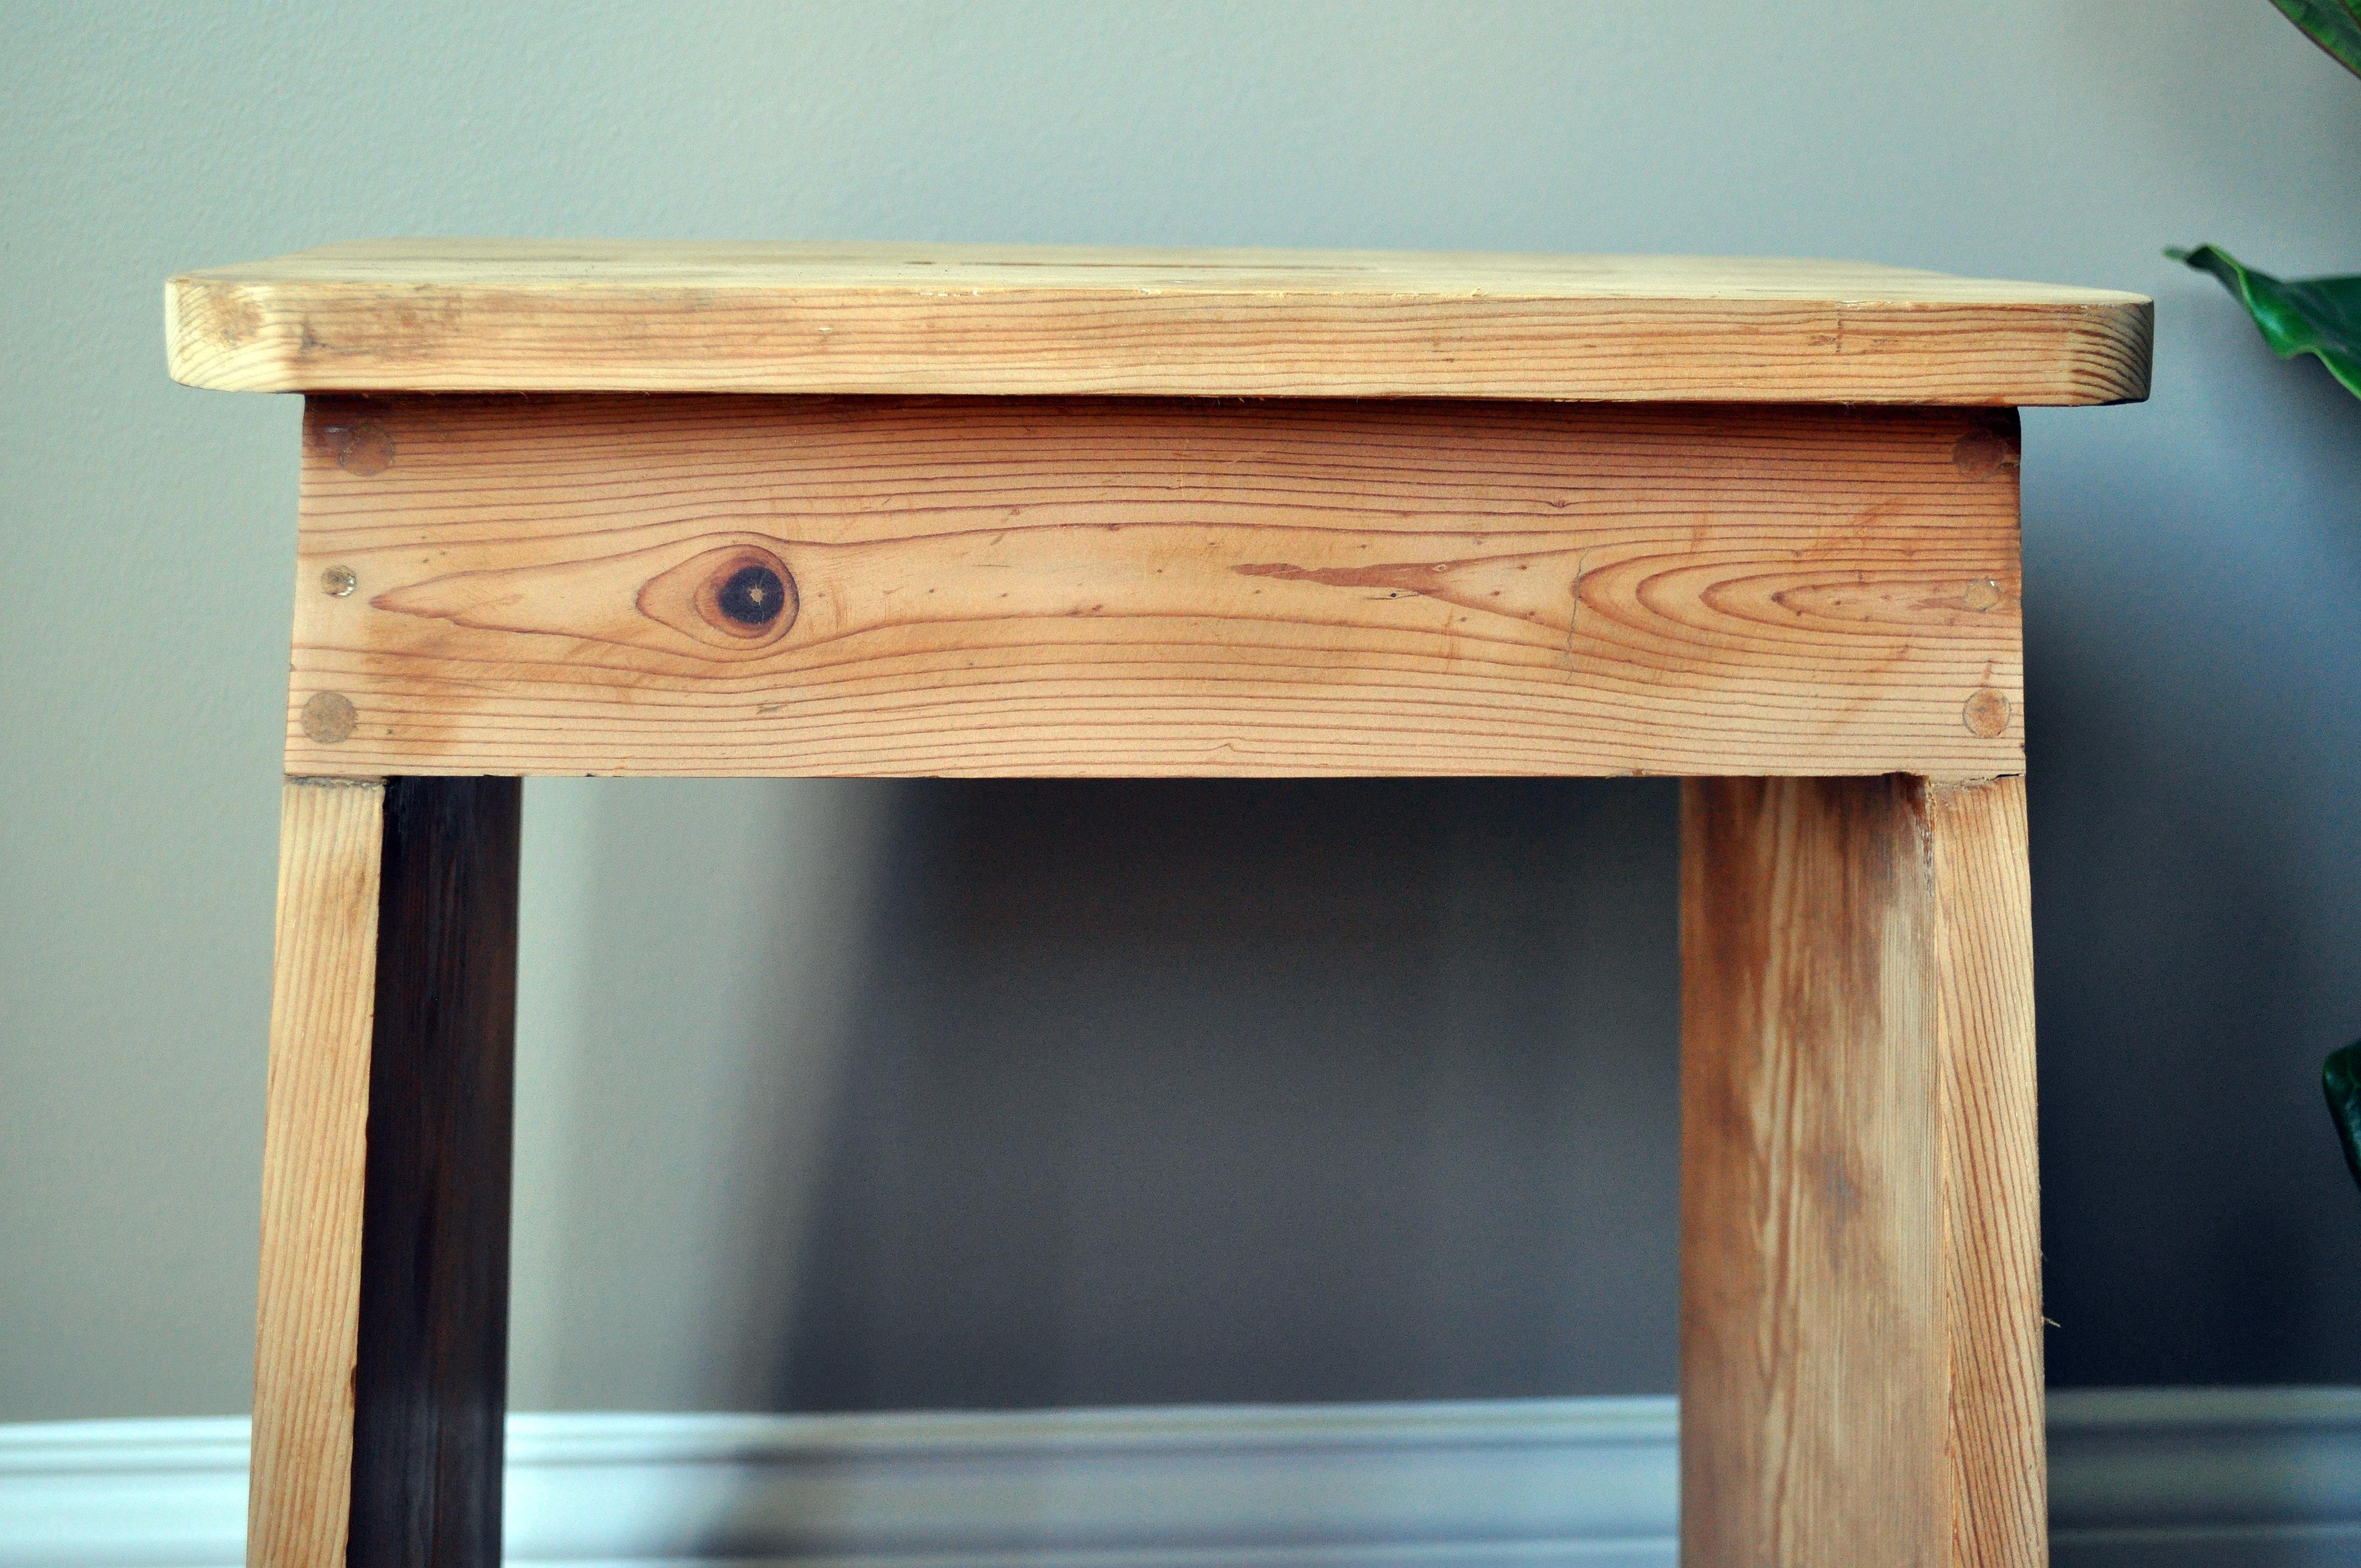
After I get down to the raw wood, I am ready to apply the wood stain. So let’s continue where we left off!
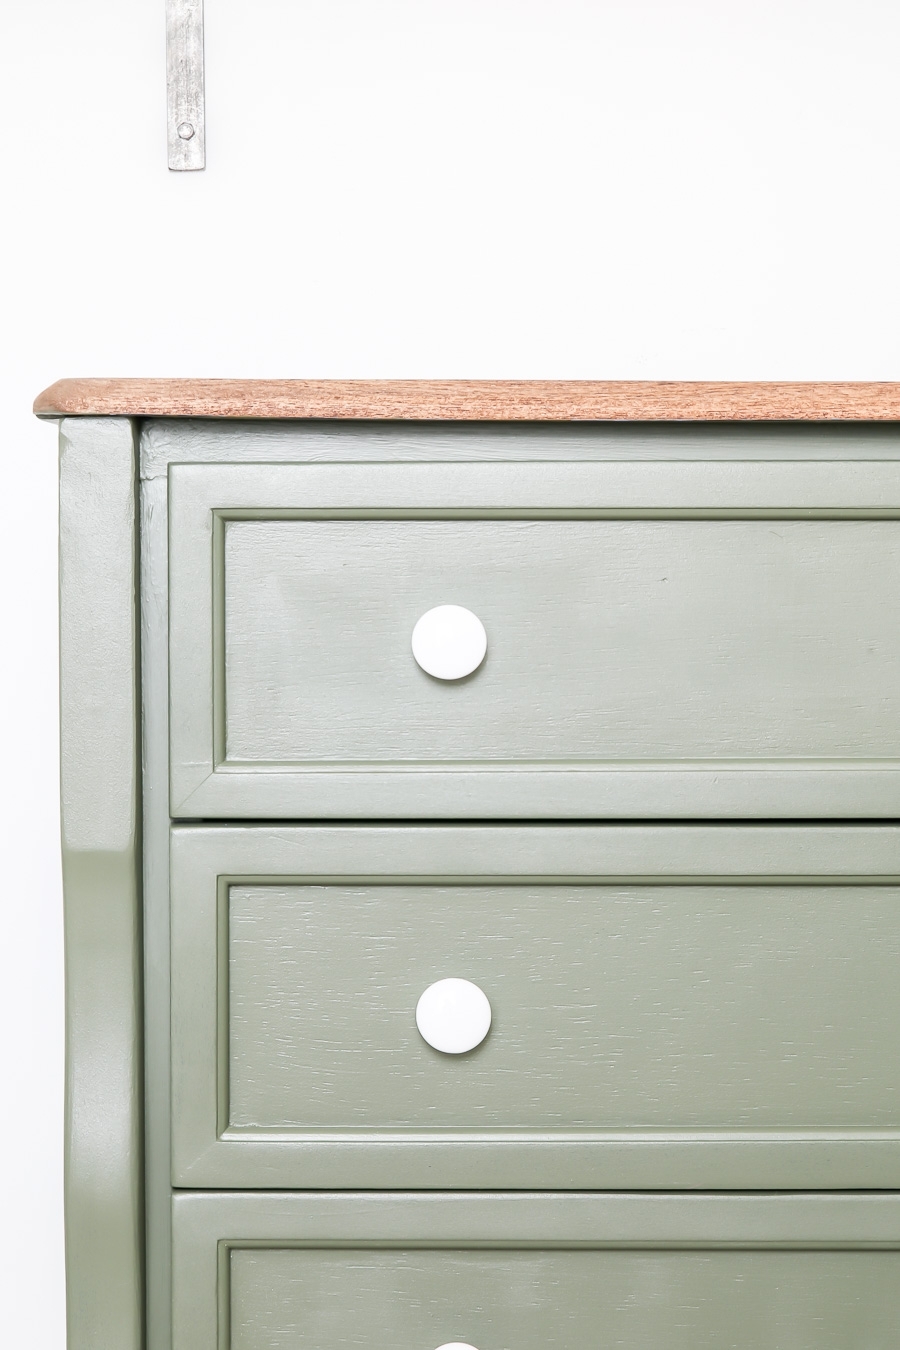
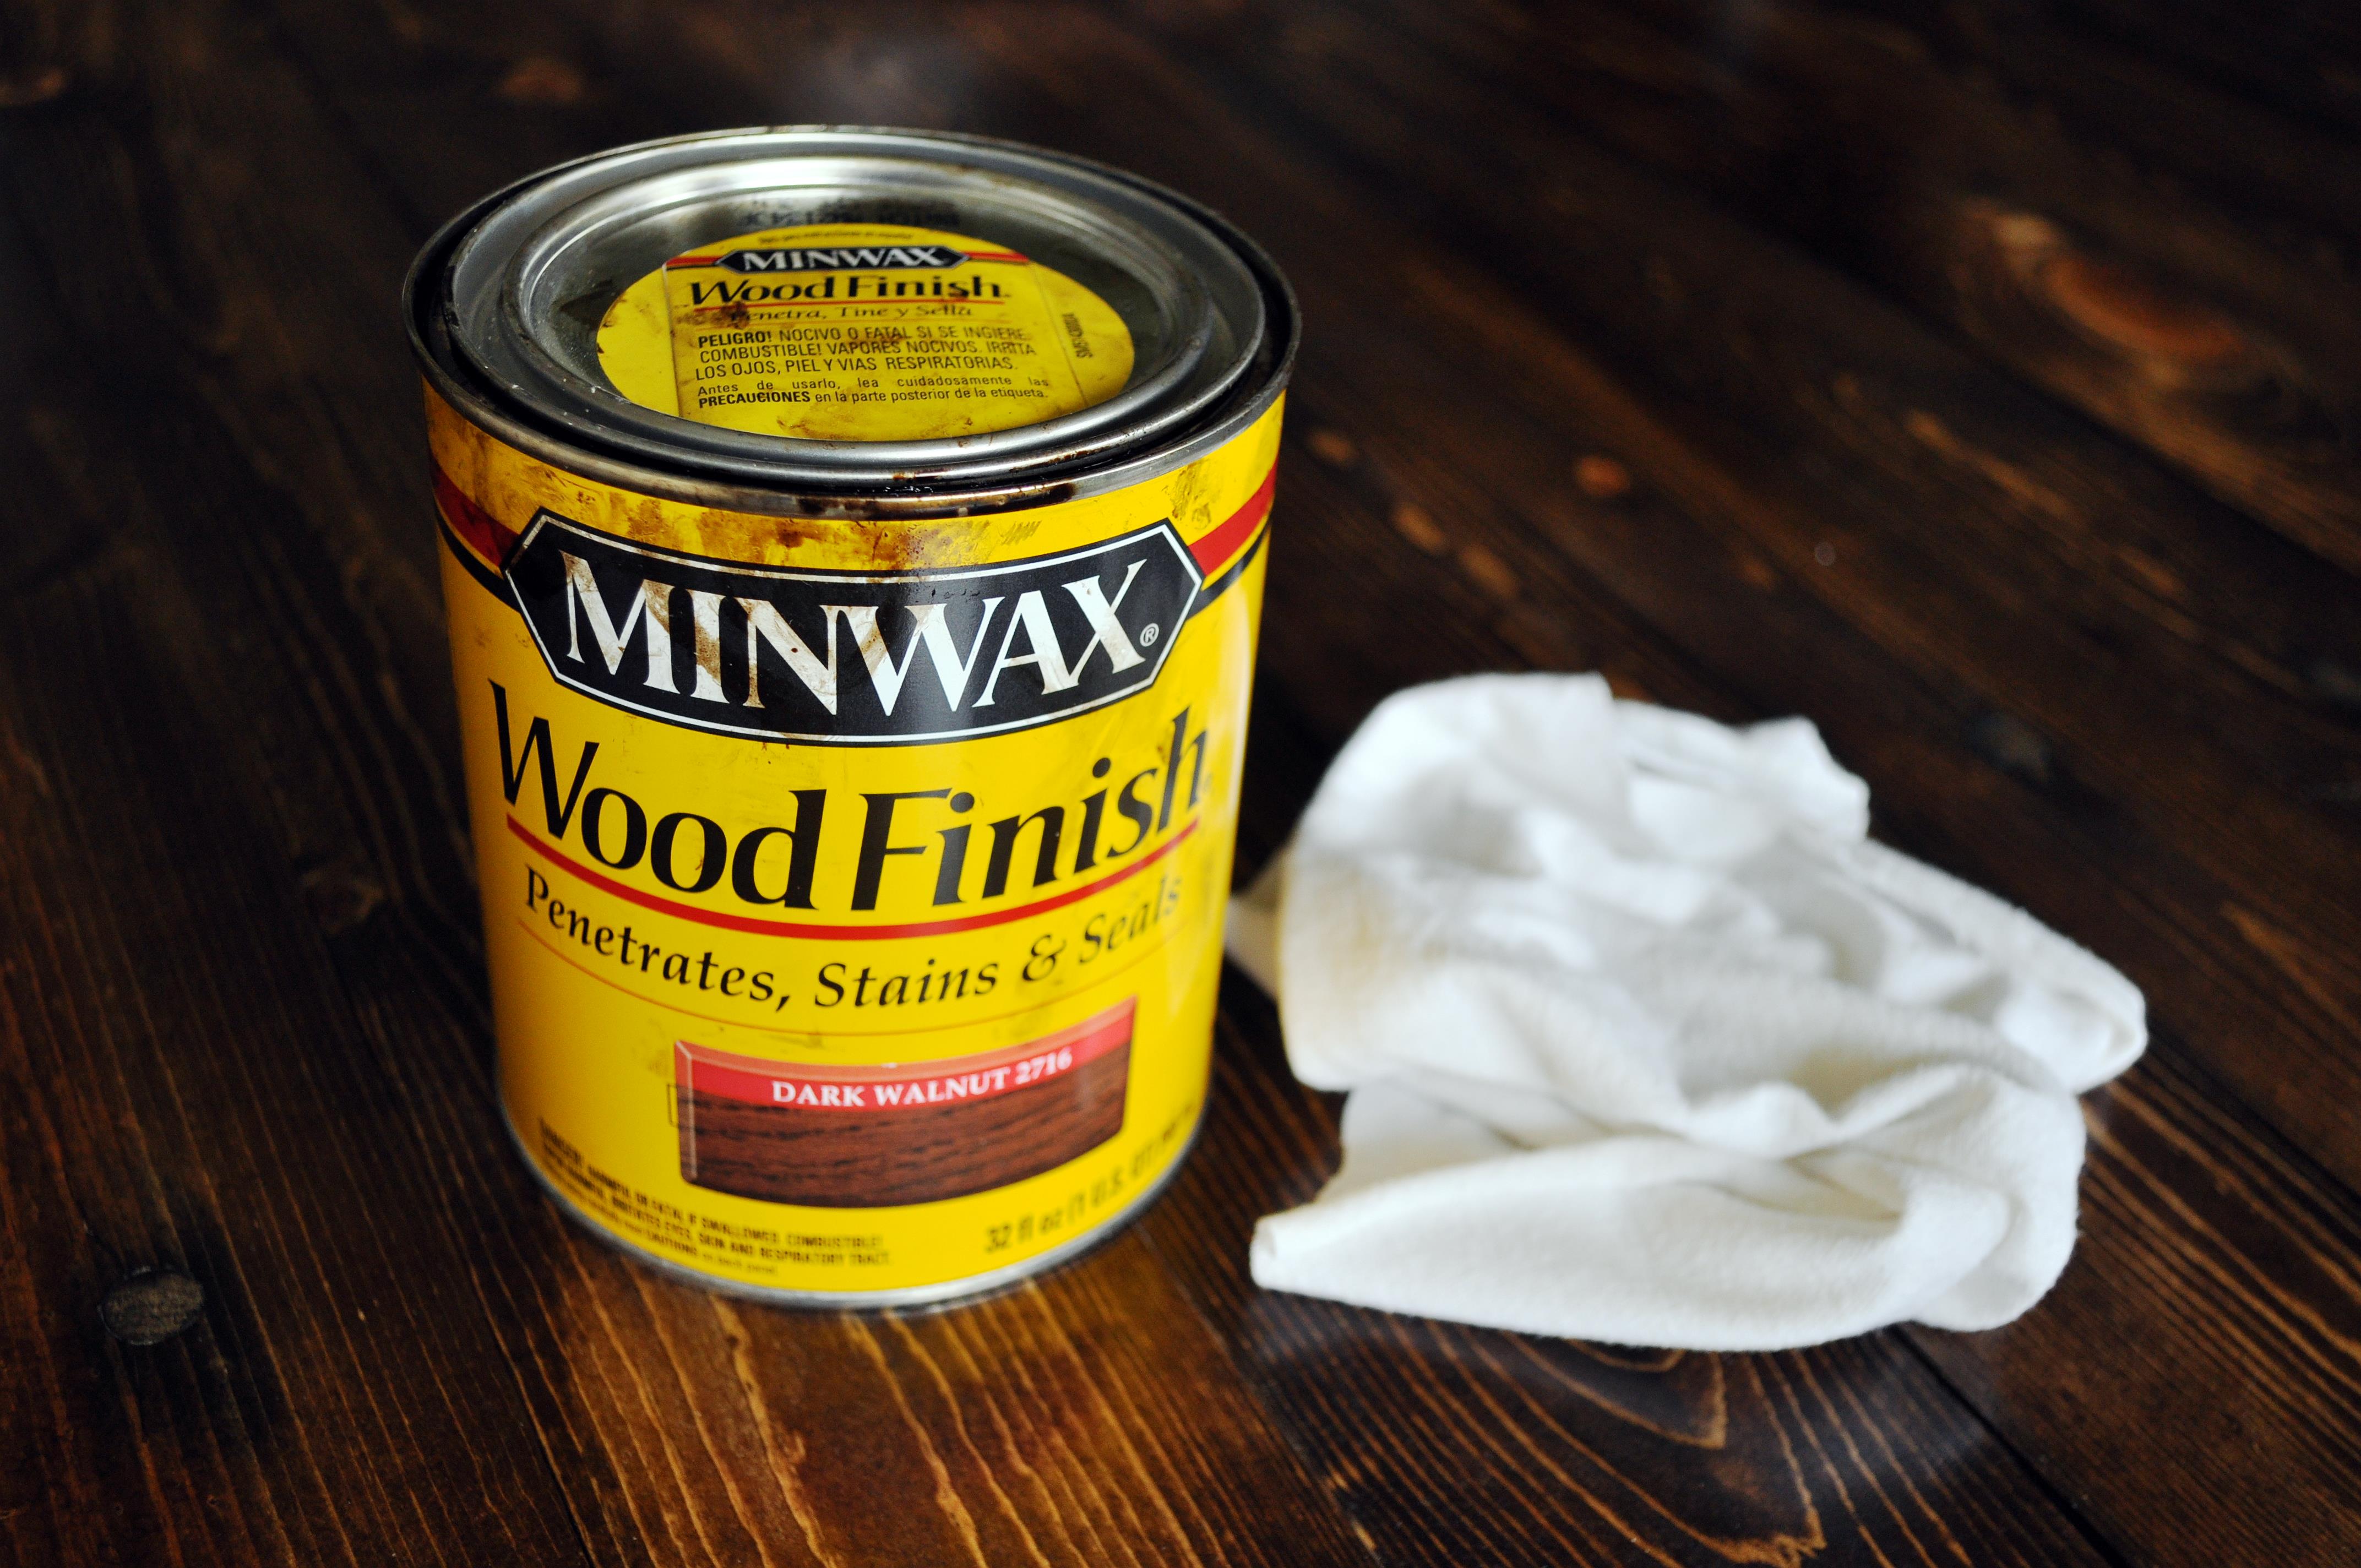
8. STAIN IT. My all time favorite stain to use under paint is Minwax Dark Walnut. It’s dark enough to show through when you distress it later, and the color is just gorgeous! To apply the stain I do NOT use a paint brush, I always use old rags or old cut up white t-shirts that my husband so kindly supplies me with! (Thanks honey!) Make sure they are clean and don’t have any particles or lent that will get mixed up in your stain. The most important thing to know when you apply the stain is to immediately wipe it off. I know that sounds weird, but if you apply stain to wood and leave pools of it wet on the piece, it will take a million years to dry and won’t look even. (I learned this the hard way the first time I ever used stain! It was not fun!) Therefore, I usually have two rags when I stain, one to apply it and one to wipe it off. After you’ve put a coat on, let it dry! Don’t rush it, stain always looks different once it’s dry versus wet. It will also give you a better idea of how many coats you want for whatever look you’re going for. Obviously, the more coats you use the darker the piece will turn out.
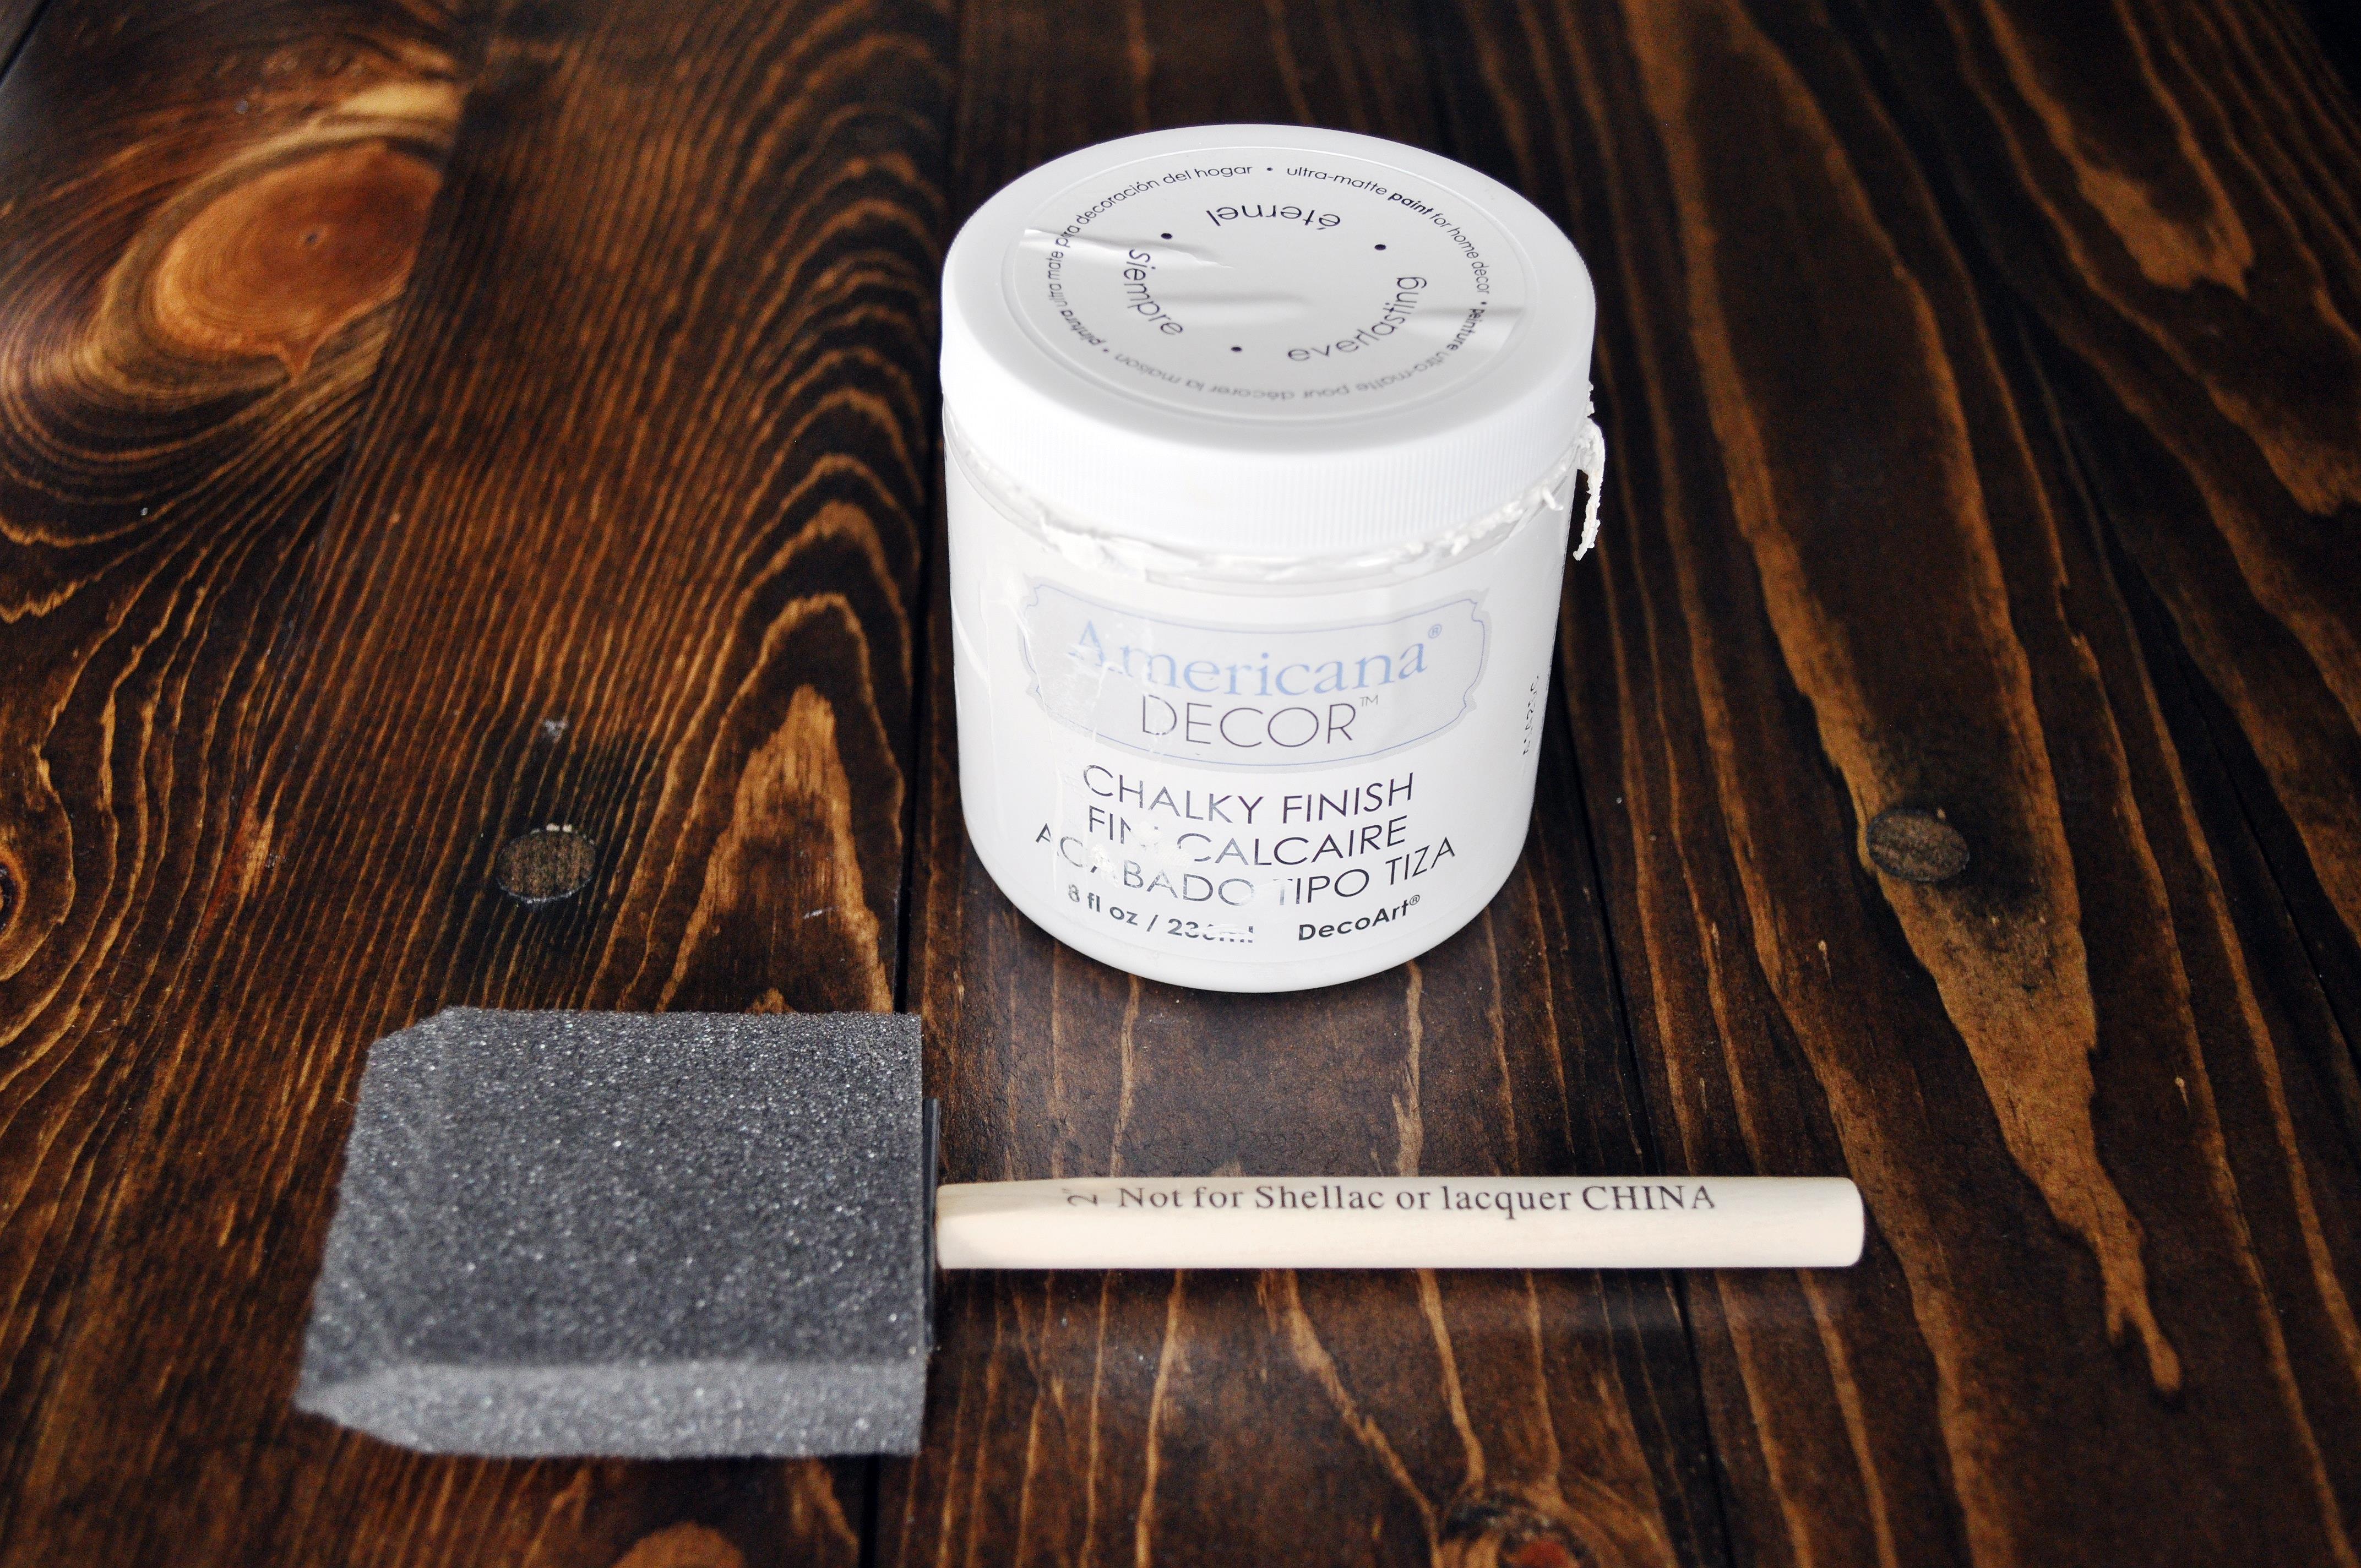
9. PAINT IT. Once the stain is all dry, it’s time to pick out a paint color. I chose to use Americana Décor Chalky Finish in white that I bought at Michaels. I’ve used this color before on top of the Dark Walnut stain and I just love it! When I apply chalk paint I typically use a sponge brush. I’ve found it goes on better with one of these, and I can just throw them out once I’m done since they are so cheap! ( I hateeee washing paint brushes!)
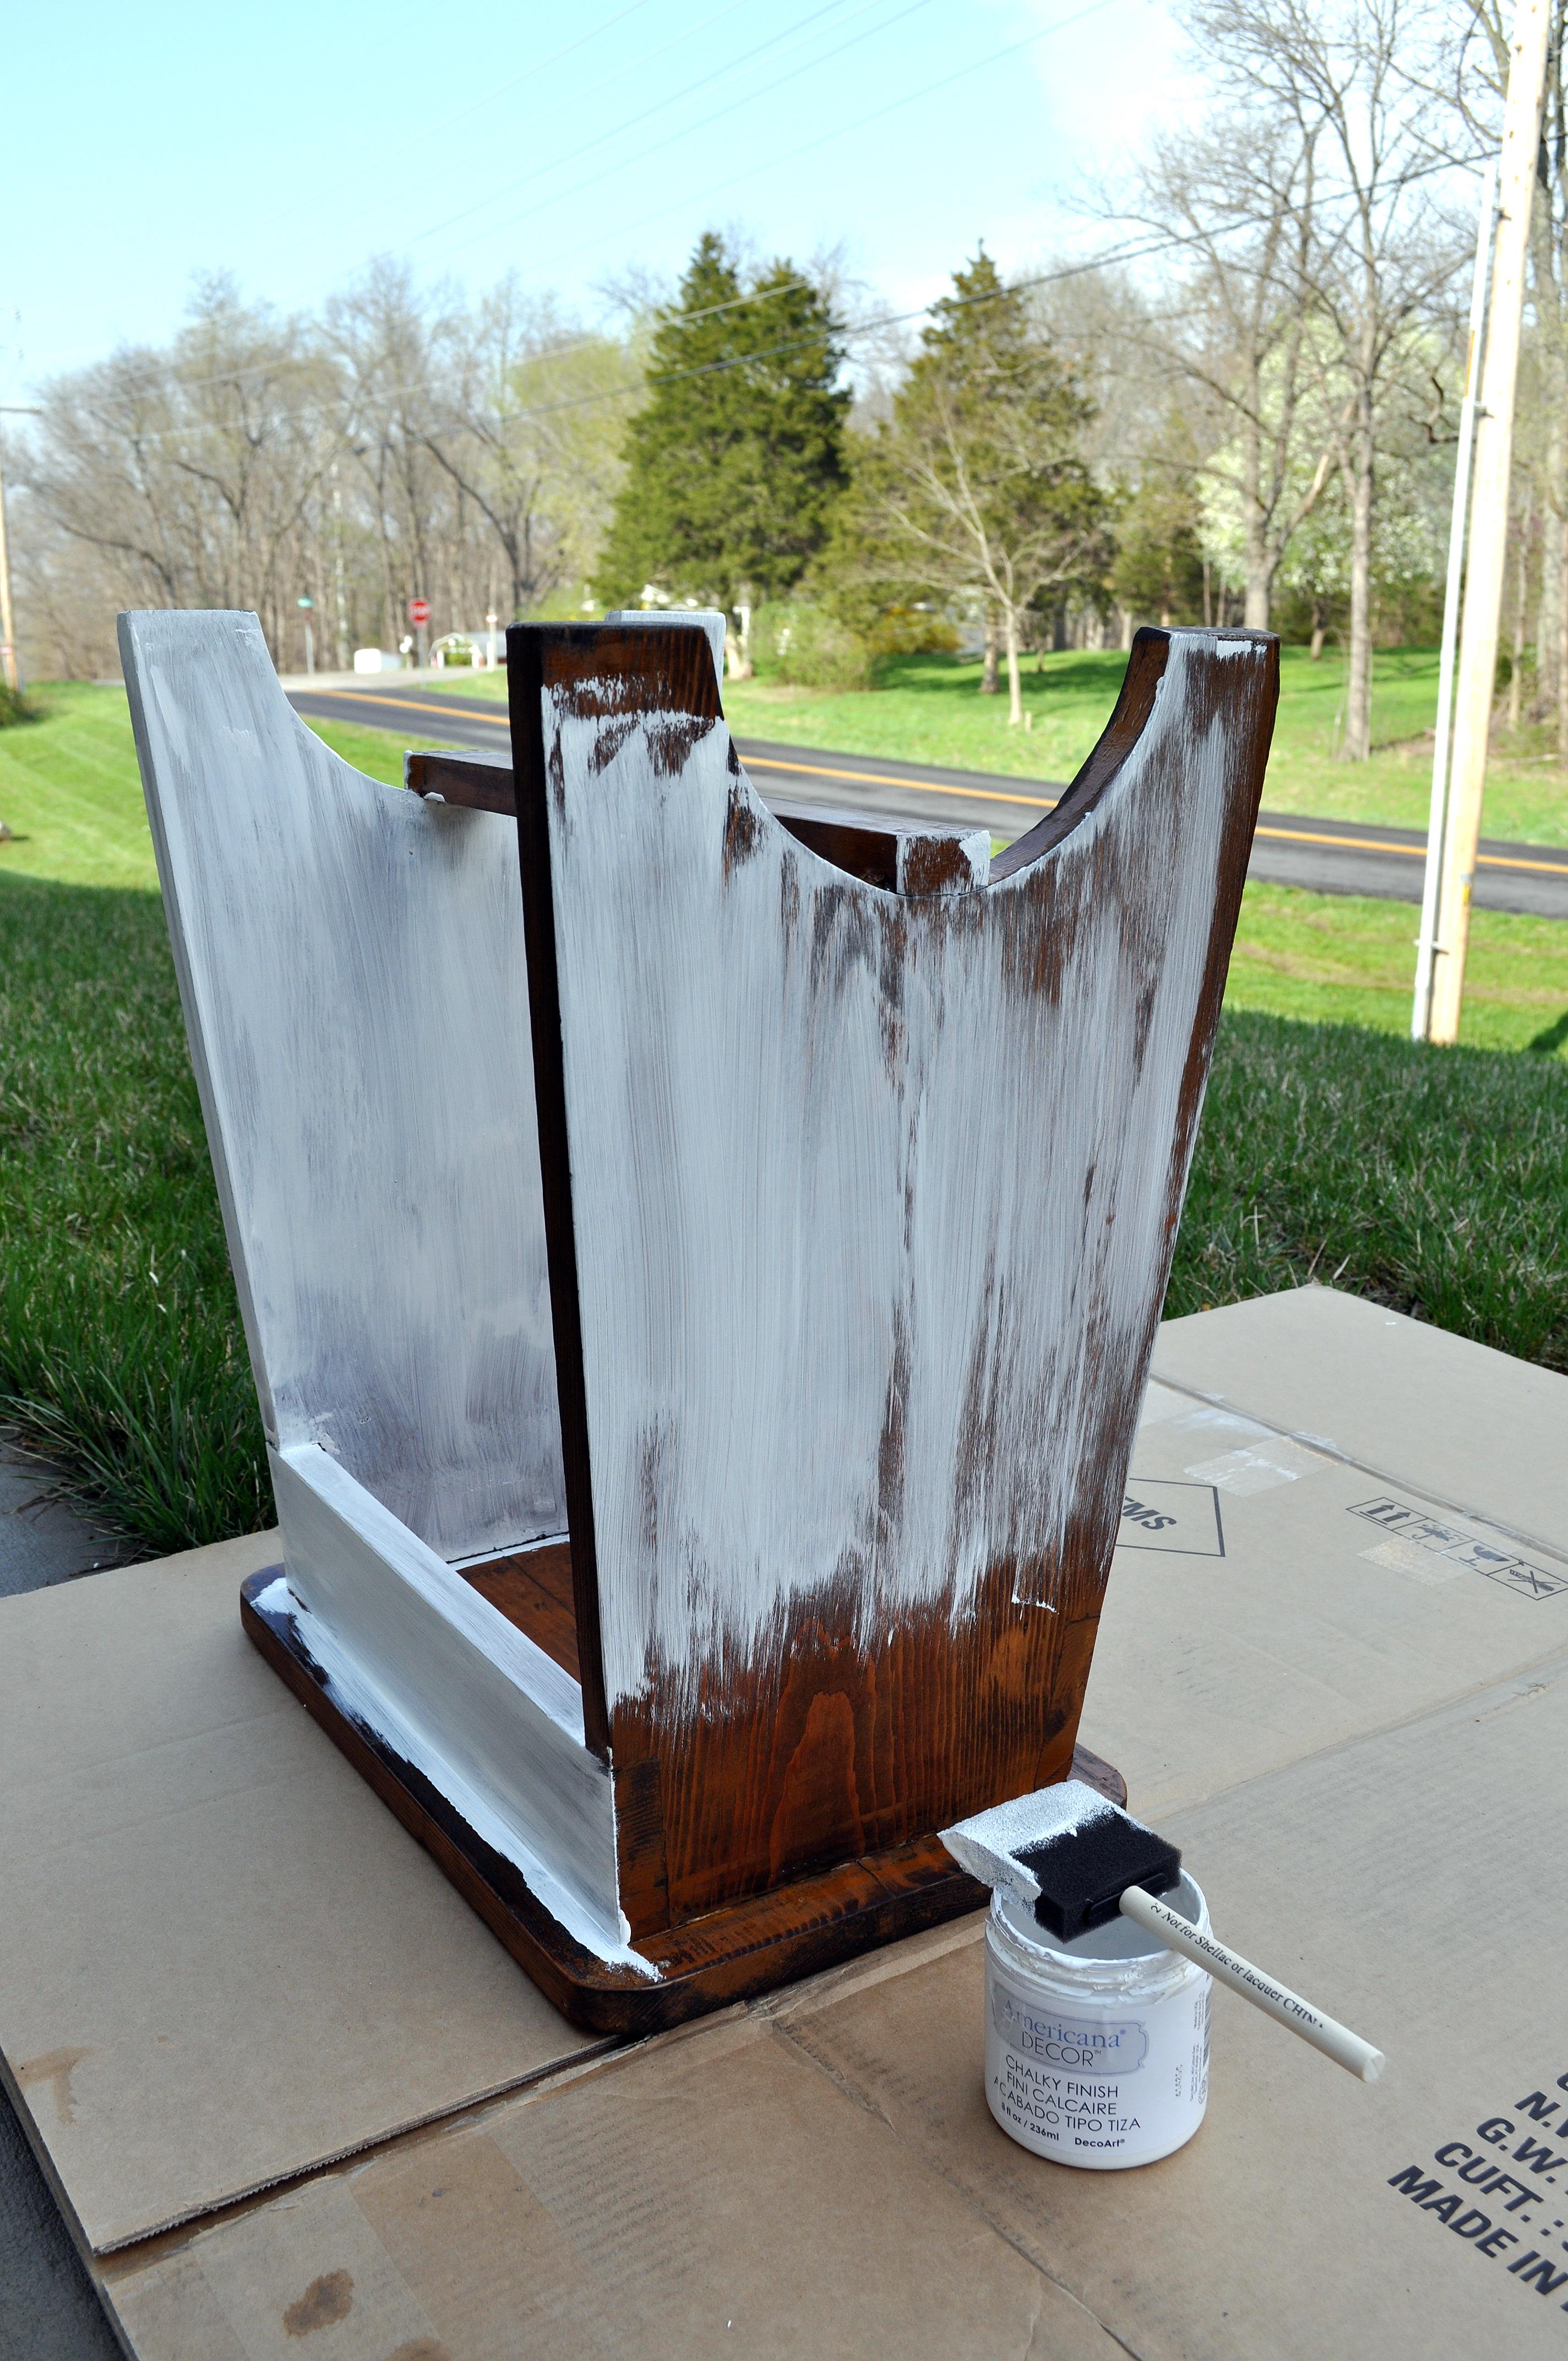
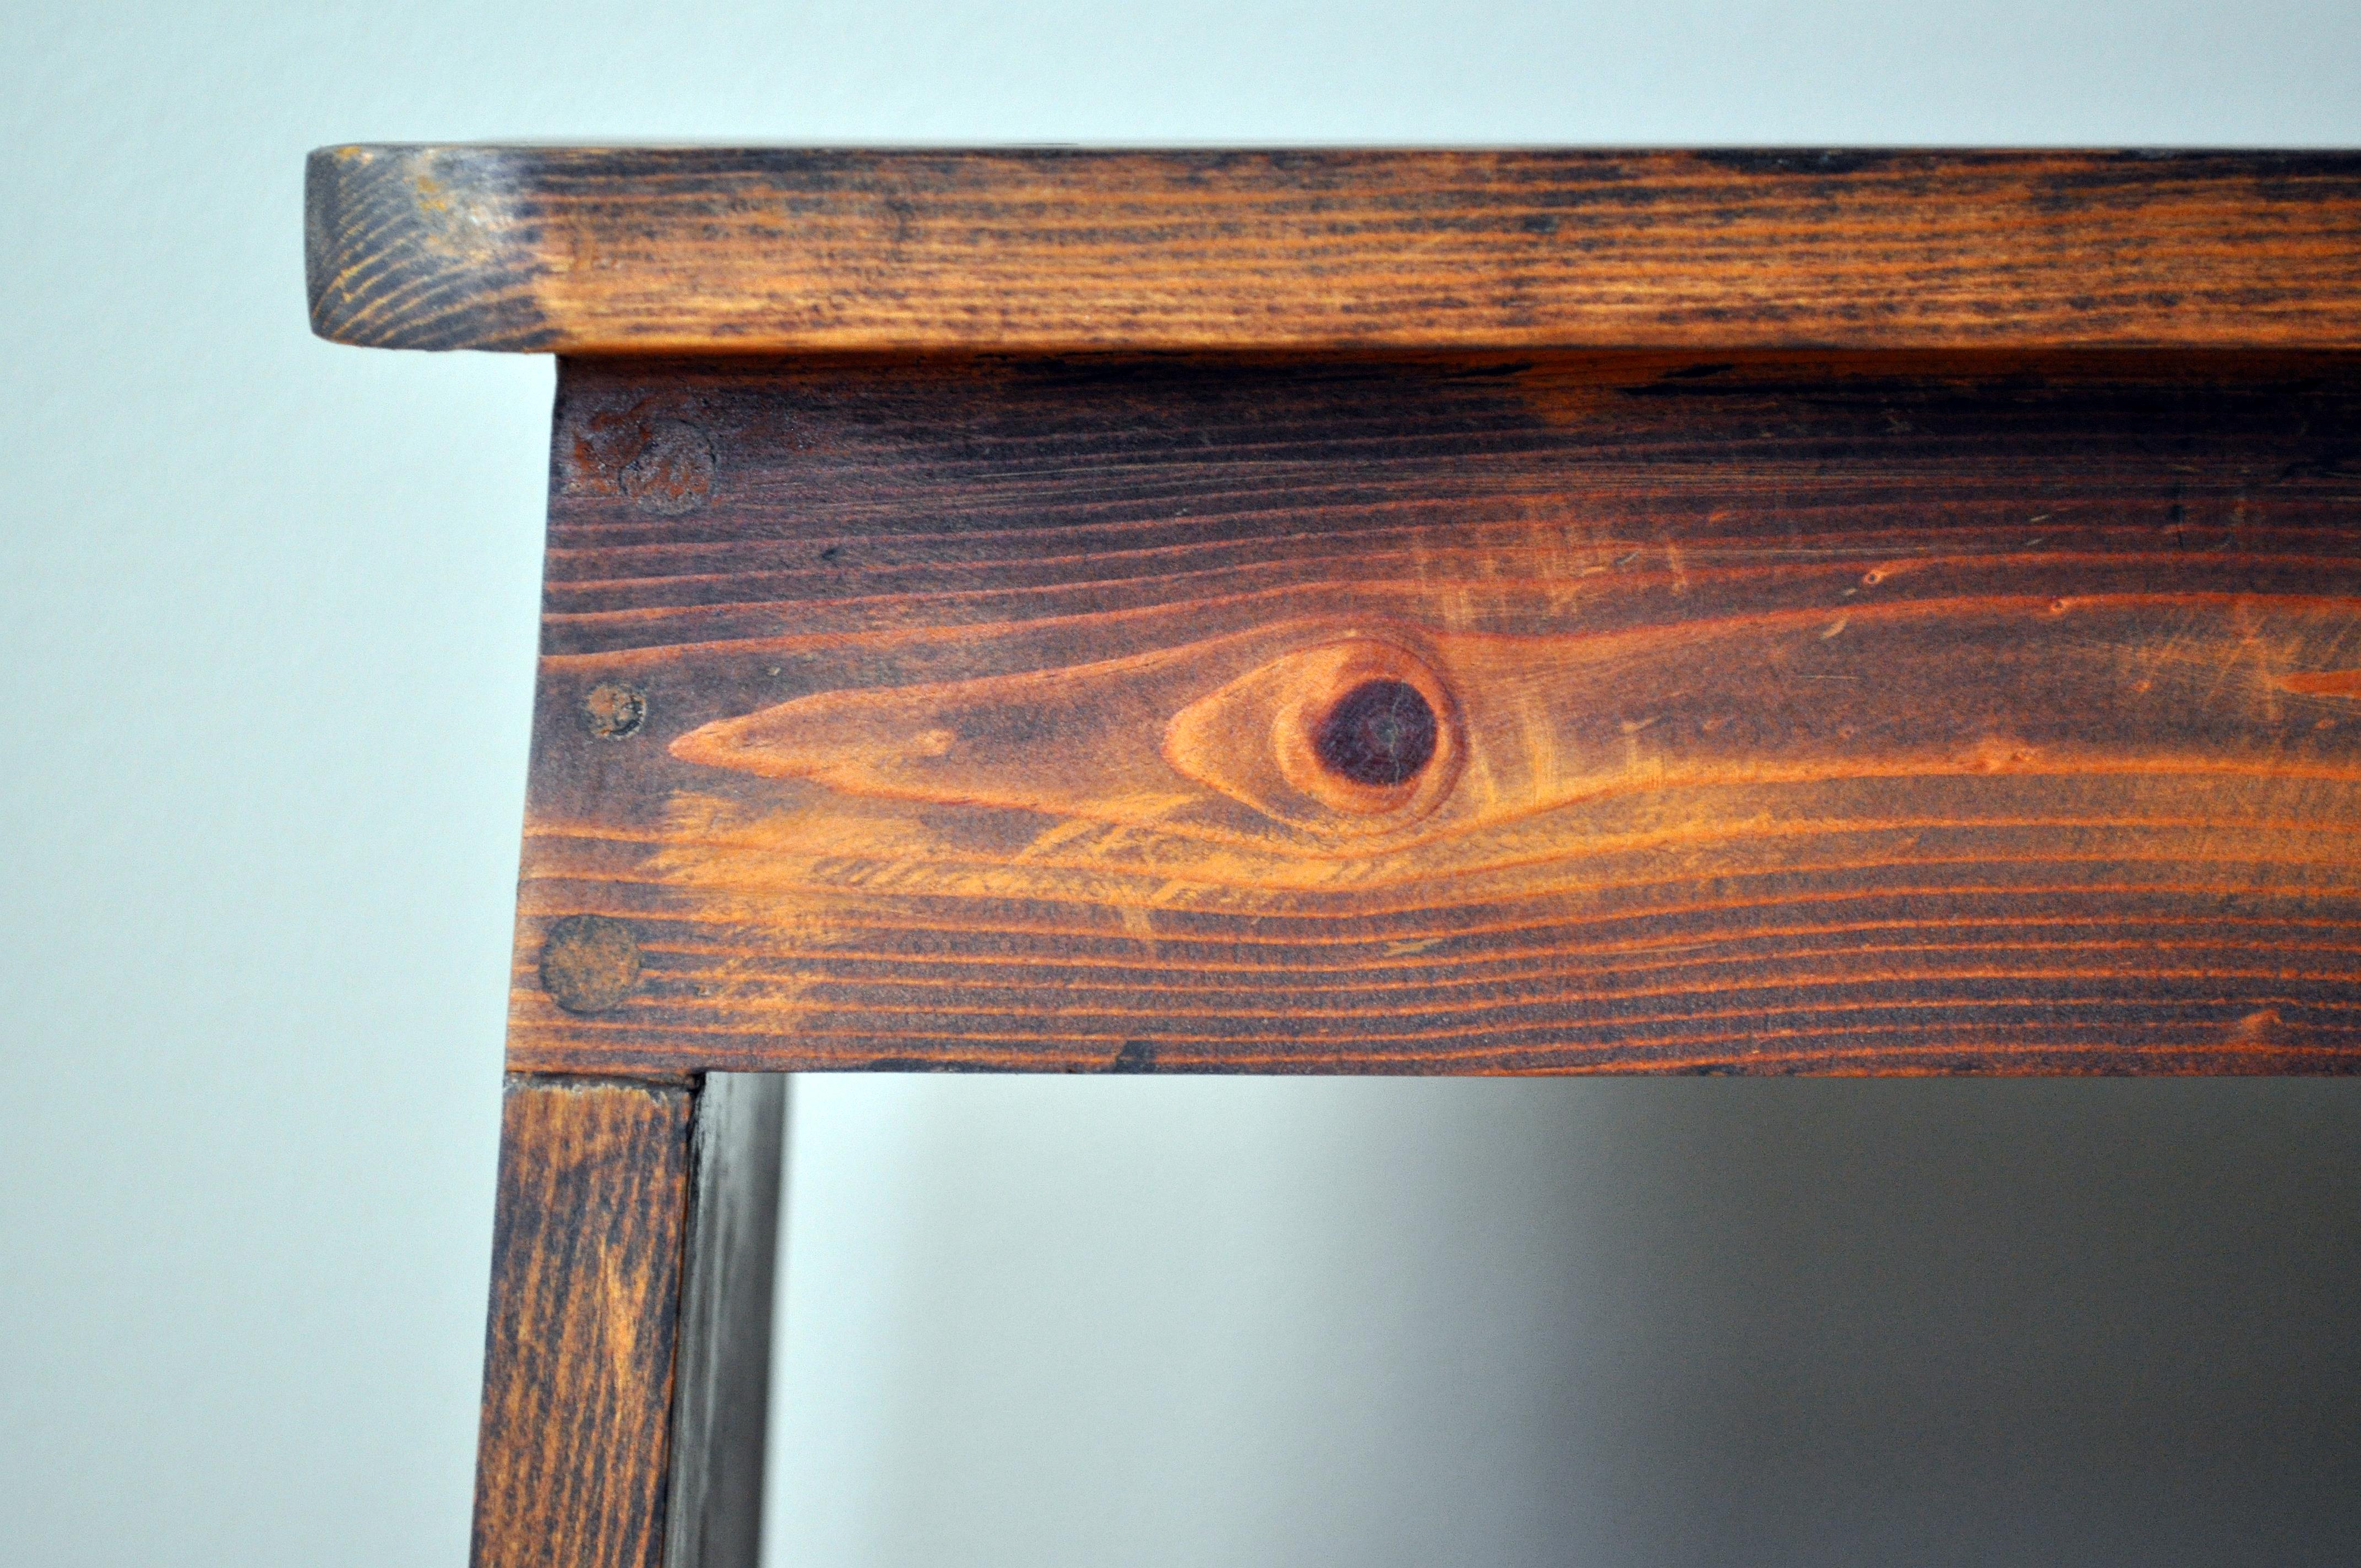
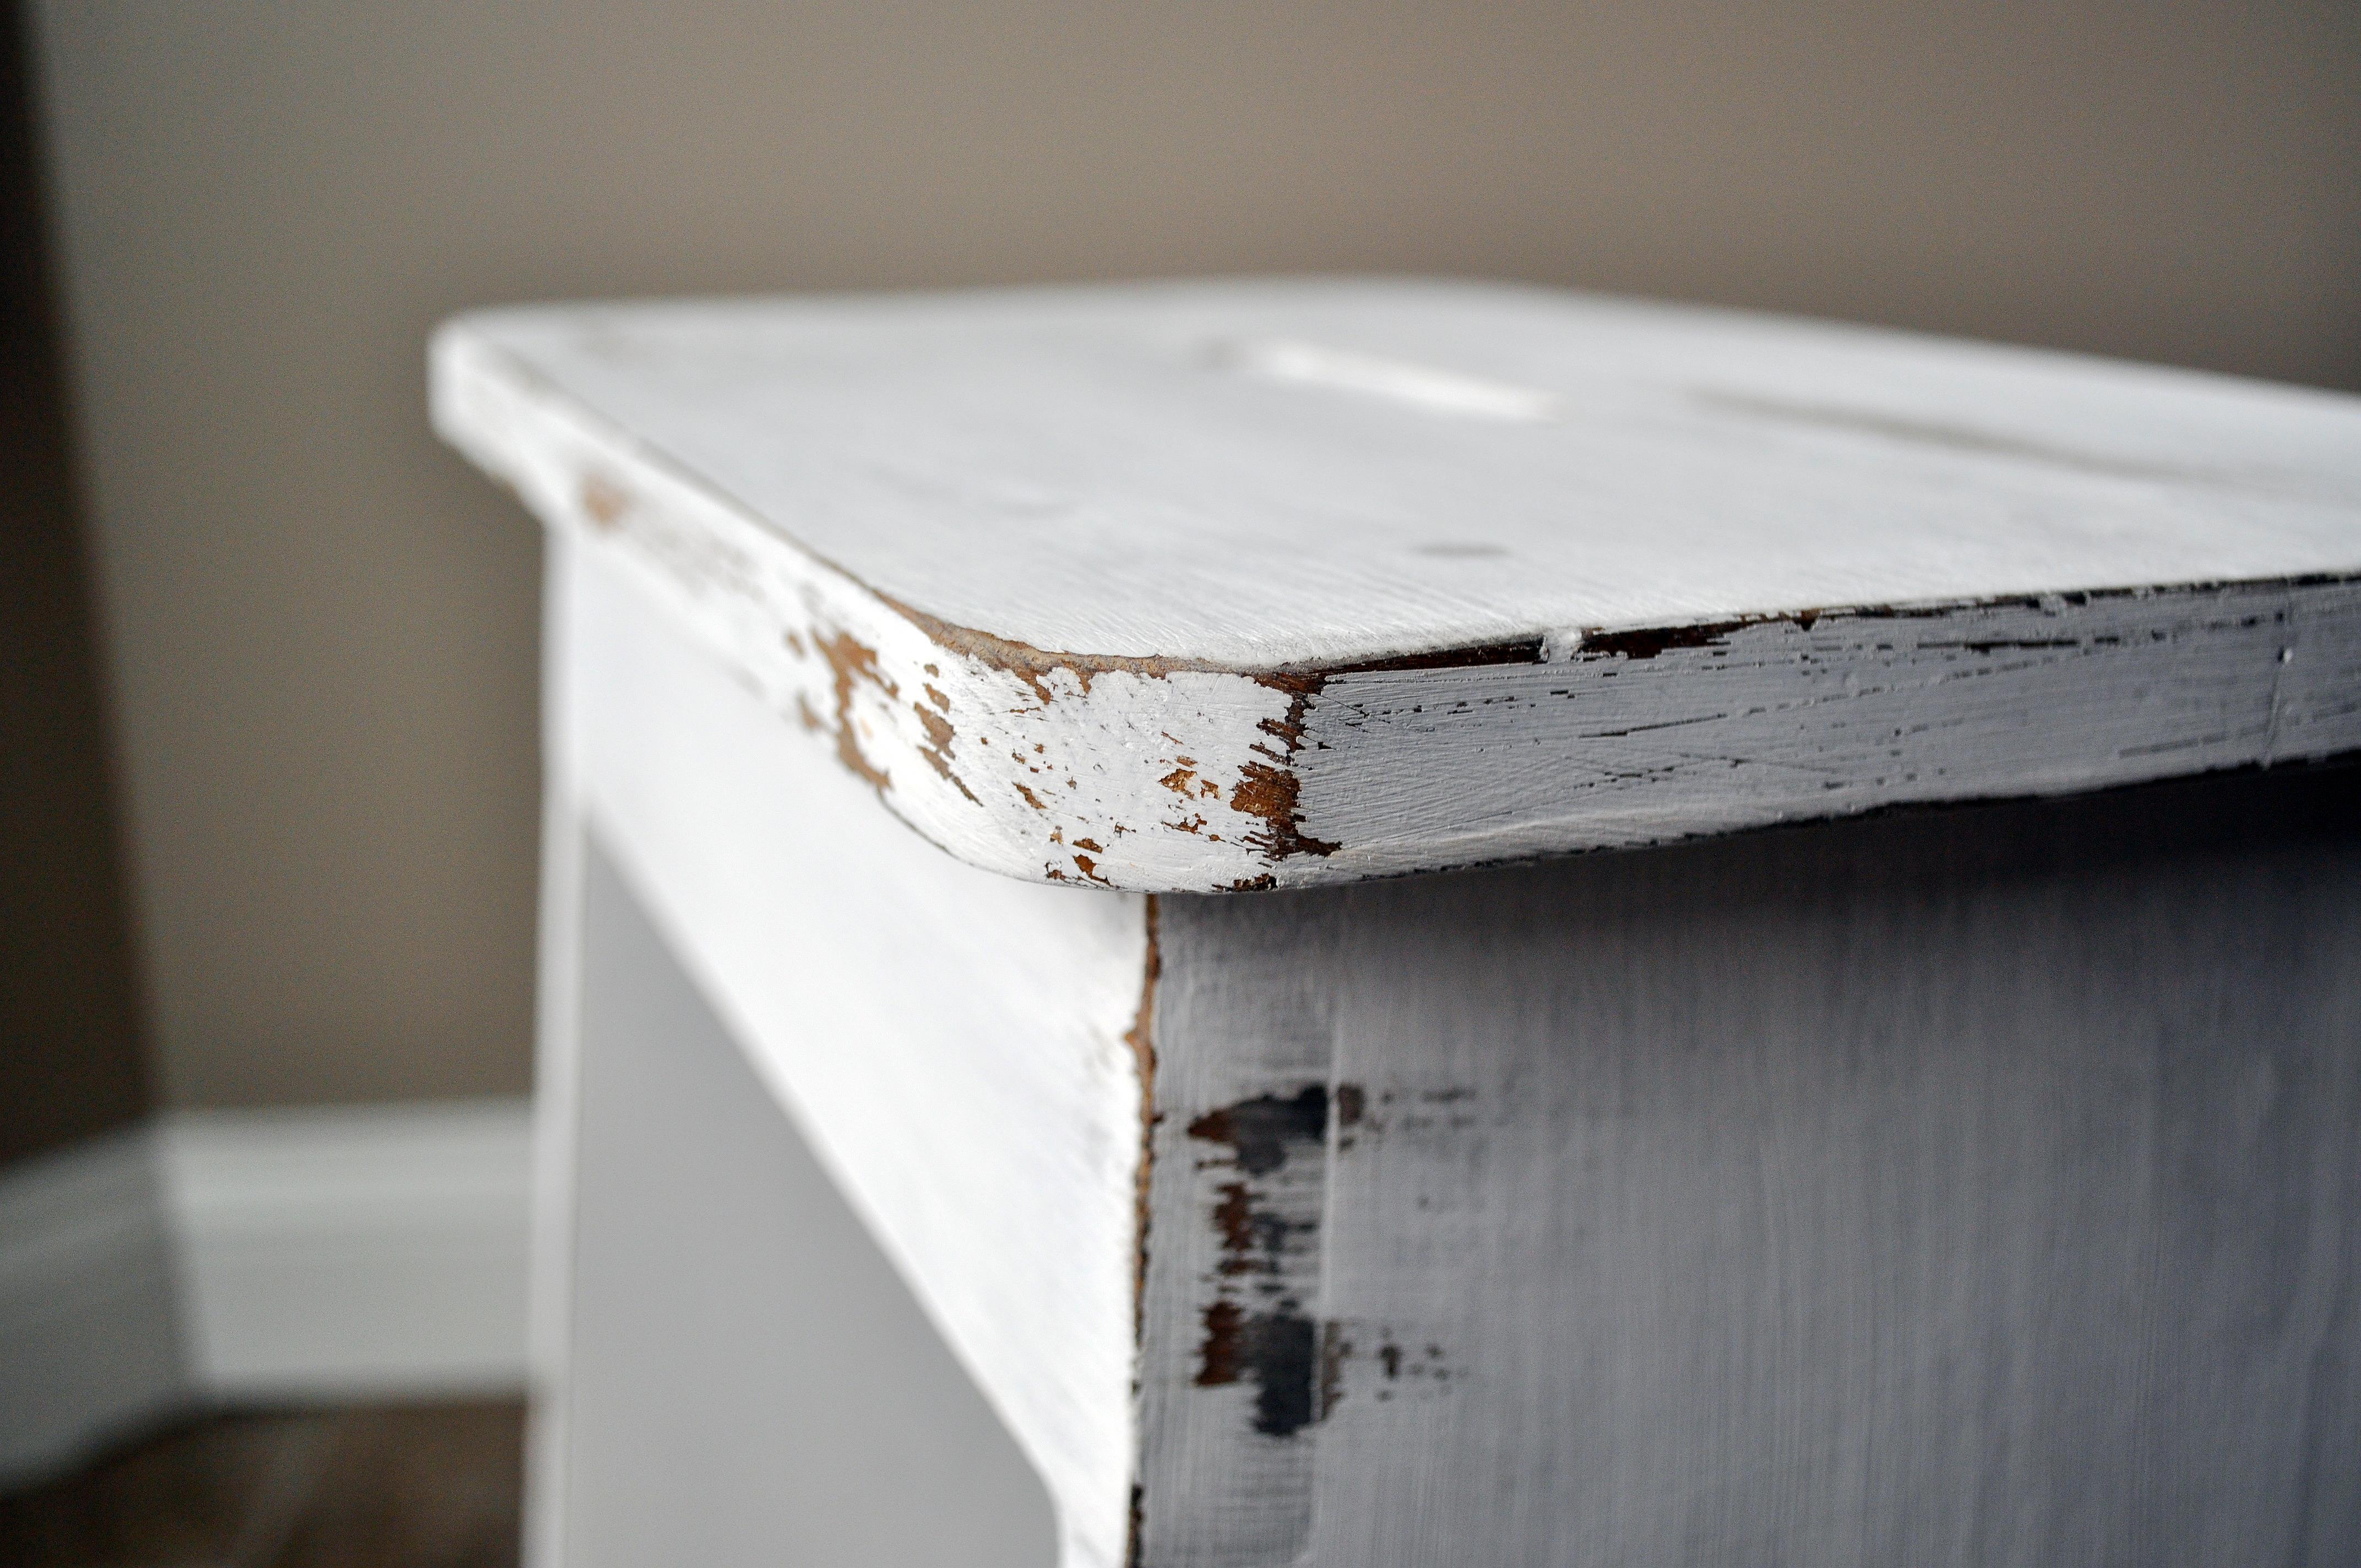
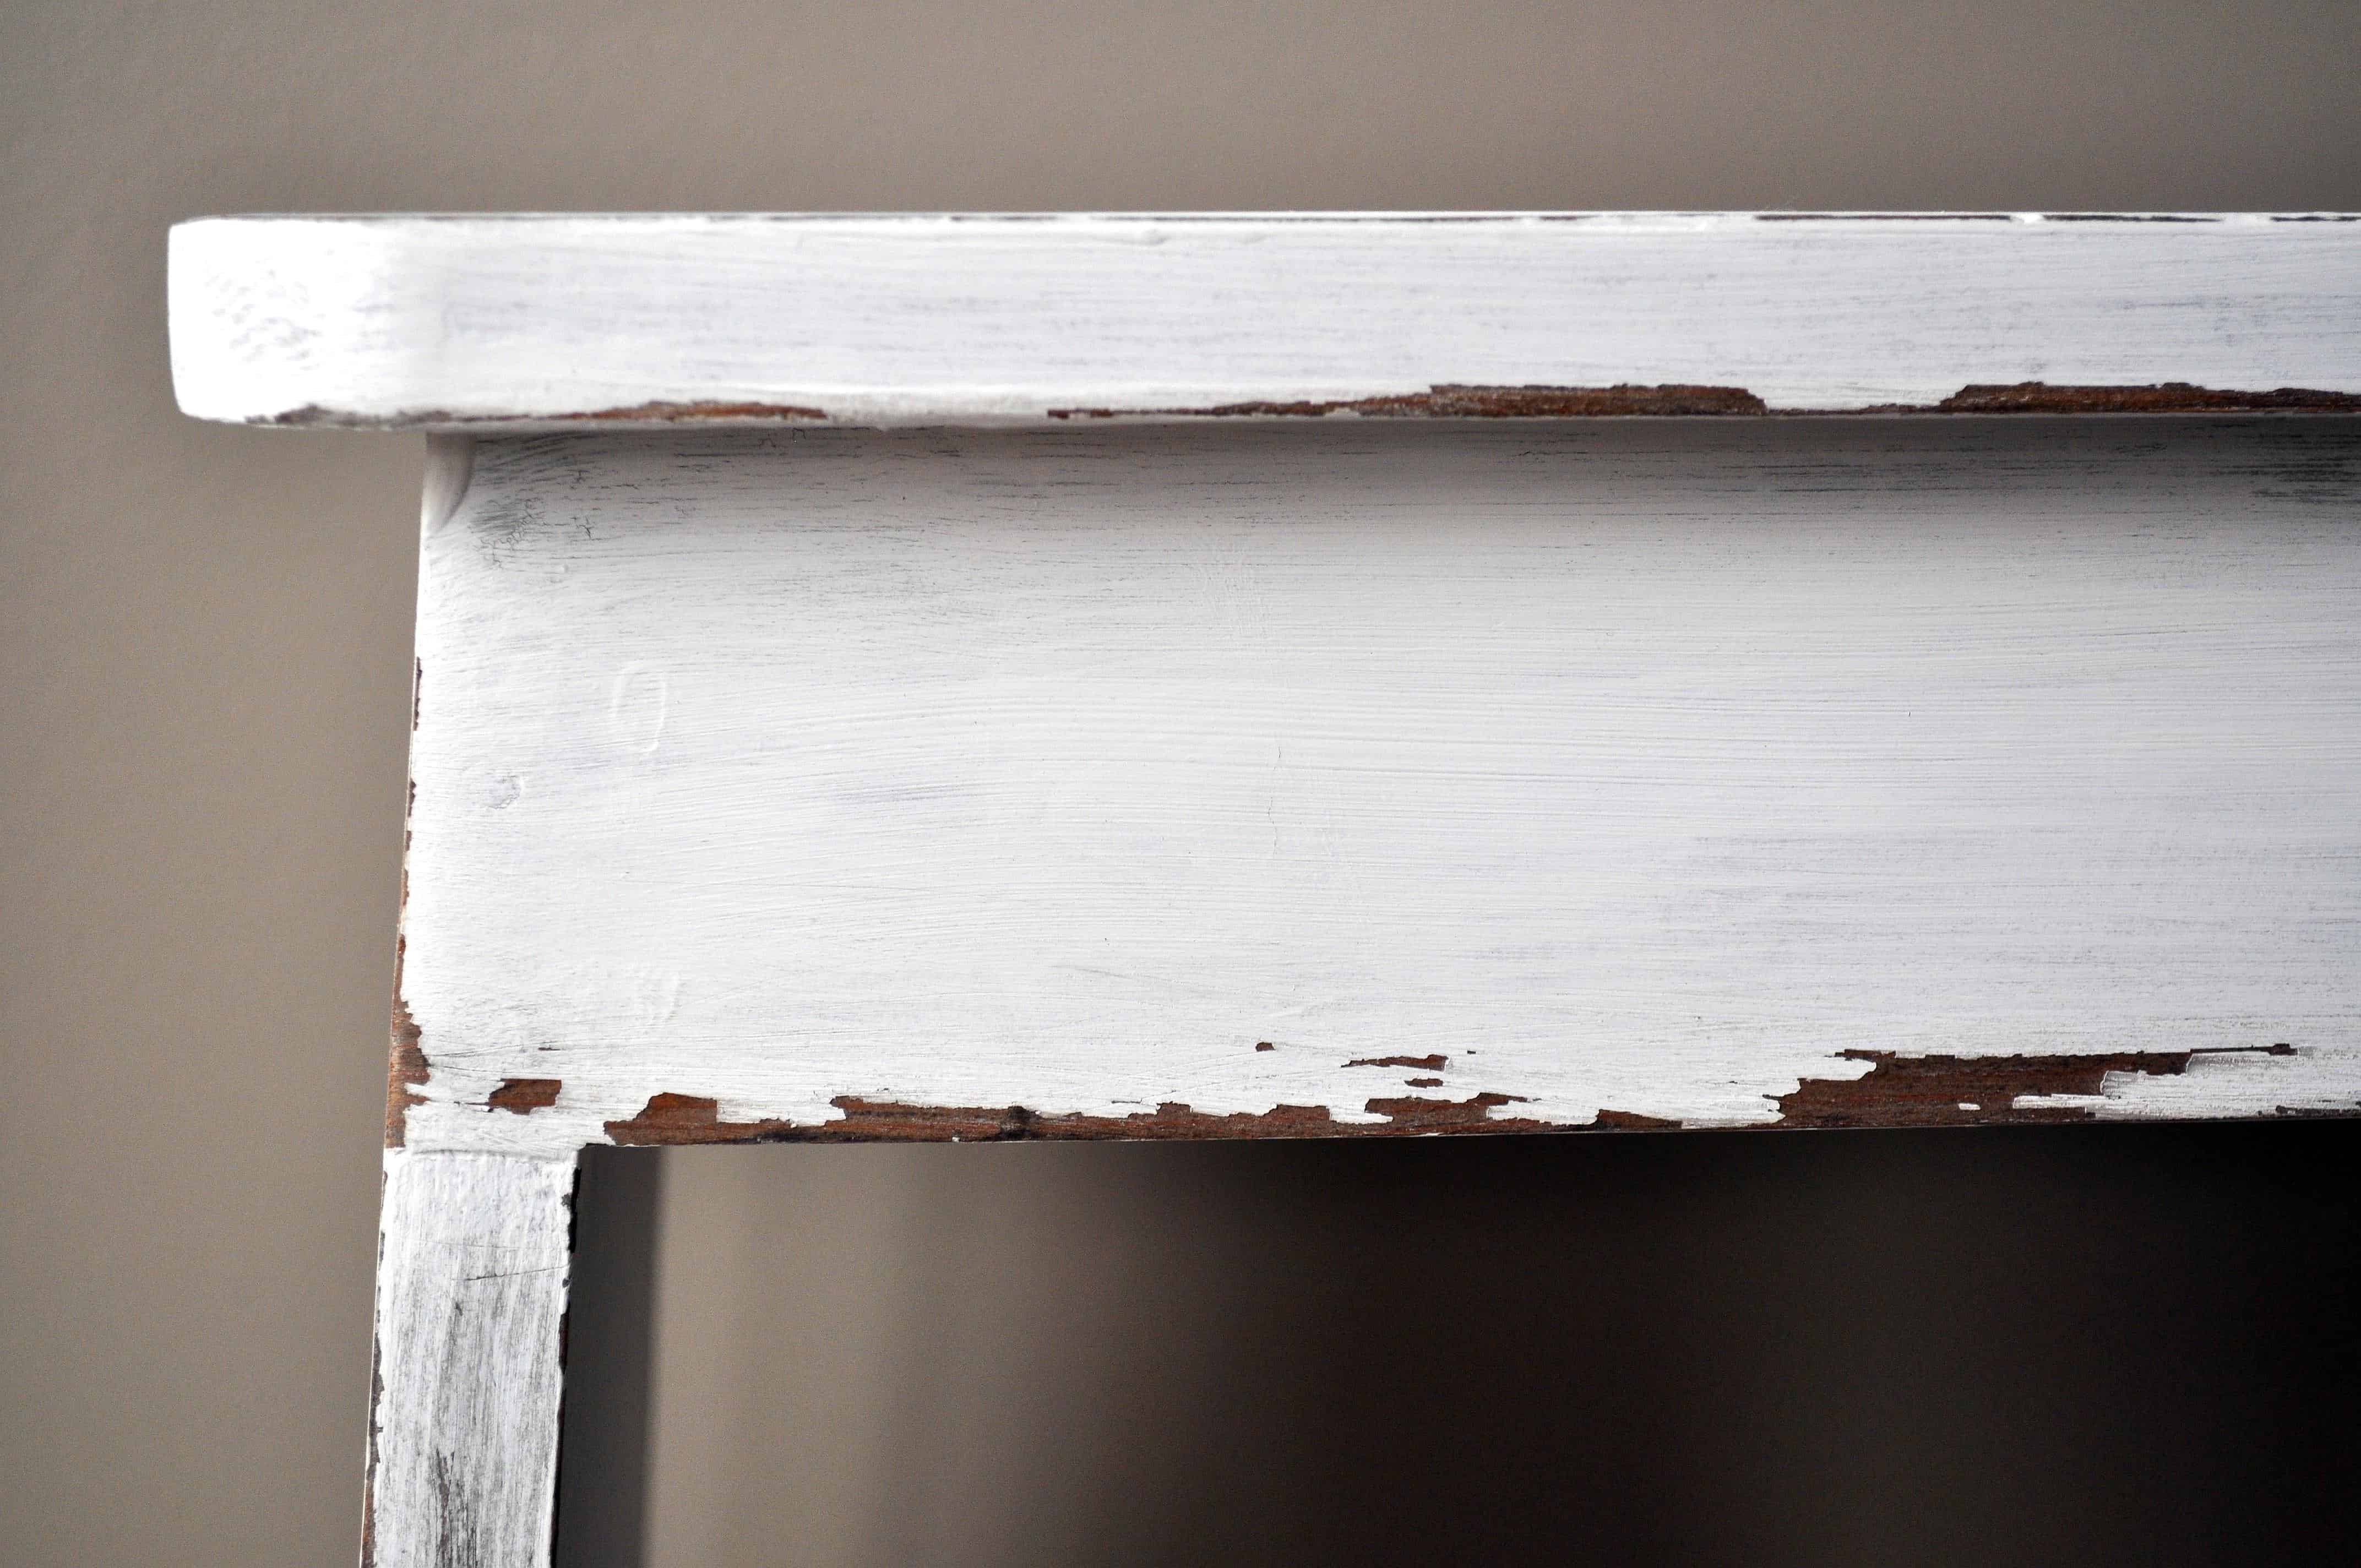
Chalk paint takes layers to get an even color, but it dries SUPER fast so by the time I am done with one layer I can immediately start on another coat. Since I have a dark wood stain on this piece to cover up, it actually took me four coats to get it pretty even. You can still see the wood grain through the paint, and since I love that, I left it. Otherwise I would have kept applying more coats until it was solid white.
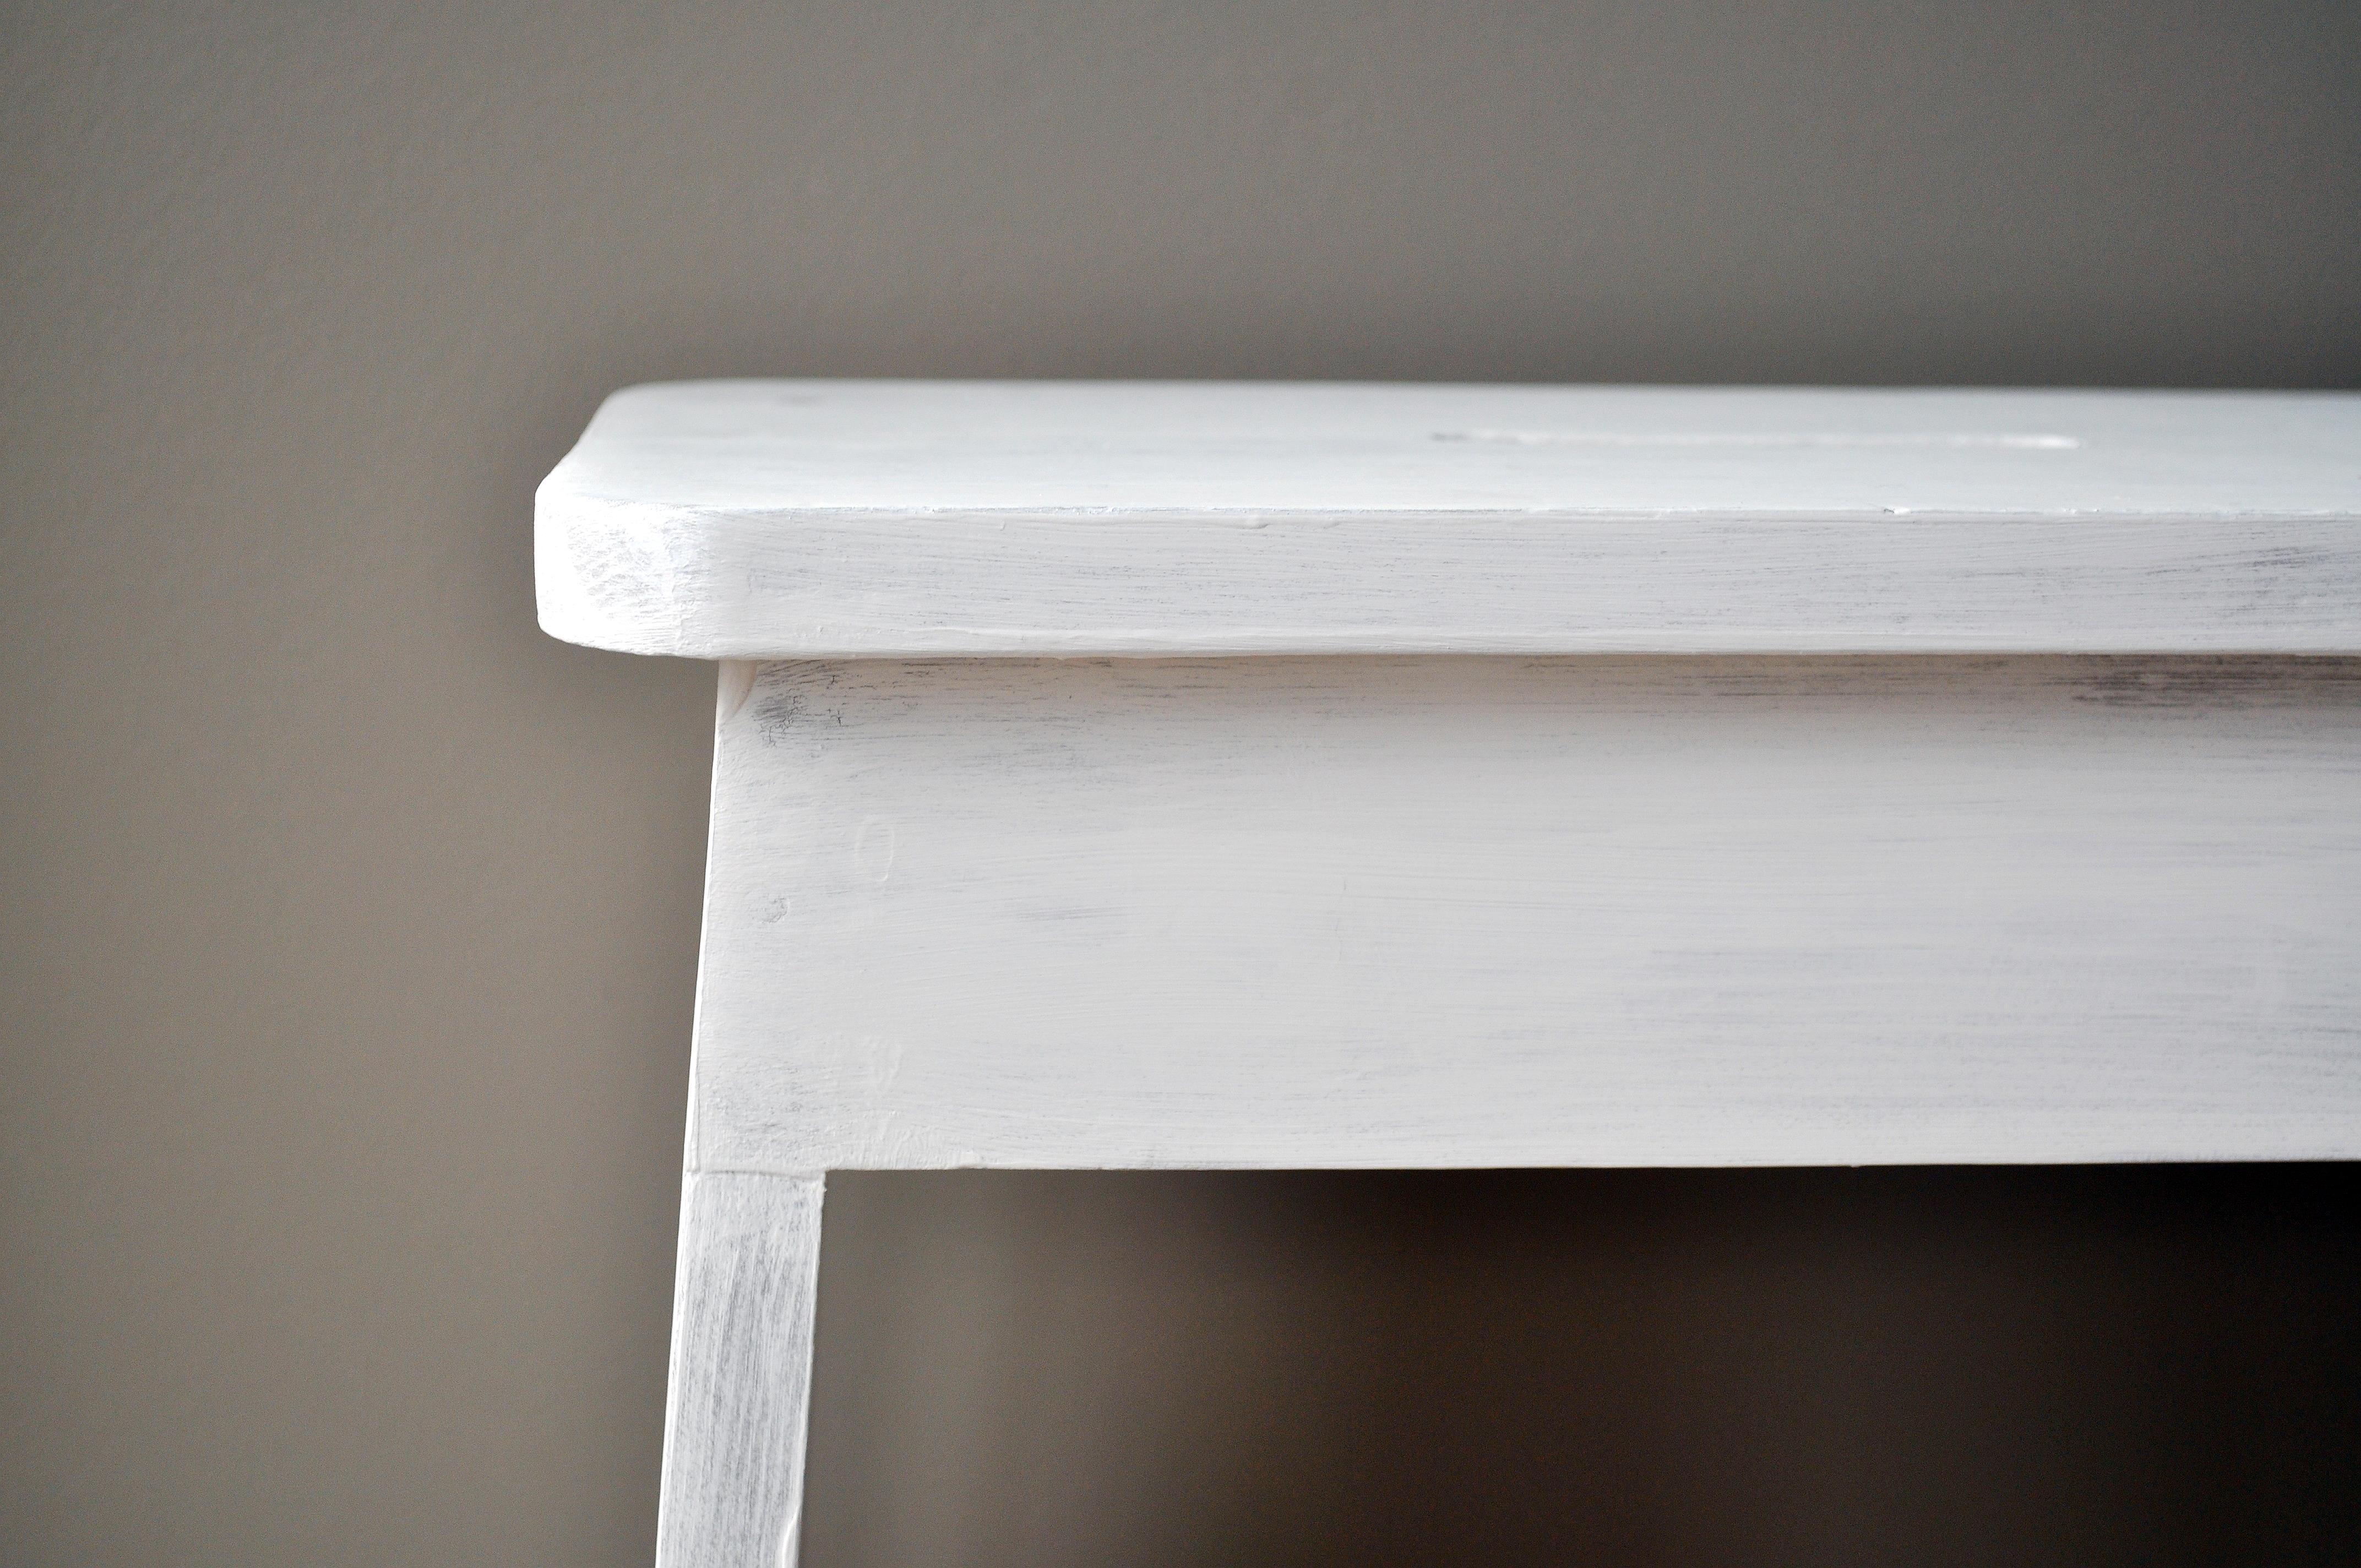
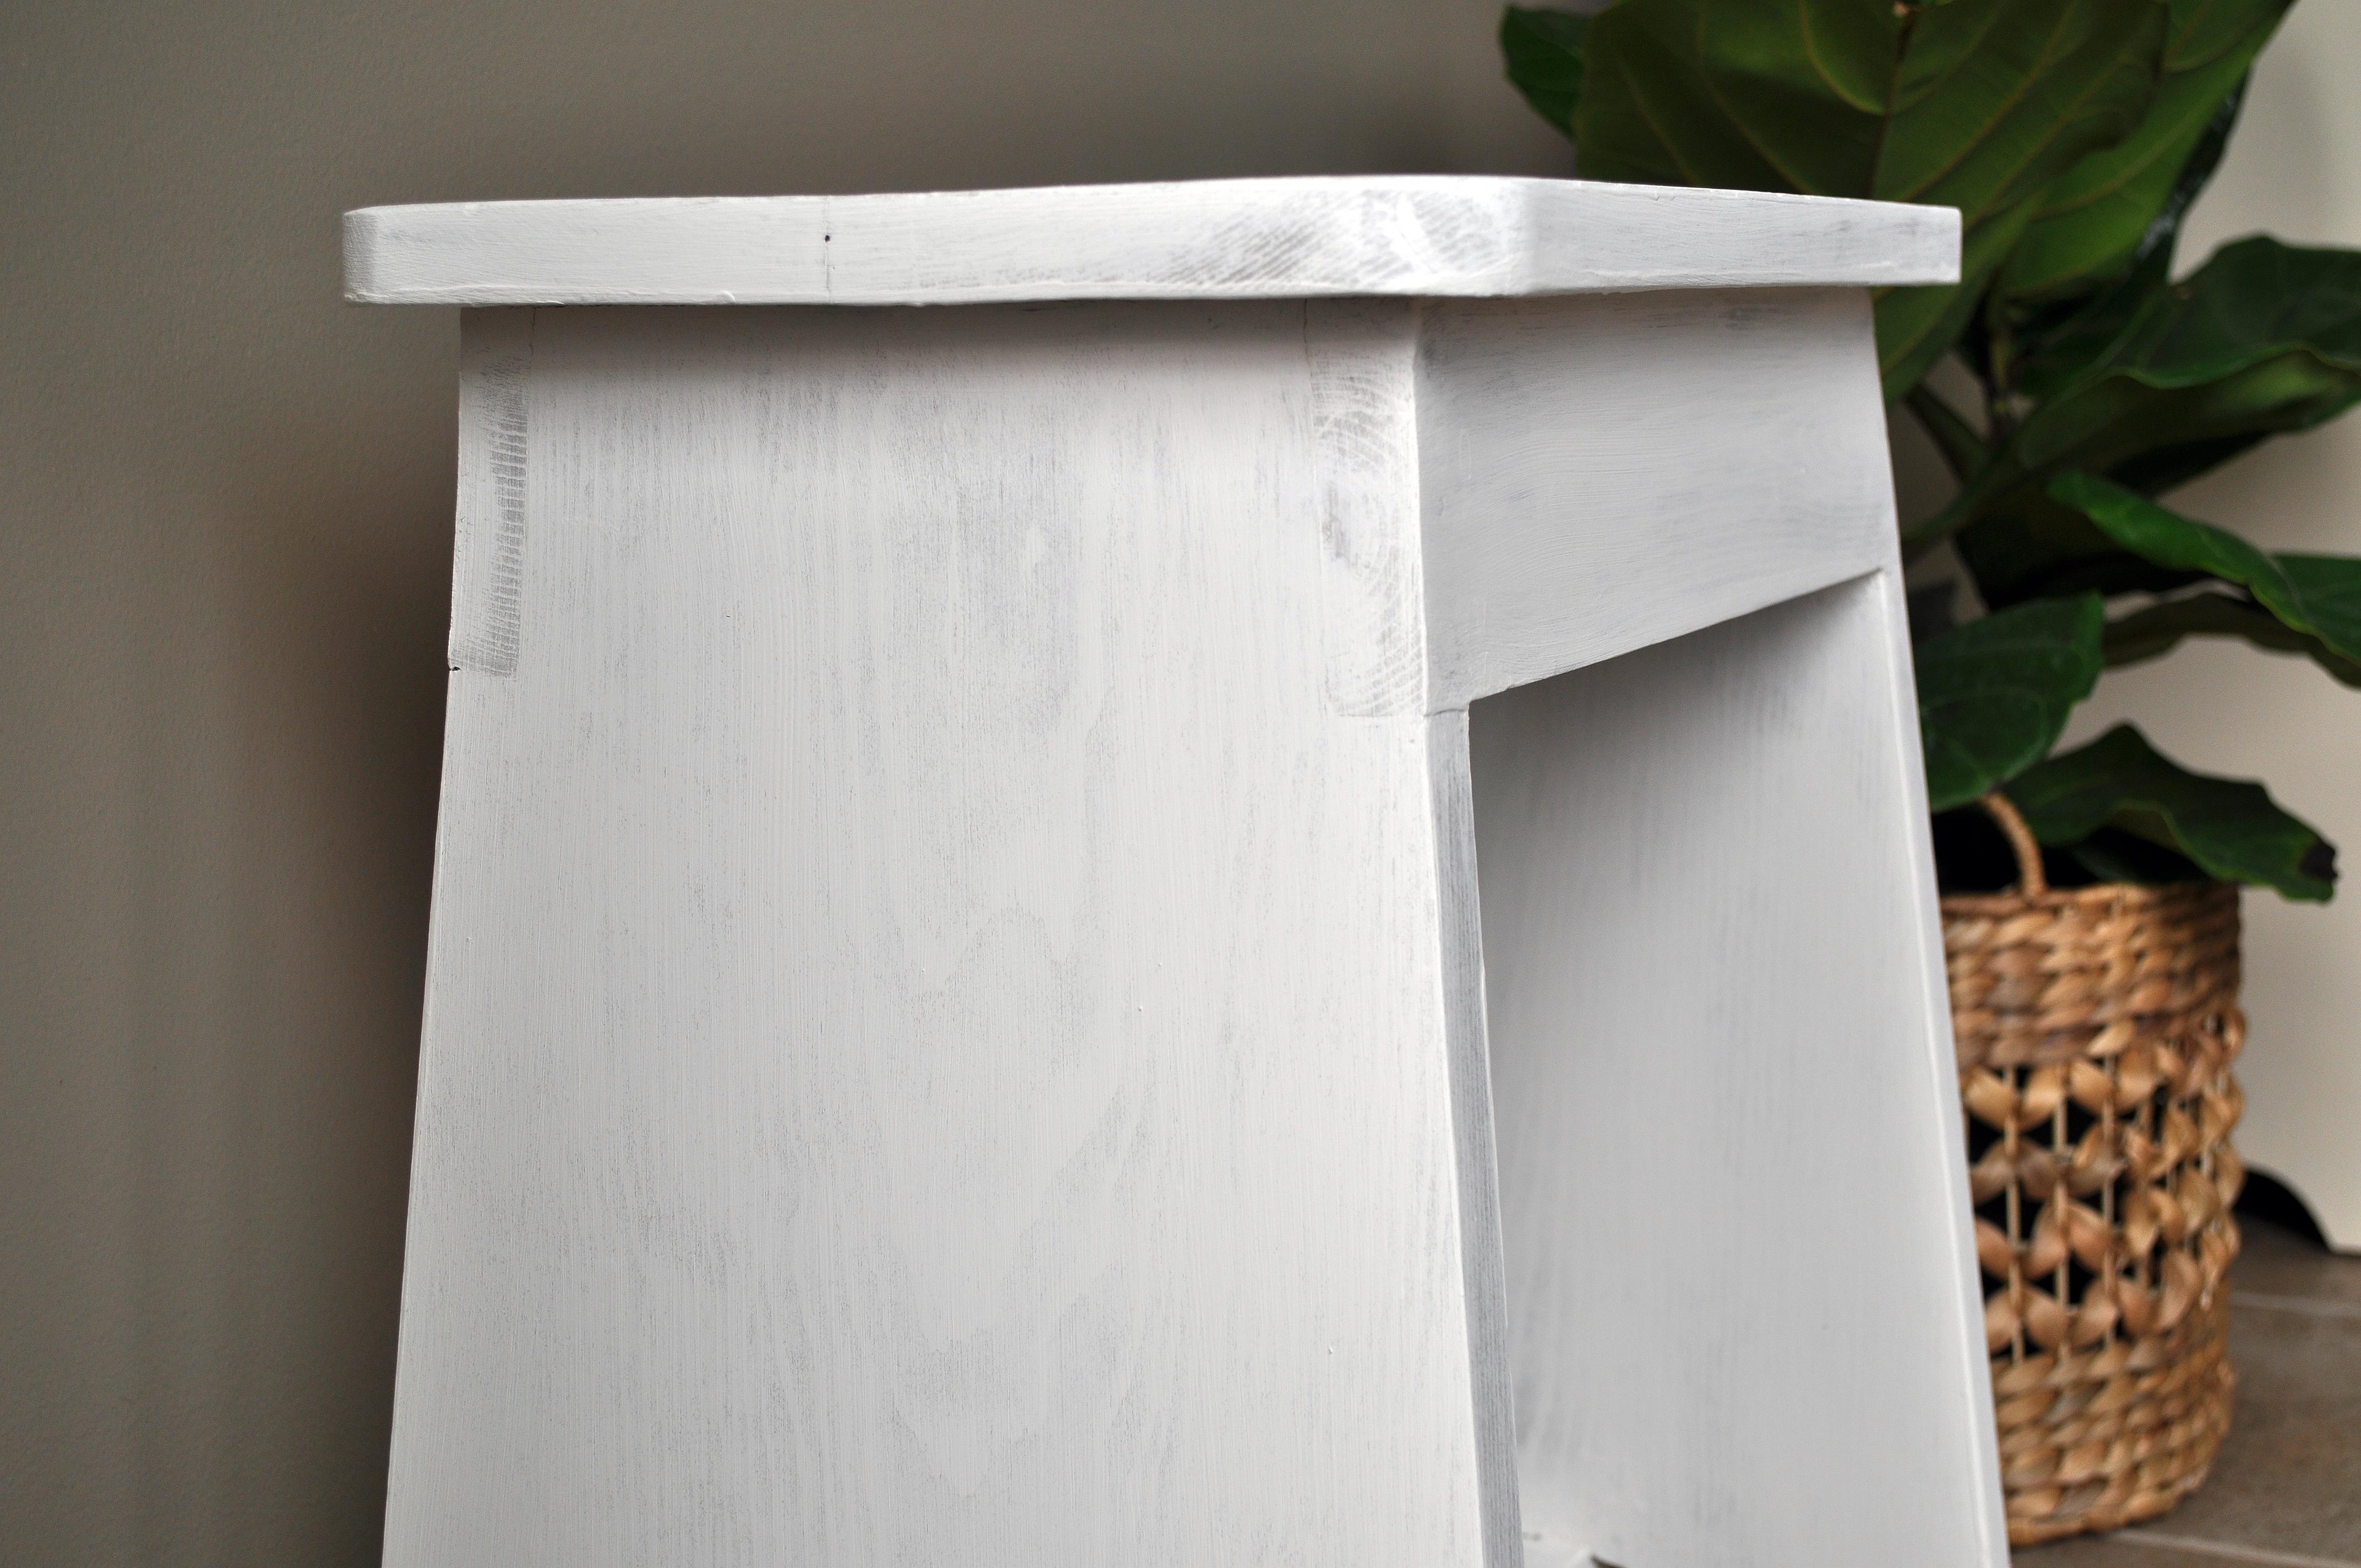
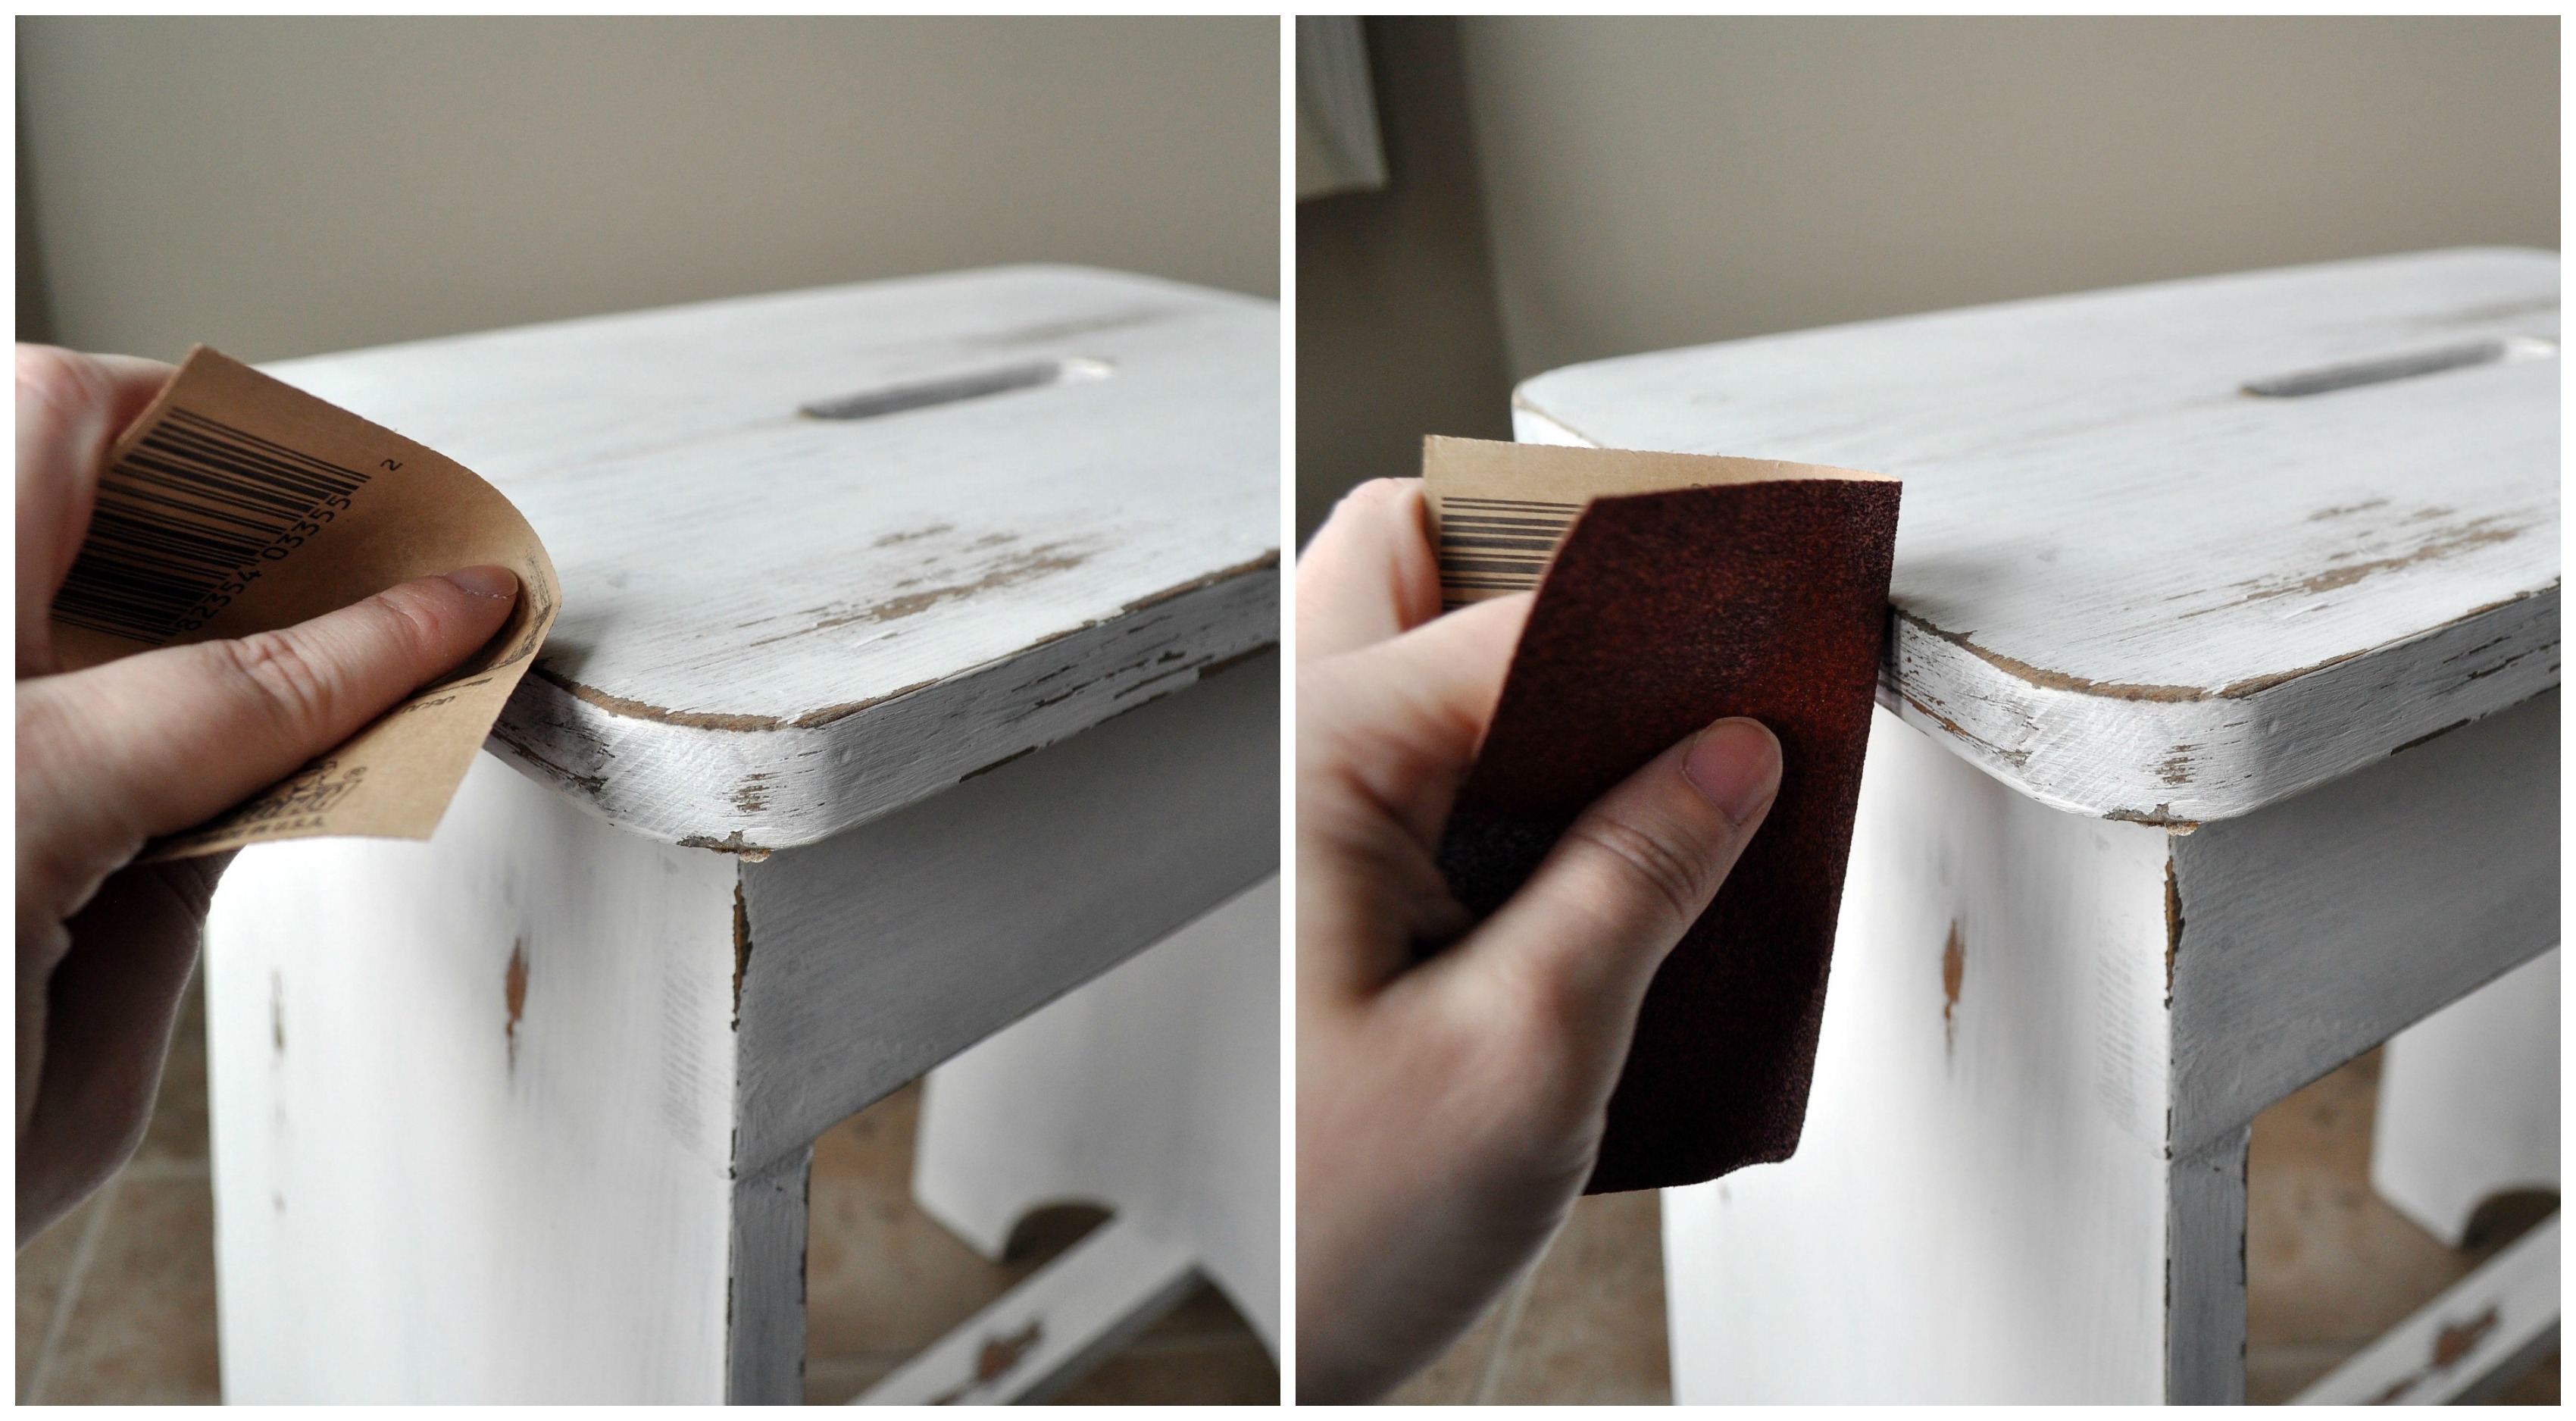
10. DISTRESS IT. My favorite part! I really have learned there is an art to distressing a piece of furniture. Sometimes you can go overboard and it just looks bad, too chippy, and a hot mess. So I just take my time with it and make sure I don’t get carried away. I start with a sand block and go around the edges to get that scruffed look. Don’t overdo it to where you are going beyond the stain, just take your time!
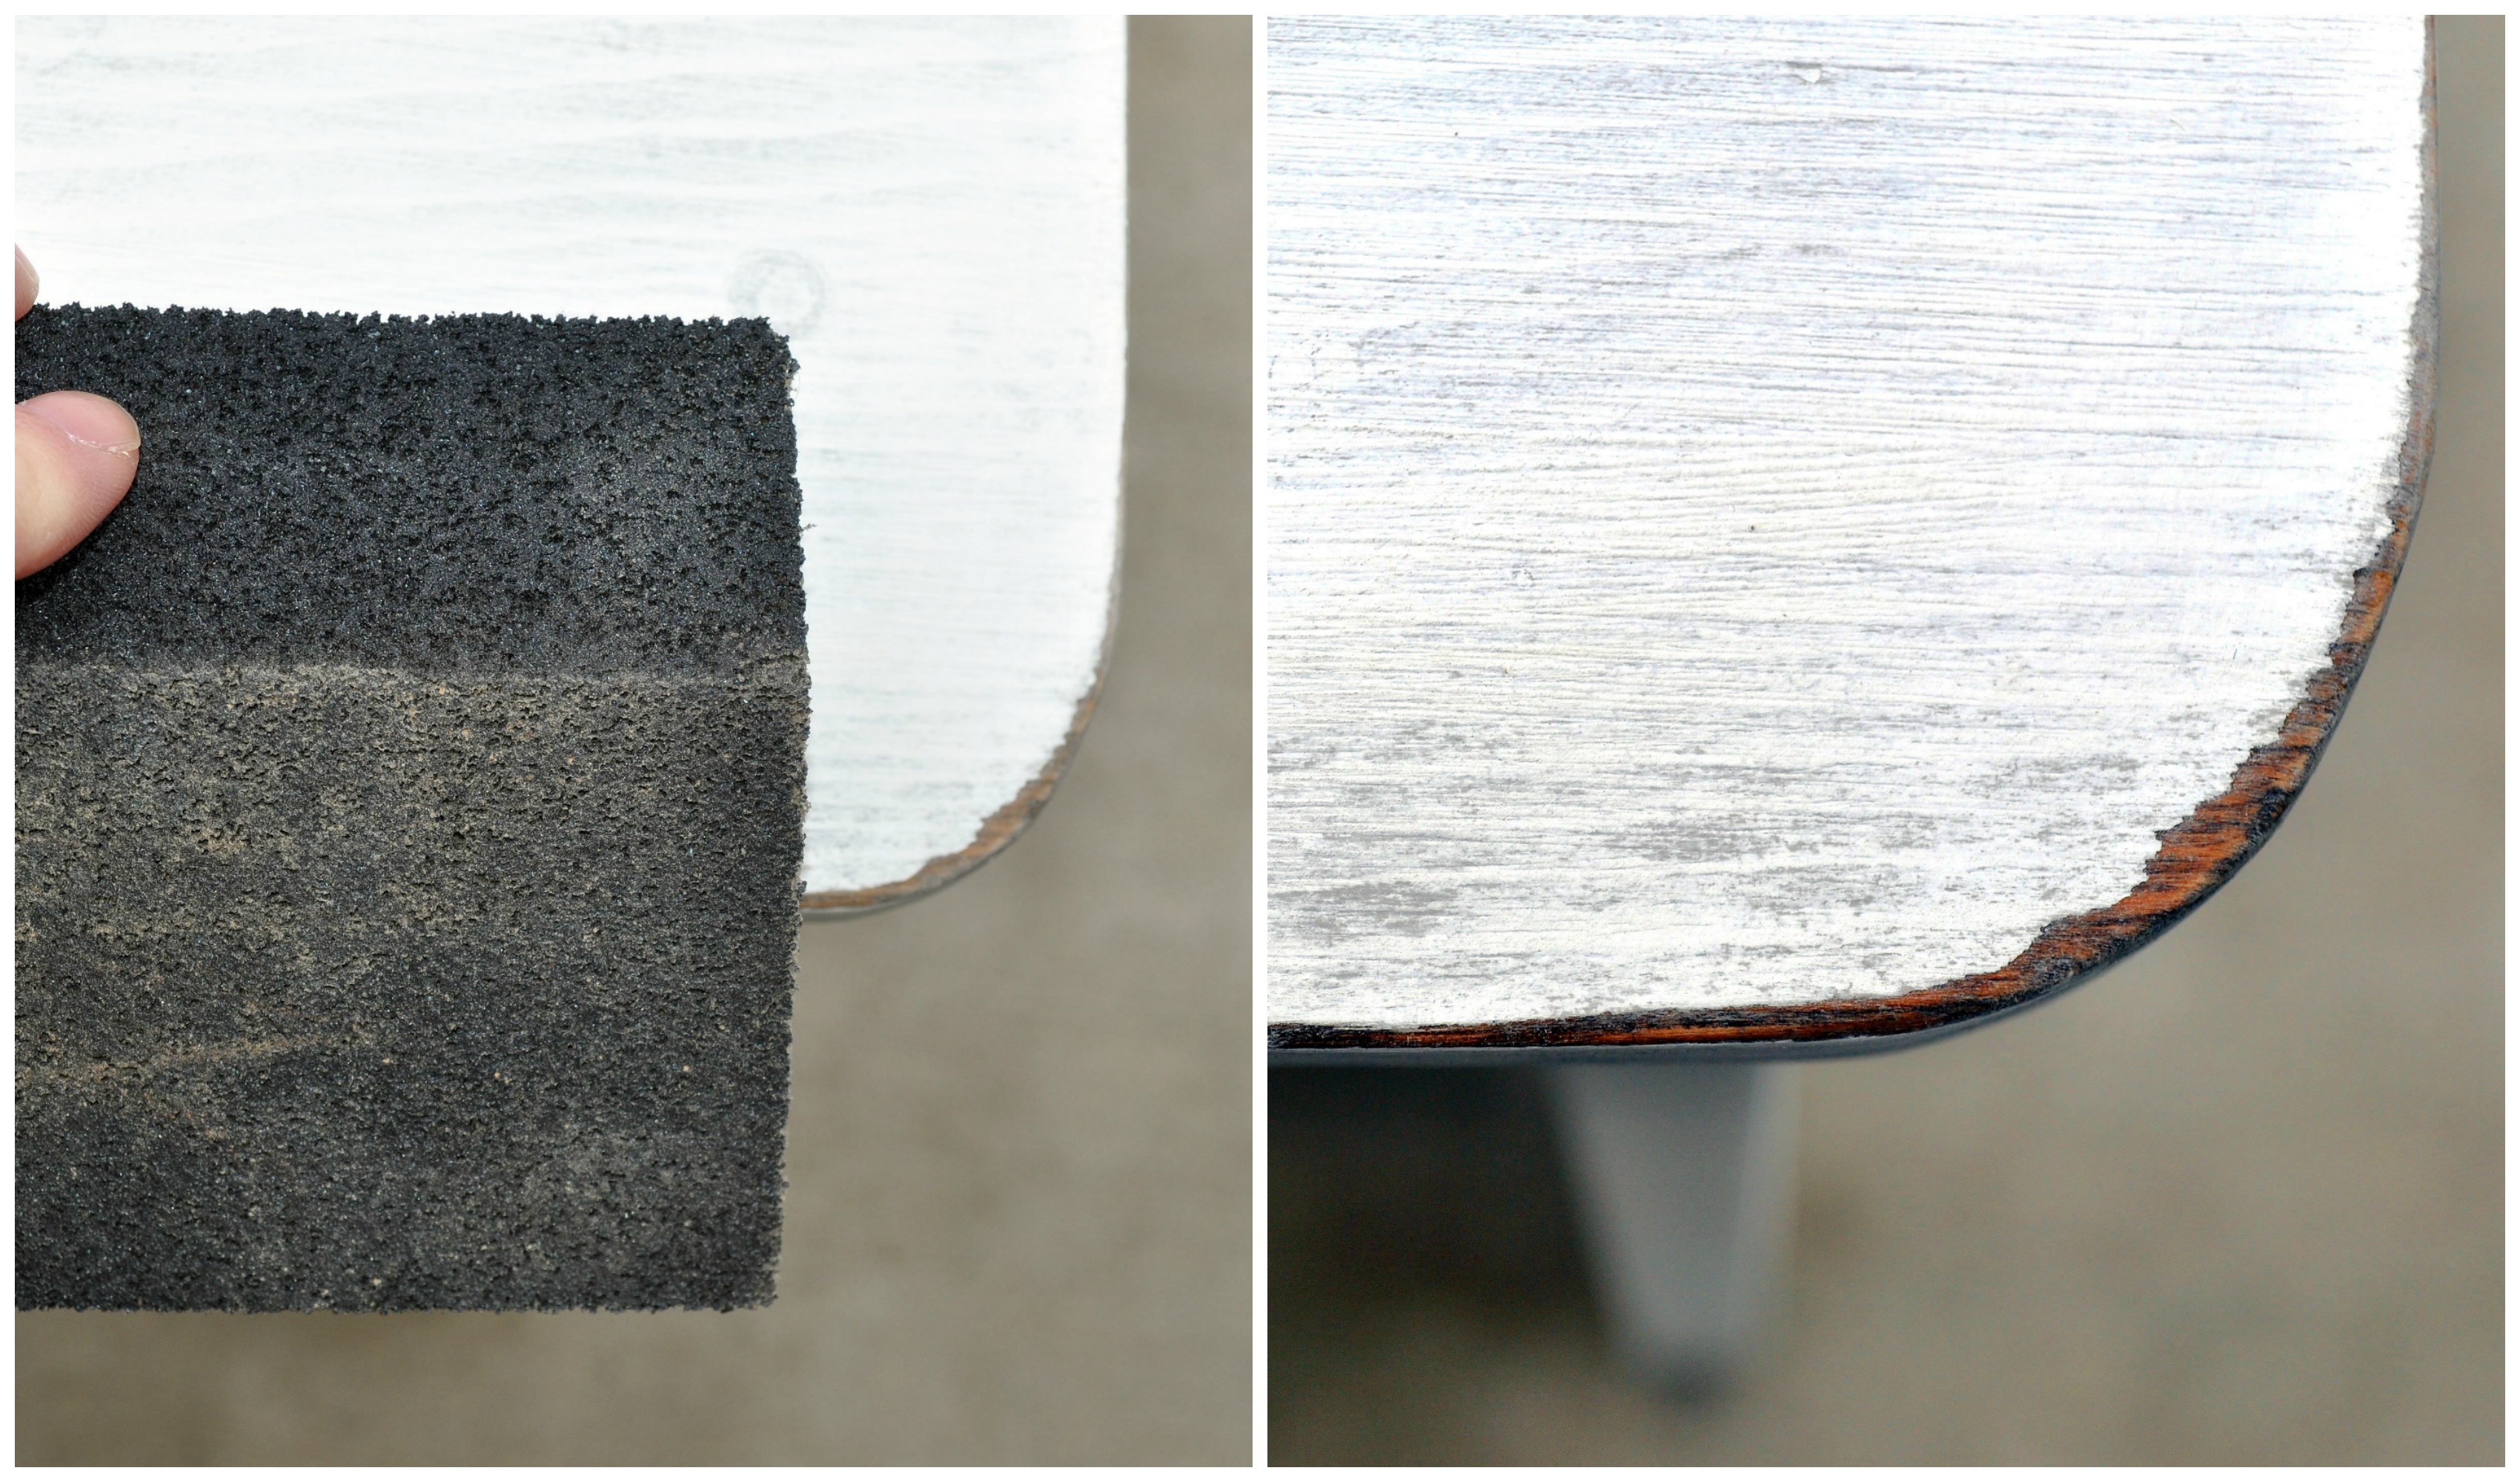
After I’ve gone around all the edges with the sand block, I’ll grab a loose piece of sand paper, this time I used 80 grit, and I’ll just use my finger to “pick” at parts I want to look chippy. I basically just press my finger on the wood and flick it away, over and over until the paint starts to chip.
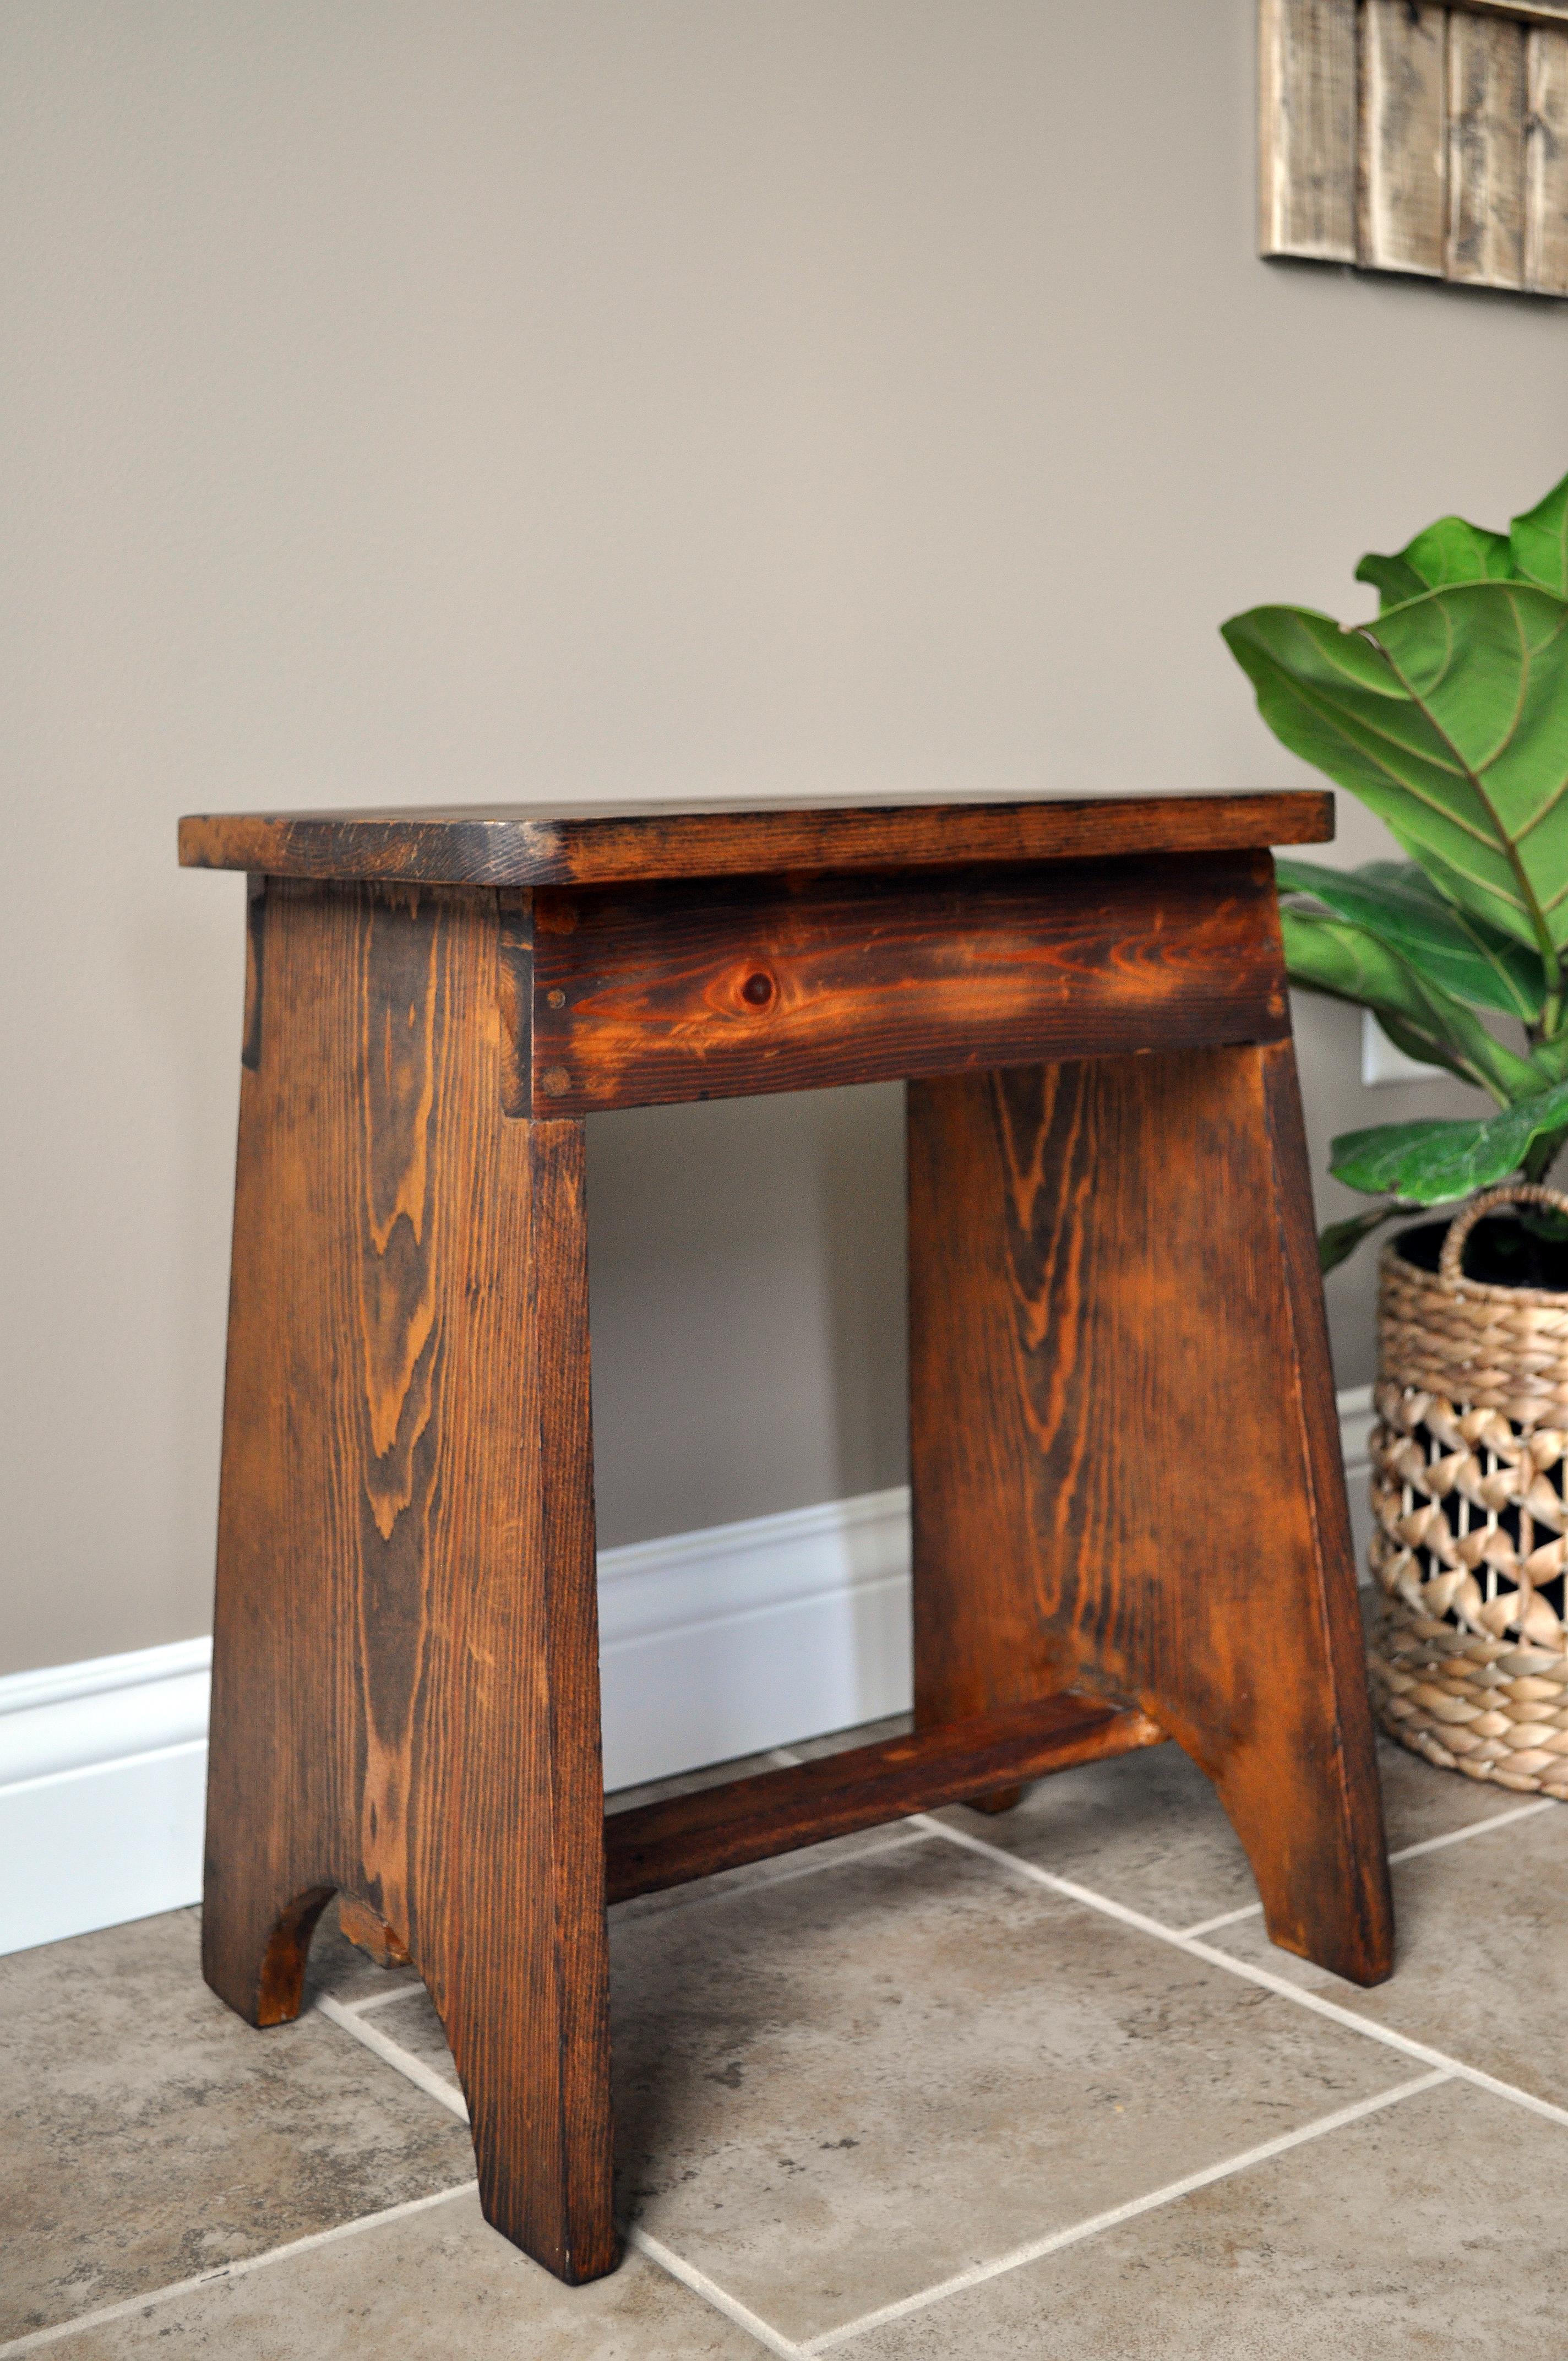
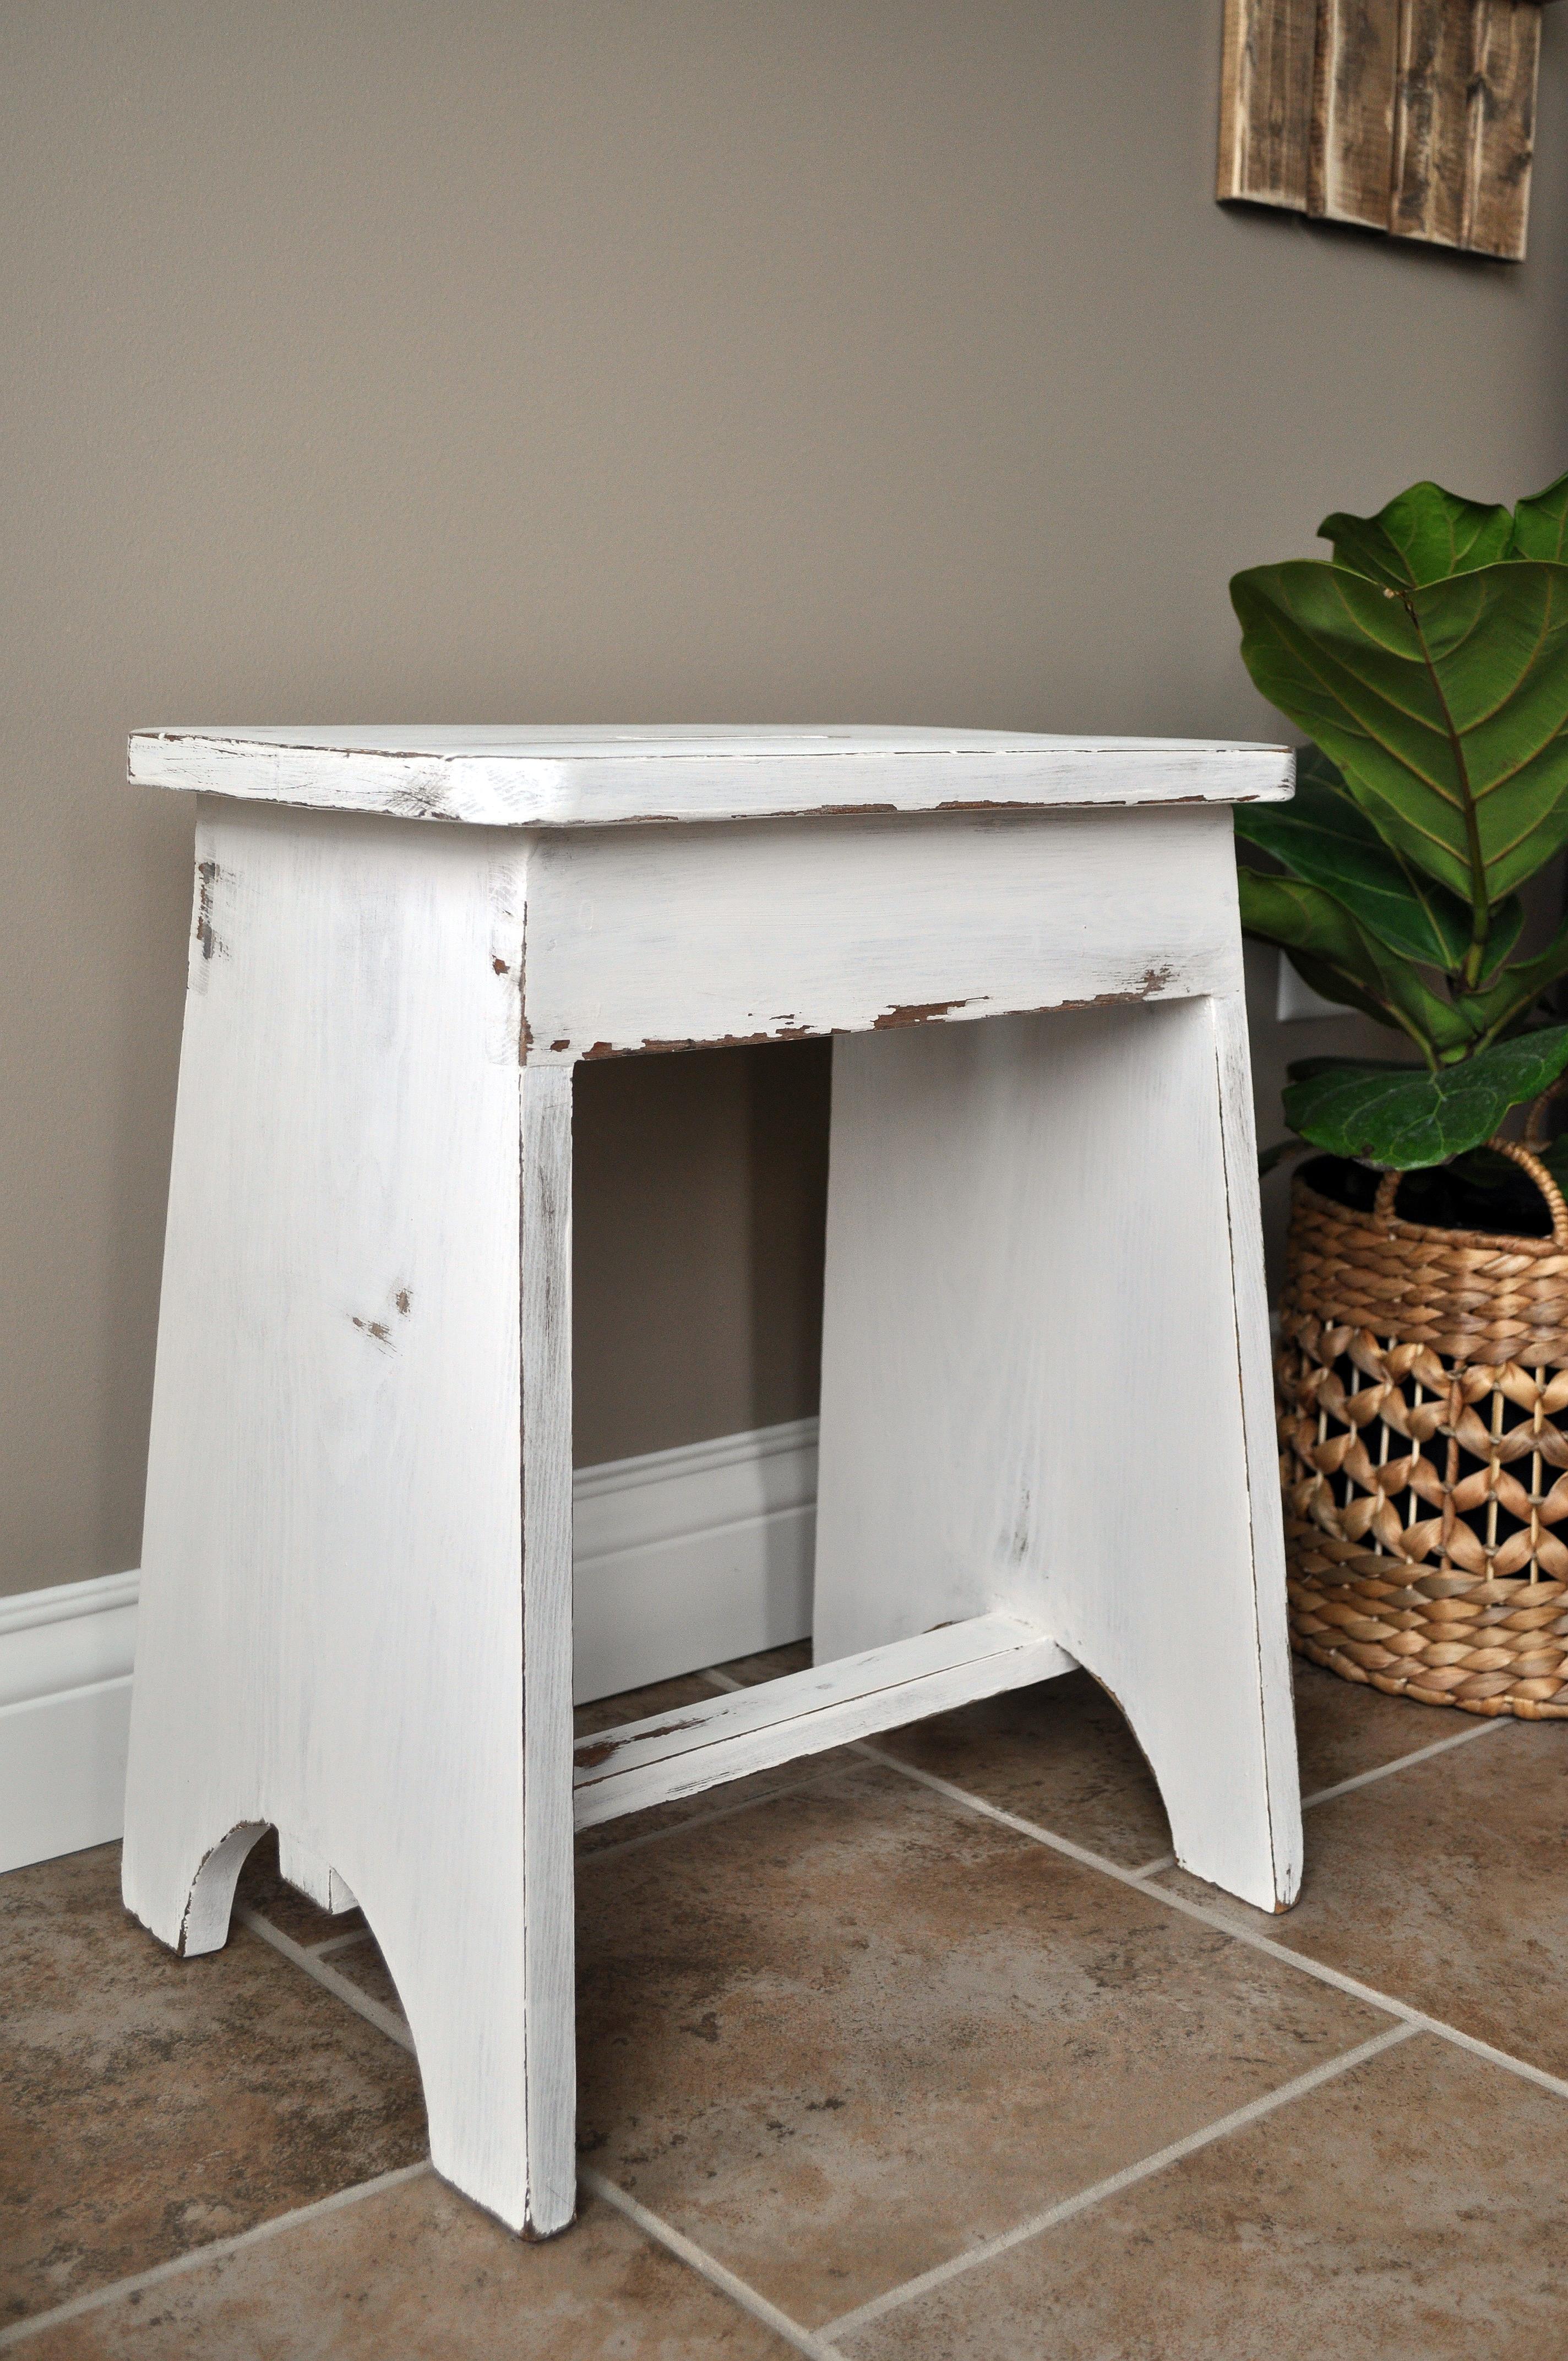
And here is my little stool with its full makeover! What do you think!? I have the perfect spot for it, but you’ll have to wait to see which room it ends up in!
Also, if you wanted to seal the paint you would just add a coat of polyacrylic. I would suggest using this over polyurethane when it comes to chalk paint because it drys clear rather than with a yellow tint, and it’s water based instead of oil based. It just works better in my opinion! I chose not to seal this stool because it won’t get much use!
If this all seems overwhelming to you, don’t let it be! Once you’ve worked thru the process it’s simple the next time around! I am always looking for new methods so please share in the comments below if you have any! What works best for you?
Thanks for stopping by! Don’t forget you can follow me on Instagram & Facebook for more extras!